
Hard-Boiled Egg (No-Fail Easy Peel Method)
Hard-boiled eggs should be simple … and they are, once you know a few rules. I’ve worked with thousands of eggs between the restaurants and at home, and I’ve read all the science on it too (a little too much actually). You know what I’ve learned? There are too many experts teaching a 20-step system and extra special tools. I’ve tested too many methods and tools … THAT’S NOT NEEDED! You need the right, simple technique, and that’s it.
As far as my easy peel method for hard-boiled eggs, my uncle taught it to me when I was around 10 and I’ve been using it ever since. It has never failed me once.
Table of Contents
Why My Easy Method Works
Most hard boiled egg problems come down to two things: overcooking and the wrong peeling approach. Overcooked eggs not only get that greenish ring around the yolk, they’re also a nightmare to peel because the white starts to bond with the membrane under the shell. And peeling blindly like chipping away at the shell only leaves you with a torn-up egg and a lot of frustration.
The key to easy peeling isn’t a special ingredient or a fancy tool. It’s understanding that the thin membrane sitting between the shell and the egg white is actually your best friend. Grab it with the loosened shell, and the whole thing comes off cleanly. I’ll walk you through exactly how.
Ingredient Notes
All we’re talking about here is just eggs. Use large eggs because this is the most common size of eggs people use and most used in recipes. Keep in mind that smaller or jumbo eggs will need a minute or two less or more.
How To Make Hard-Boiled Eggs Easy
Seriously…stop overthinking it! There are only a couple of important things to know.
PRO TIP: Pot Size Matters! Pick the right pot, your eggs should sit in a single layer at the bottom with a little breathing room between them. Don’t pile eggs into a pot that’s too small or they won’t cook evenly. (There is also a temperature shift and distributions that I won’t bore you with.)
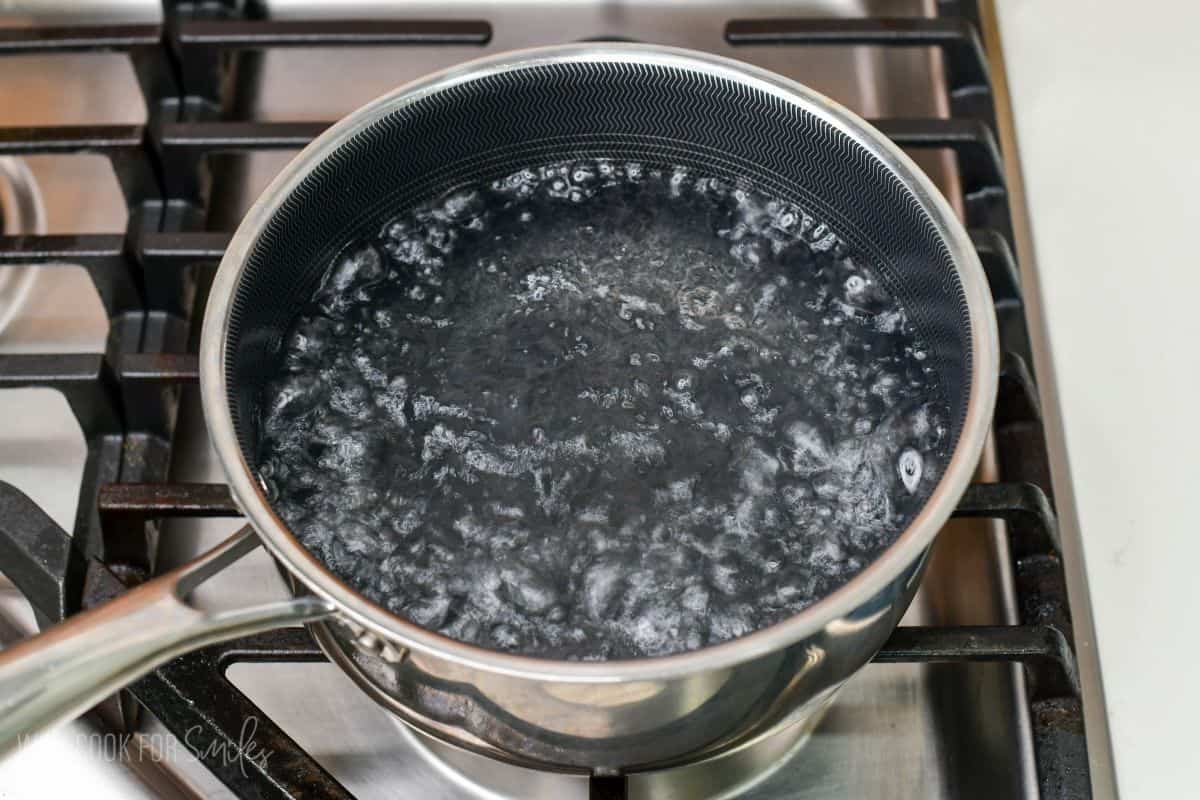
Fill the pot halfway with water and bring it to a full boil. Yes, after testing lots of methods, I found that adding eggs to boiling water is best and easiest.
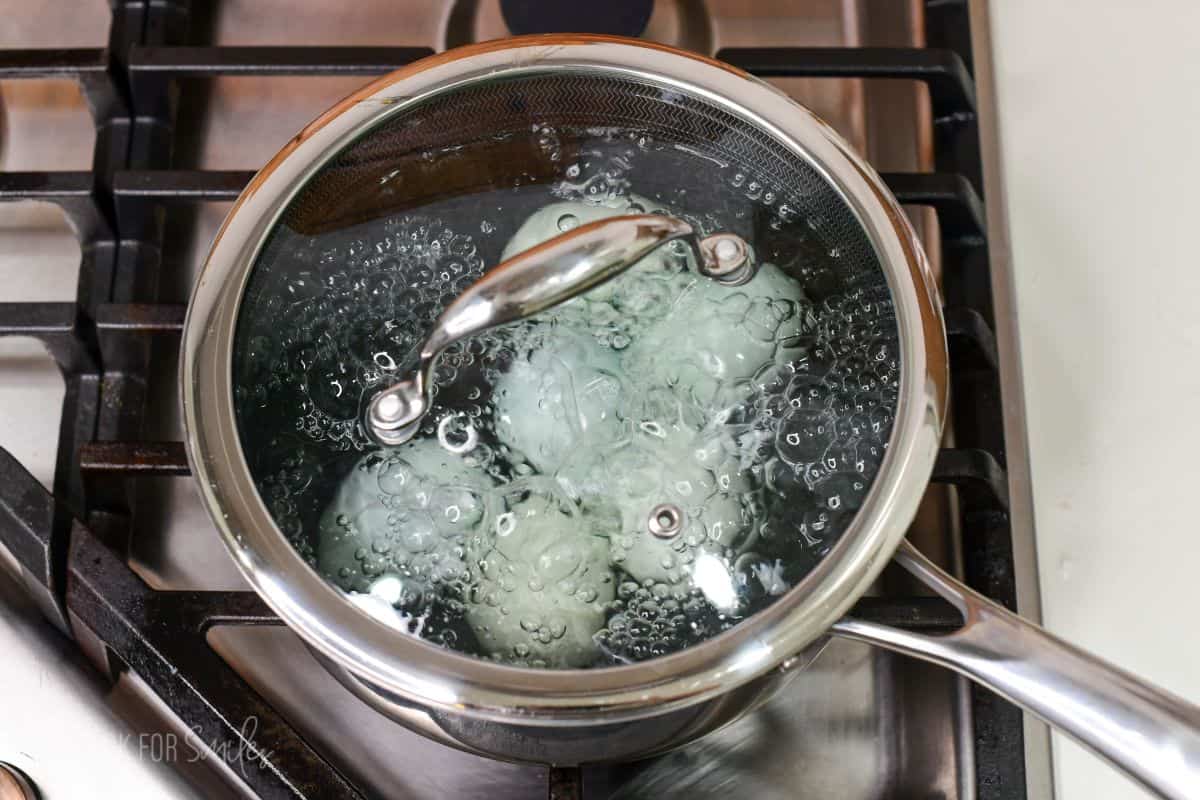
Once it’s boiling, lower the eggs in gently with a slotted spoon, don’t drop them in or they’ll crack on impact. Reduce the heat to just below medium and cover with a lid. Cook for 10 to 12 minutes depending on your preference.
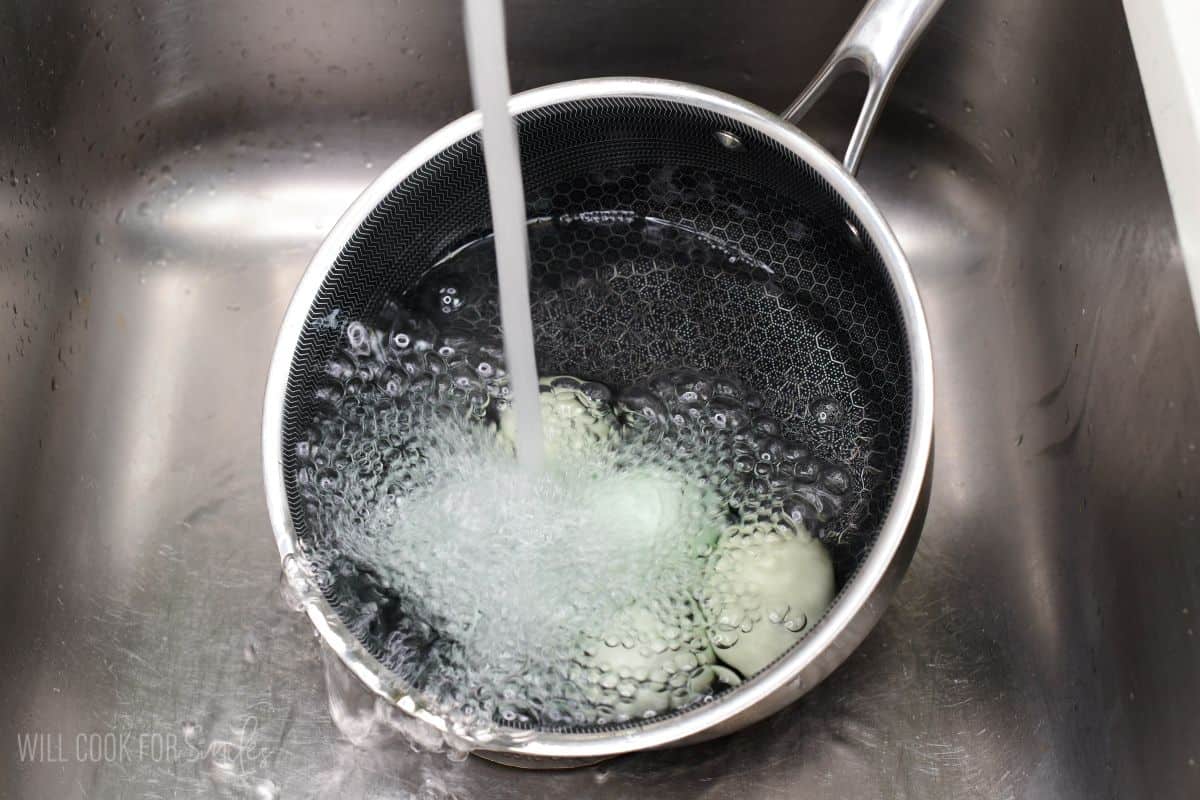
When time is up, pour off the hot water and run cold water over the eggs until they’re cool enough to handle. You don’t need an ice bath, just run cold tap water over them, or fill and drain the pot a couple of times until they’re cooled down.
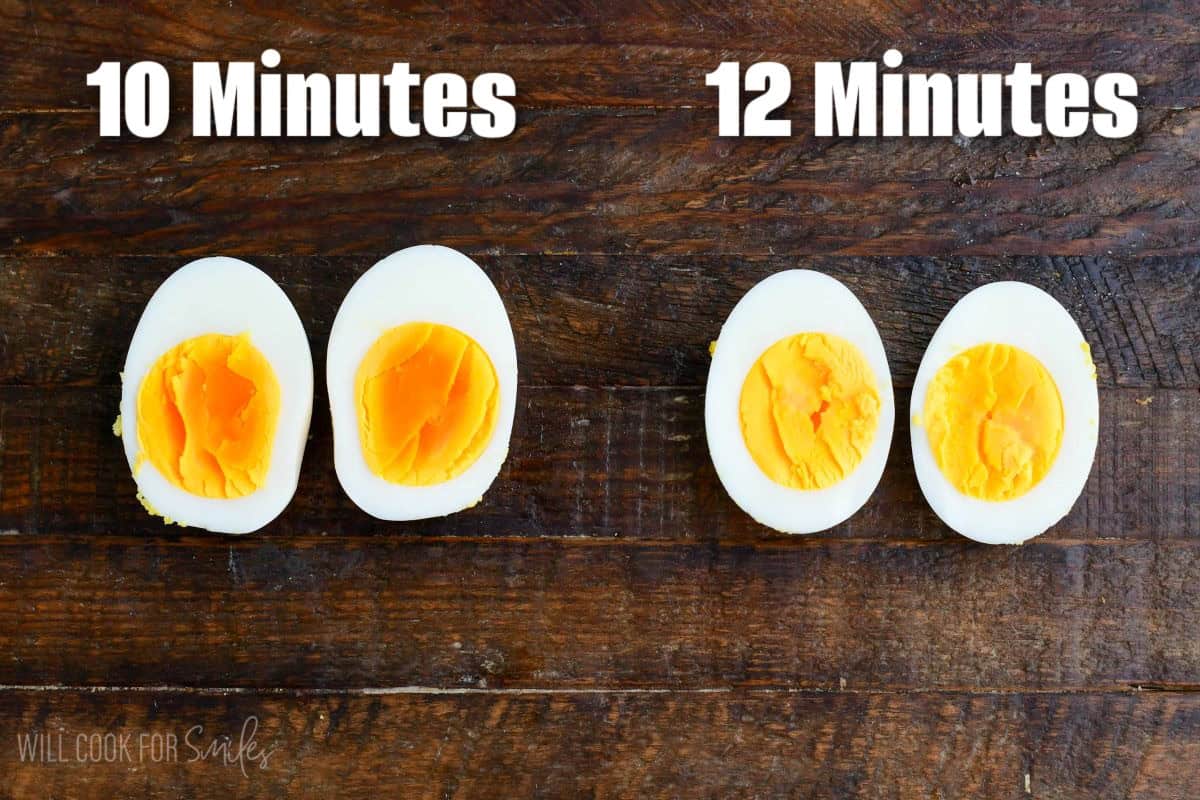
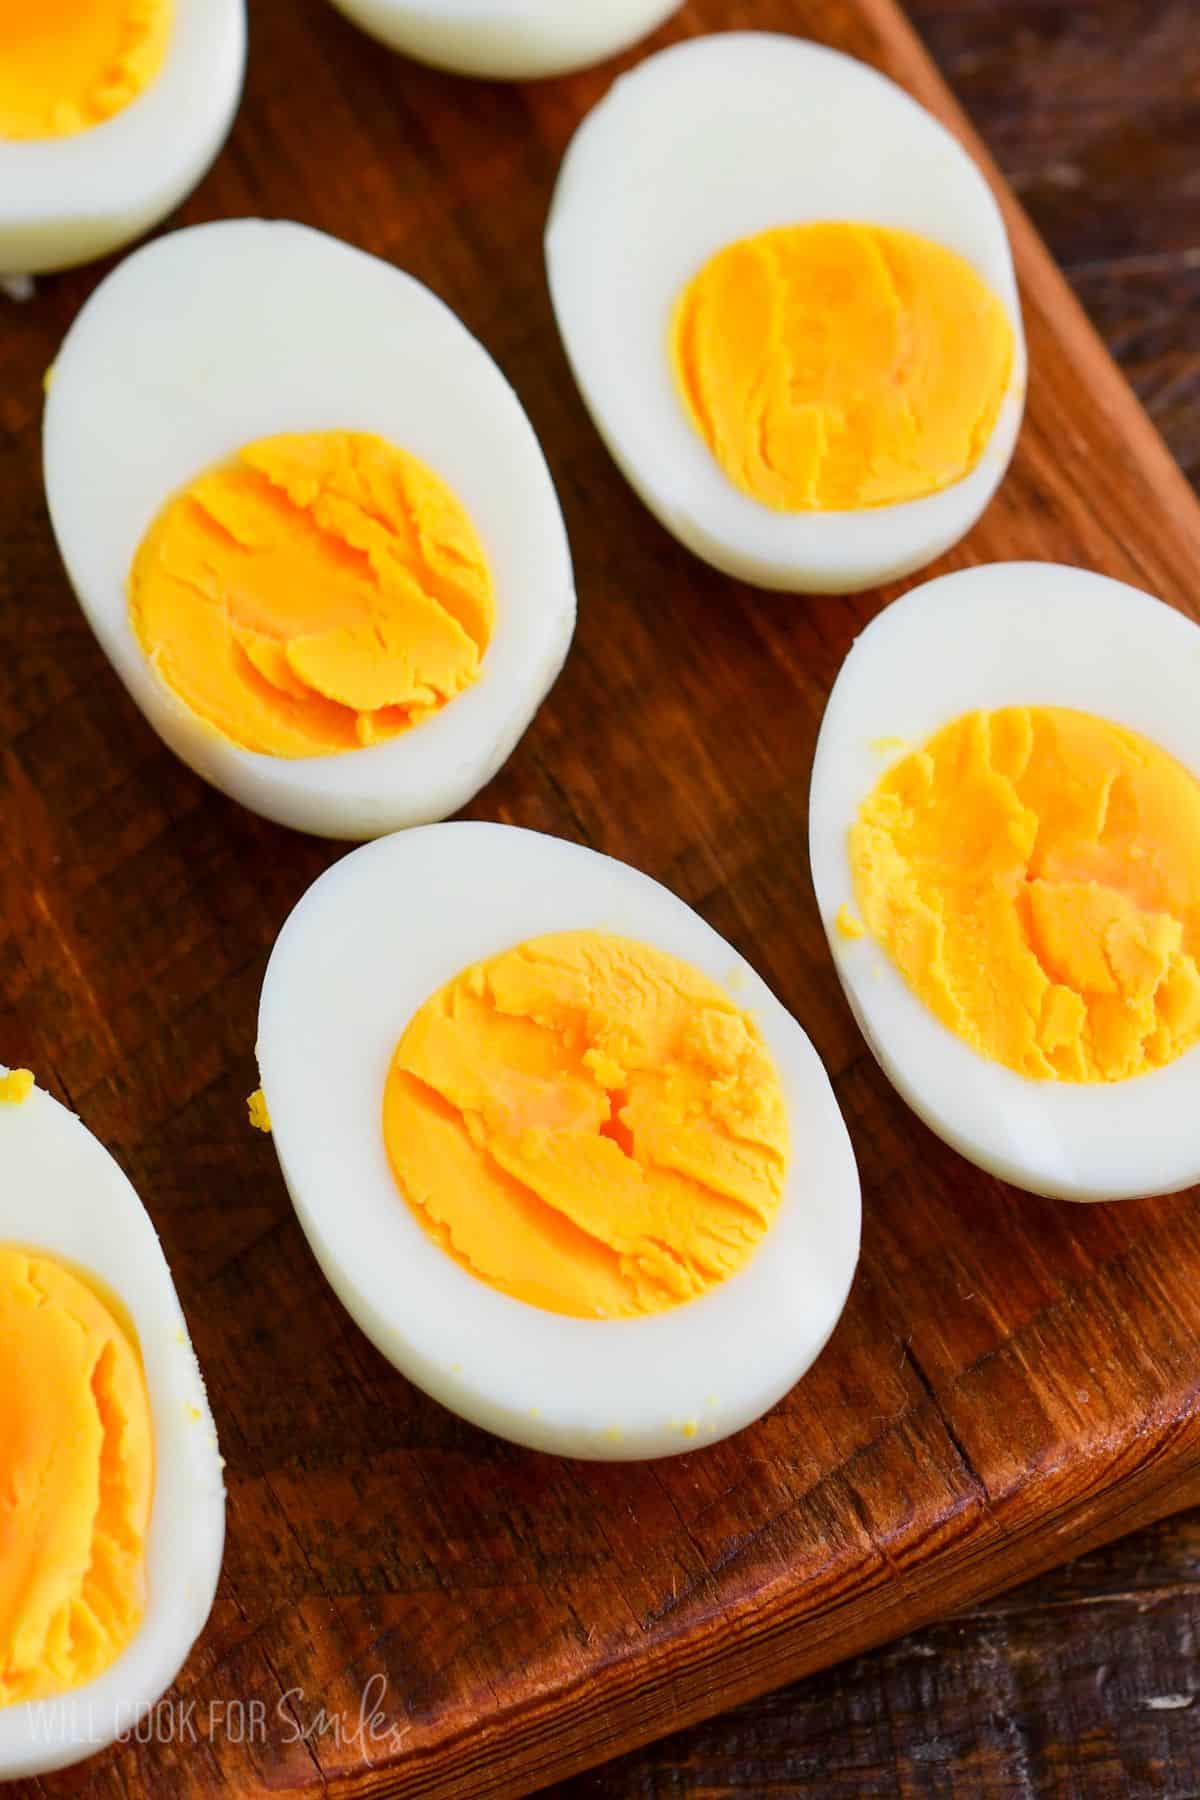
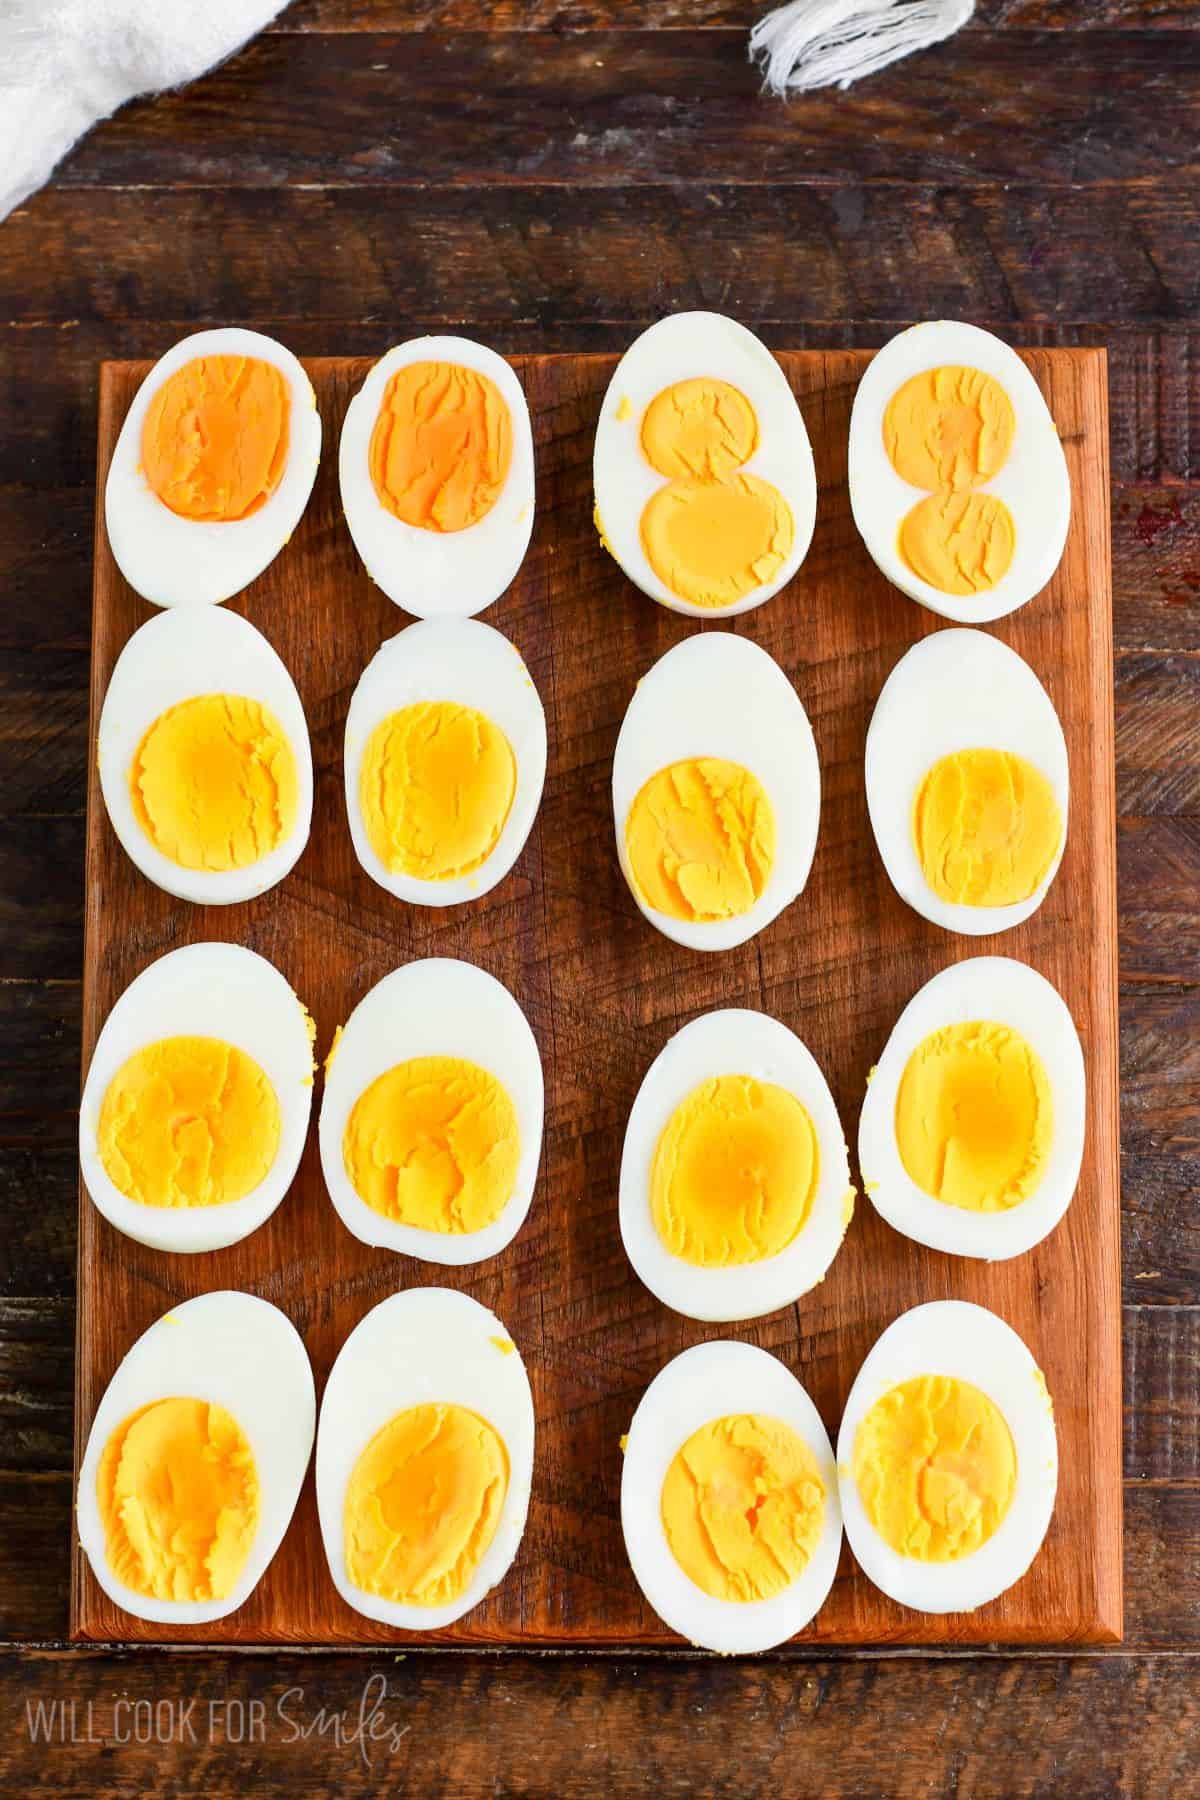
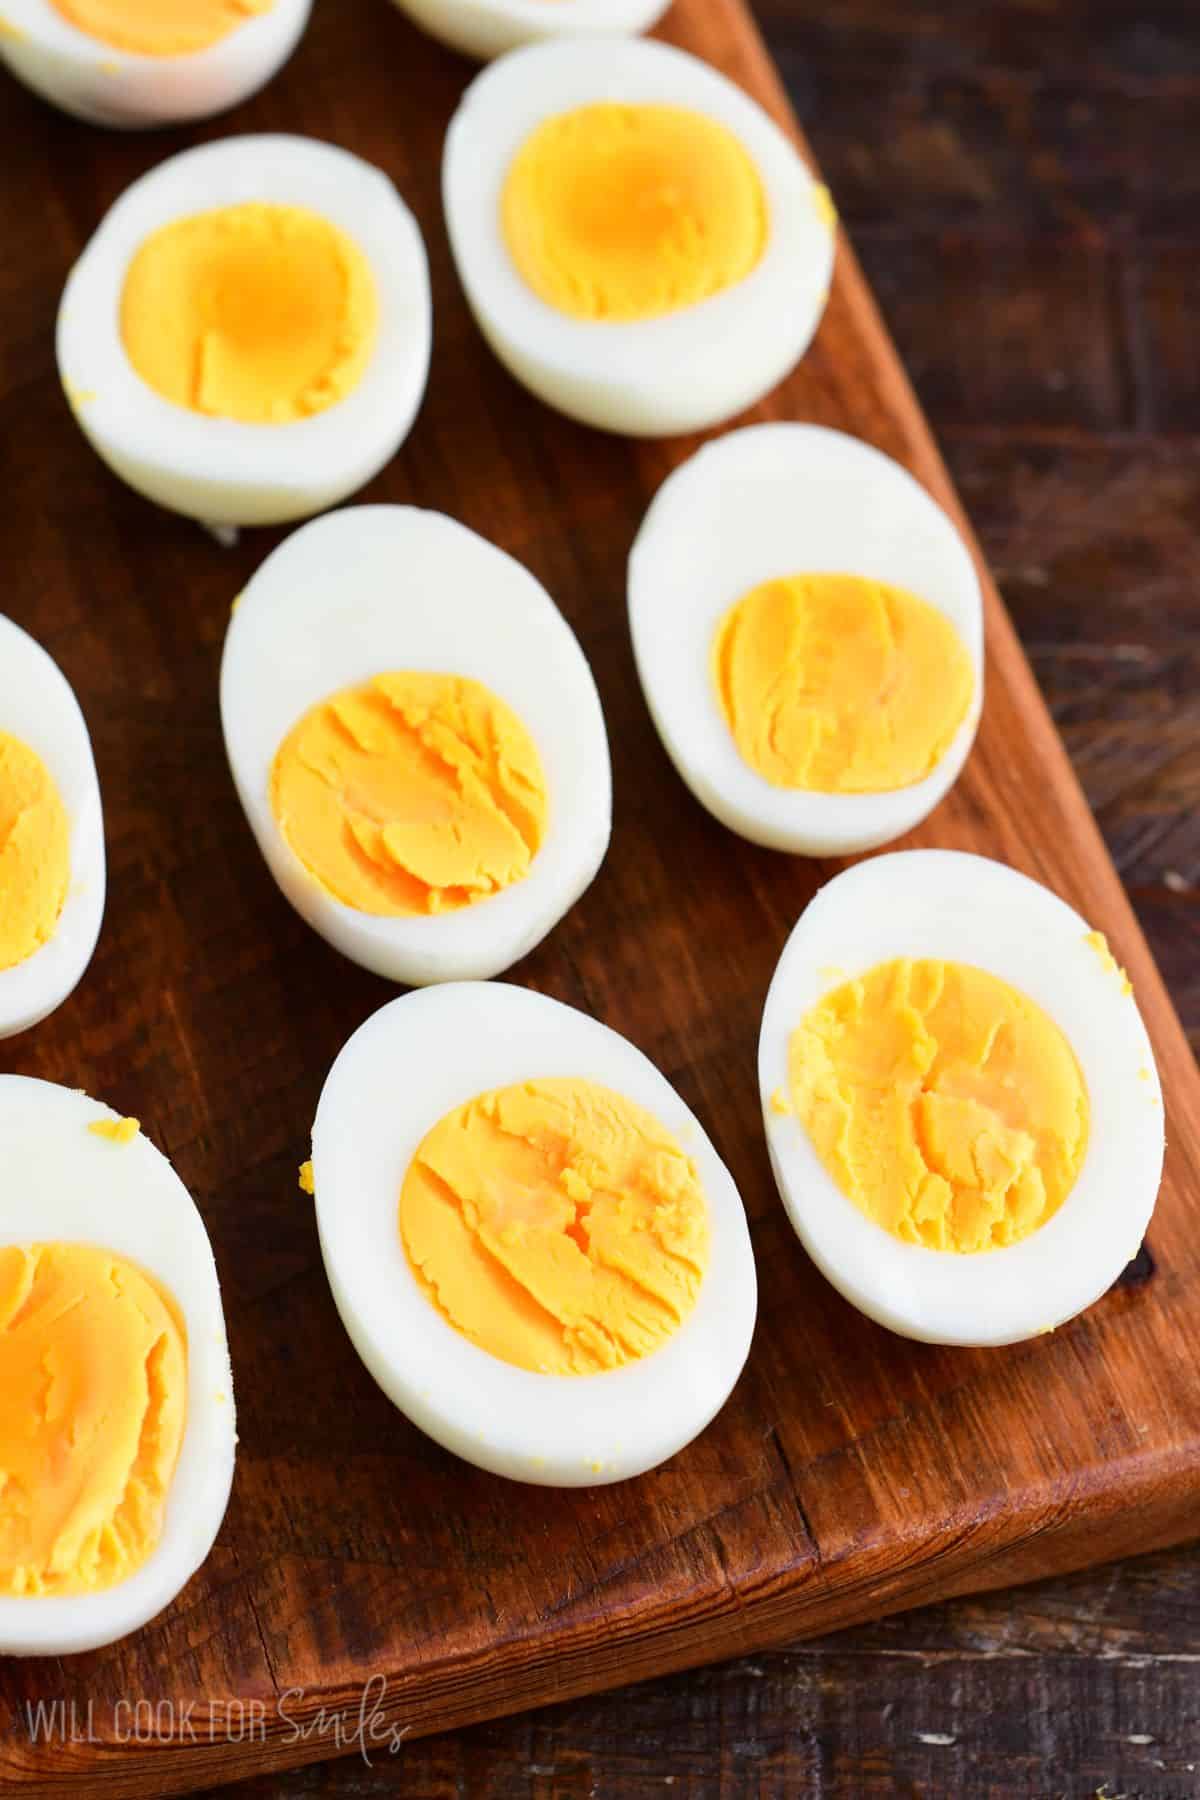
Boil time difference:
- 10 minutes: yolks are just set in the center, still a touch creamy. Great for egg salad.
- 12 minutes: yolks are fully set and slightly crumbly. Best for deviled eggs.
The Easy Peel Method For Hard-Boiled Eggs
This is my favorite part and part that everyone generally hates.
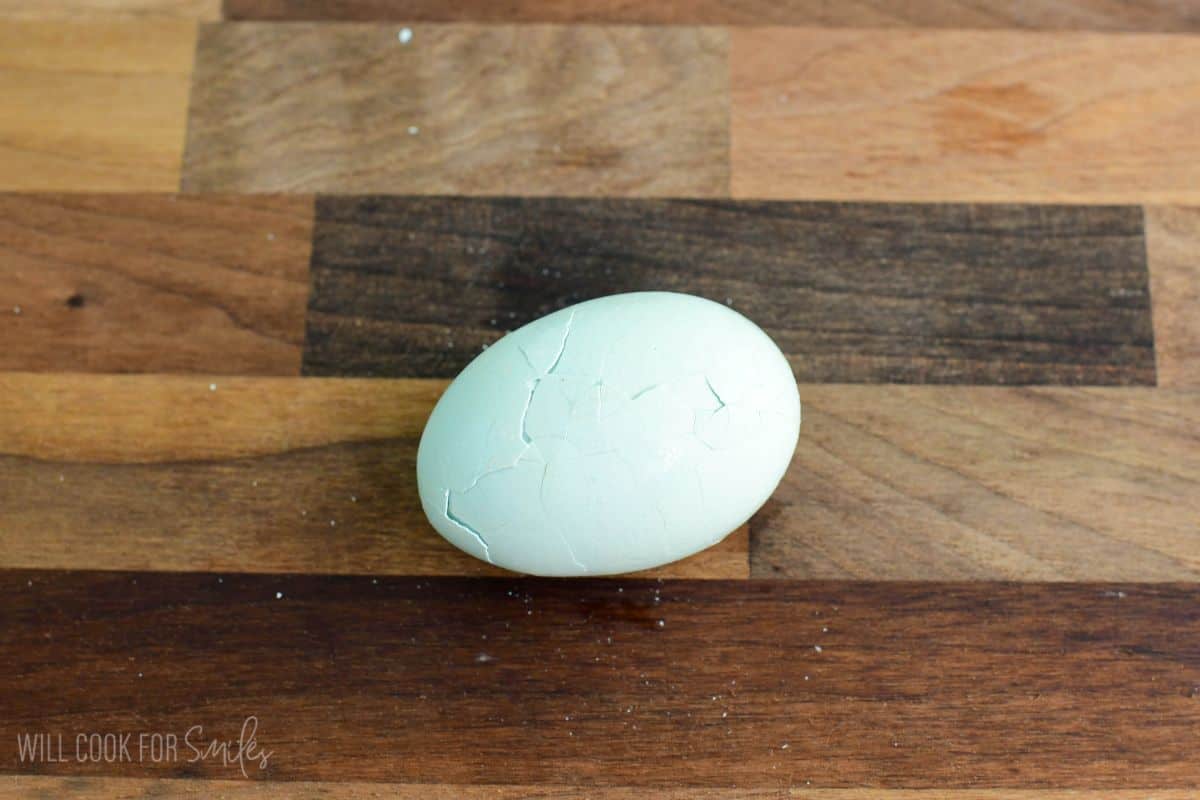
Once the eggs are cool enough to hold, tap the top and bottom firmly on your cutting board to crack both ends. Then tap all the way around the middle.
Now, and this is the move, roll the egg gently under your palm on the cutting board. Use light, even pressure. This creates fine, even cracks all over the shell and loosens everything underneath.
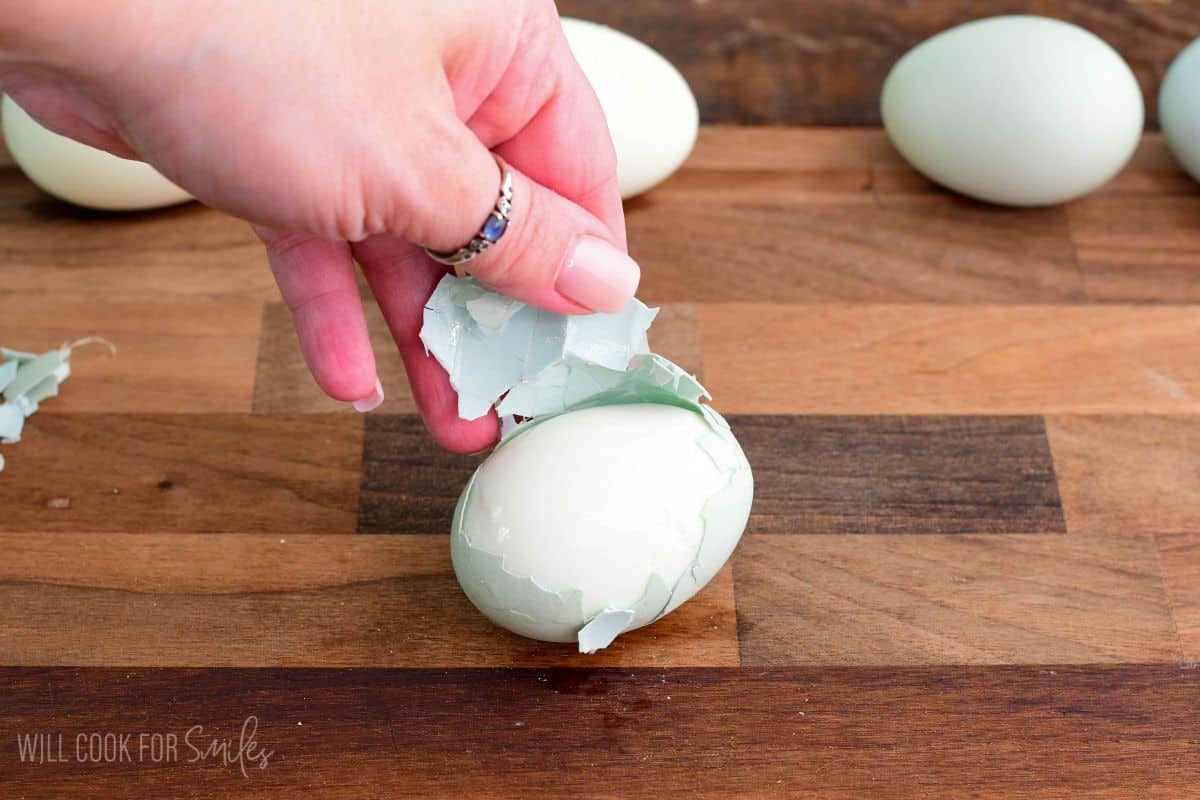
Now start peeling. Here’s the secret: find the thin, clear membrane sitting right under the shell and grab it along with the shell. When you peel the shell with the membrane, it pulls everything away in clean, satisfying strips.
Few Pro Tips To Remember
Like I mentioned, no overcomplicated science and steps but just a few things to remember when making hard-boiled eggs:
- Don’t overcrowd the pot – Keep eggs in a single layer so they cook evenly.
- Don’t overcook! This is the number one cause of hard-to-peel eggs and the unsightly grey ring sulfur build up around the yolk. Stick to 10-12 minutes.
- Control your heat – Once eggs are added, lower the heat slightly to prevent bouncing, cracking, and boiling over.
- Peel with the membrane – Get a fine crack on the shell, and grab the membrane with peeling.
- Cracked egg in the pot? If one of your eggs has a hairline crack going in, it may release some egg into the water and cause it to foam up or boil over. Prop the lid open slightly to let steam escape.
- Cold shock stops the cooking. Running cold water over the eggs right away when they come off the heat is important, not just for handling, but to stop the yolk from overcooking.
- Note that warm and room temperature eggs are easier to peel than cold refrigerated eggs!
How to Store Hard-Boiled Eggs
Hard-boiled eggs are great to make ahead!
- Let eggs cool completely before storing and refrigerate within 2 hours of cooking.
- Keep them in the refrigerator in a covered container.
- Peeled or unpeeled eggs keep for up to 1 week in the refrigerator.
- Label with the date so you know when you made them.
Ways to Use Hard-Boiled Eggs
Hard-boiled eggs are one of my favorite meal prep staples because they’re so versatile:
- Quick protein-packed breakfast.
- Egg salad, like my jalapeno cheddar egg salad, avocado cucumber egg salad, or bacon green onion egg salad.
- Deviled eggs like my bacon deviled eggs and pickle deviled eggs.
- Sliced over avocado toast.
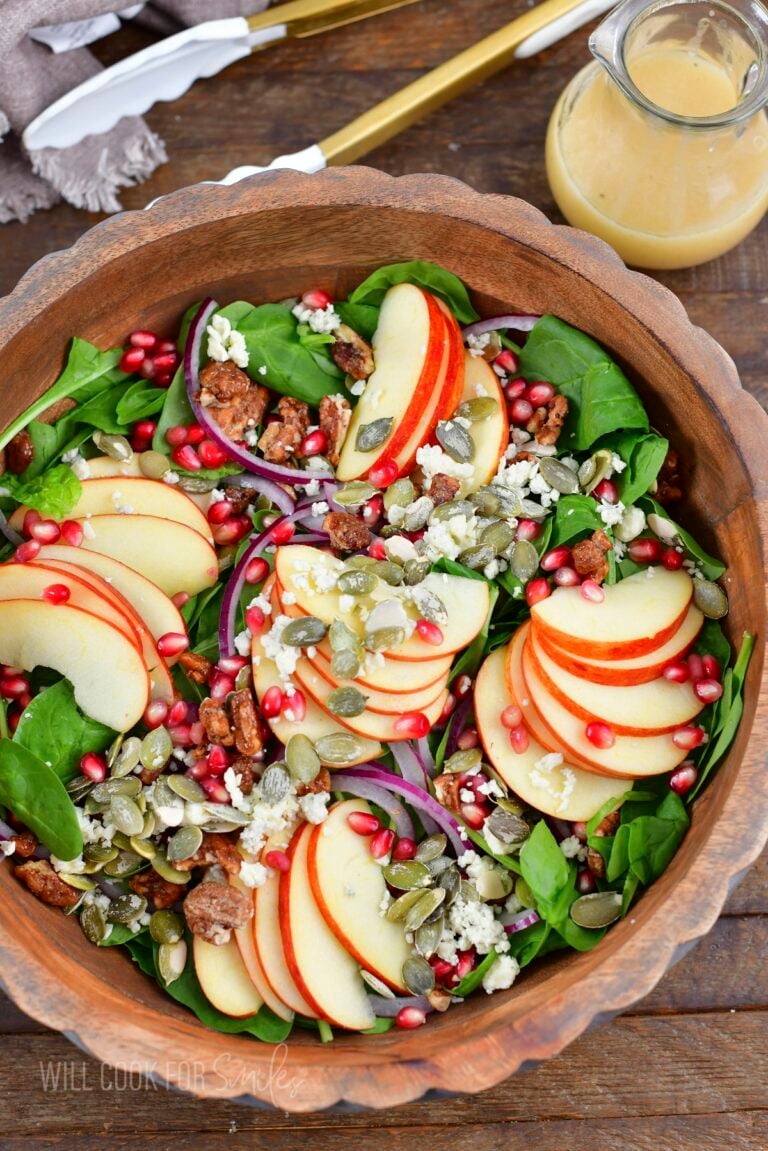
- Added to salads or grain bowls.
- Mix into a tuna salad, potato salad, pasta salad or chicken salad.
- Add to sandwiches.
- Snack with a little salt and pepper.
Recipe FAQs
That greenish ring is a reaction between sulfur and iron in the egg, and it happens when eggs are overcooked or not cooled quickly enough. It’s harmless, but the flavor slightly suffers. Stick to the 10-12 minute boiling range and run cold water over them right away.
Yes, hard-boiled eggs are one of the best things to meal prep. Cook a batch at the beginning of the week and you’ve got ready-to-go protein for salads, snacks, and breakfasts all week long.
A couple of reasons: the eggs may have gone straight from the refrigerator into boiling water (the temperature shock can crack cold eggs), or they were dropped in rather than lowered gently, or they already had a hairline fracture that was not noticeable. Use a slotted spoon and lower them in carefully.
DID YOU MAKE THIS RECIPE? PLEASE leave a 🌟 star rating! Let me know how you liked it by leaving the 📝 comment below or share and tag me on social media @willcookforsmiles. DON’T FORGET to subscribe to my newsletter!
Hard-Boiled Eggs Recipe with an Easy Peel Method
Ingredients
- 6-12 large eggs
Instructions
Pot Size:
- Use a larger/wider pot when cooking more eggs. Eggs should fit at the bottom of the pot in one layer with some space left between them. Don't stack lots of eggs into smaller pot, this will effect how well they cook through.
Cooking Eggs:
- Pull the eggs out of the refrigerator first to let them warm up slightly on the counter.
- Fill the pot with water half way up and bring it to boil.
- Once water is boiling, use a slotted spoon to add the eggs carefully to the bottom of the pot. Don't drop the eggs in or they will crack.
- Lower the heat to slightly below medium and cover the pot with a lid.
- Let the eggs cook for 10-12 minutes. At 10 minutes the egg yolks will be slightly more "fudgy" and at 12 minutes, they will be more set and crumbly.
- When time is up, pour off the hot water and run cold water over the eggs to shock them and cool them down. You can either let the cold water run over them or fill and drain off cold water every few minutes until eggs are cooled.
Easy Peel Method:
- Once the eggs are cooled enough to handle, start by tapping it on the board at the top and bottom to crack and the all around.
- Once they are cracked all around, gently roll the egg with your palm on the cutting board to crack it finely add around. This created finer cracks and loosens the shell.
- Start peeling the egg and make sure to grab the clear white membrane that's under the shell. Grab the shell WITH that membrane and pull off. The membrane will help pull the shell off nice and easy. Gently pull off the shell.
Video
Notes
- Egg size – note that the egg size does effect the cooking time slightly. So add or take away a minute or two for smaller and larger eggs.
- Water boiling over? – If any of the eggs have cracks and release some egg while, there will be a chance that the water will boil over while eggs are cooking. Keep an eye on it. To mitigate, leave a large crack with a lid for steam to escape.
- Don’t overcook the eggs! – Overcooking the eggs makes it infinitely harder to peel because the shells gets stuck on the egg white.
- Peeling cold eggs – Note that warm and room temperature eggs are easier to peel than cold refrigerated eggs!
Nutrition
Would you like to save this recipe?
All images and text ©Lyubov Brooke for ©Will Cook For Smiles. Please do not use my images without prior permission. If using my posts in collections and features, please link back to this post for the recipe.
Disclaimer: Nutrition information shown is not guaranteed to be 100% accurate as most ingredients and brands have variations.


Awesome! Short, and simple! Works like a breeze!
I am so glad it worked well for you!
This was the perfect recipe. I cooked mine for 12 minutes and they were exactly like the picture. I was a little concerned when I put the eggs in the water and it quit boiling. But it was no problem at all following the directions at 12 minutes and then cold water after the eggs are beautiful! The eggs were so easy to peel when they were still warm. This will save me hours in the future, struggling to peel eggs thank you so much for the recipe!
I’m so happy to hear that! 😊 It sounds like they turned out perfectly! The cold water bath really does make a huge difference for easy peeling, especially while the eggs are still a little warm. Thank you so much for taking the time to share your results, and I’m thrilled this method will save you some future egg-peeling frustration!
I have an easier way to make a hard boiled eggs. make poached eggs, aka hard eggs. perfect unless of course you want to make deviled eggs. I have been using my poacher for several years cuz I got tired of peeling the shells.
After more than 50 years, I finally made perfect hard boiled eggs – no green around the yolk, the yolk was perfect for my deviled eggs after 12 minutes and it didn’t take me over an hour to peel them. Thank You!😊
That makes me so happy to hear!! 😊 Perfect hard boiled eggs can feel like such a win! I’m so glad the method worked for you and made deviled eggs even better. Thank you for sharing!
This method works every time! Thank you!
That’s exactly what I love to hear!! There’s nothing better than eggs that peel perfectly every time, it’s so satisfying, right?! 😄