
How to Bake Chicken Wings: The Ultimate Guide
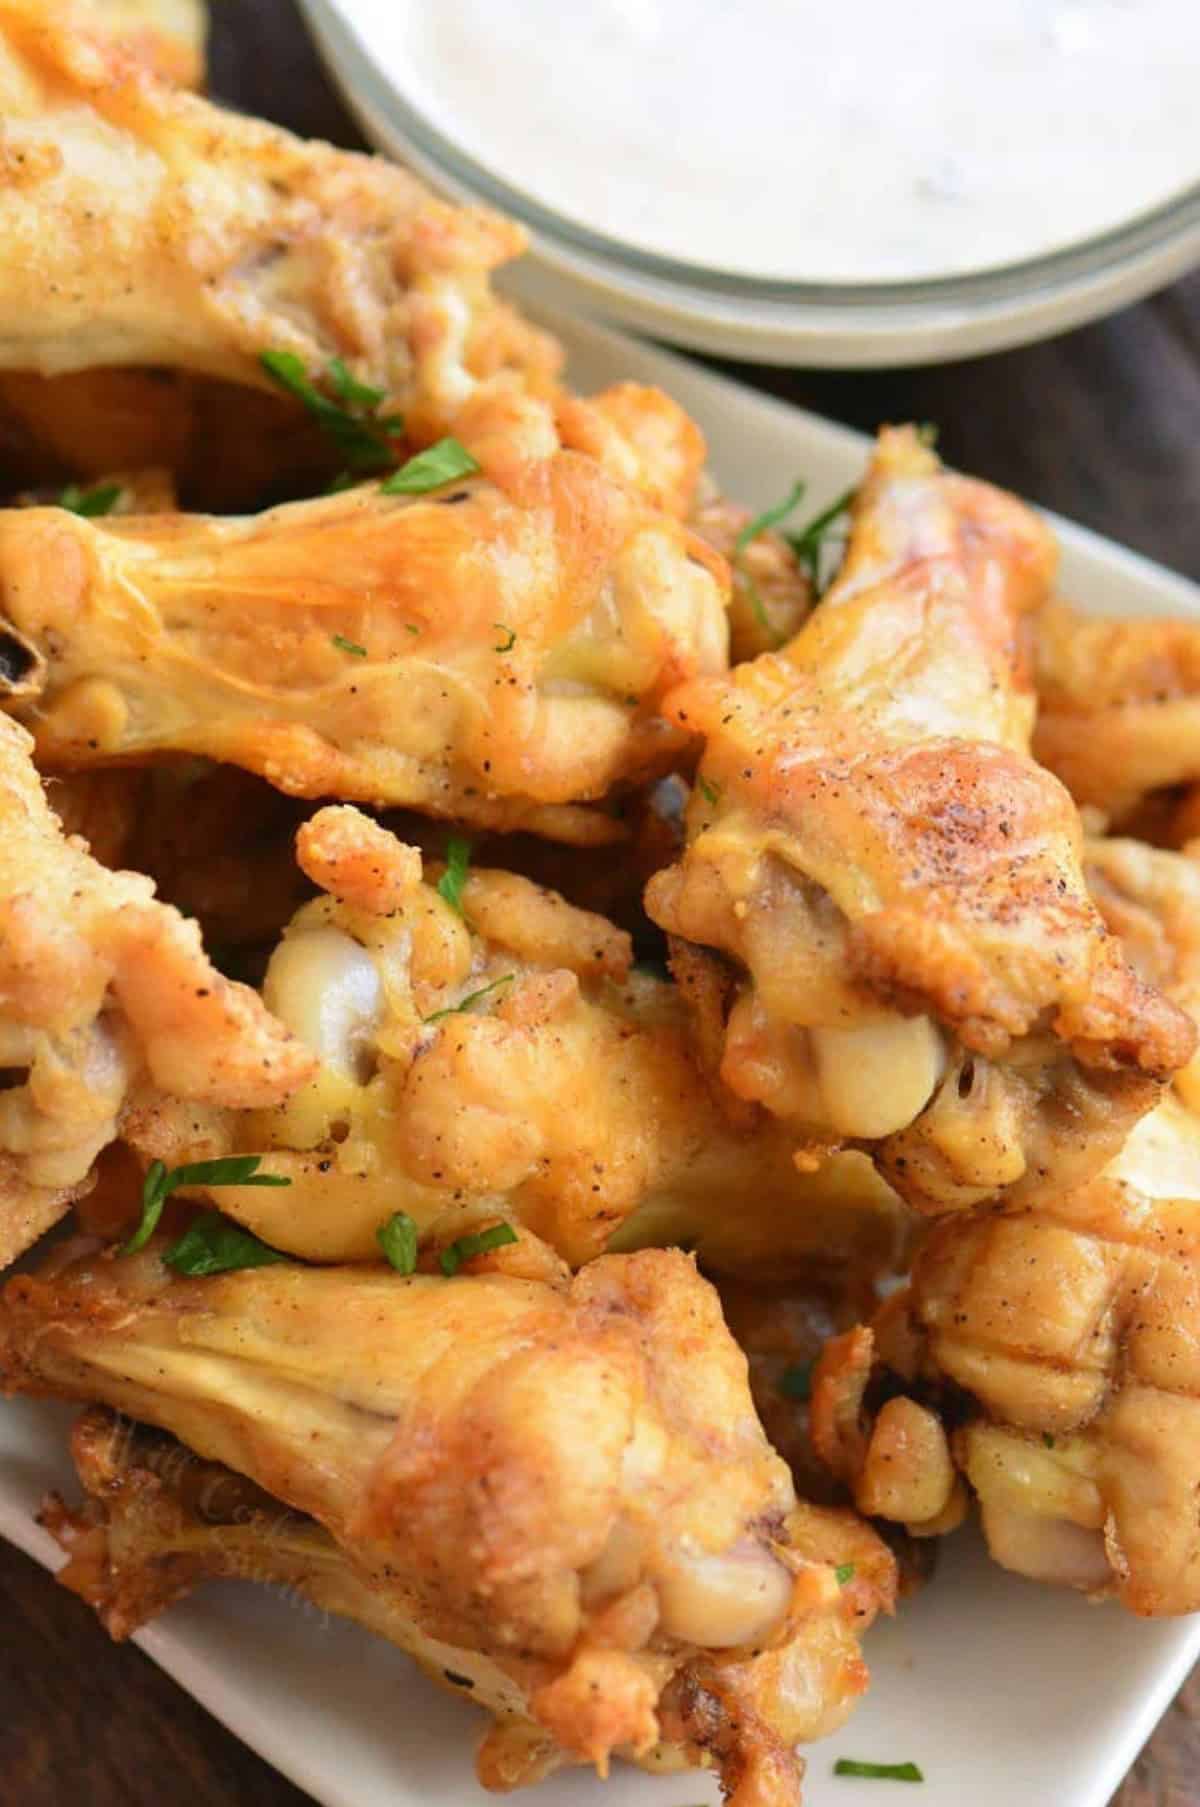
After years of making chicken wings the same way, I decided to test out new methods to see if I could improve my recipe. After spending a week making countless trays of wings and bugging my family with decisions, I’ve finally figured it out. I’ve tested two methods: coating wings in baking powder or rubbing them in oil. For crispy skin results, non-aluminum baking powder was the clear winner.
Featured Comment
This is the best baked chicken wing recipe by far. Thanks for sharing. ~Donna
How To Break Down Whole Chicken Wings
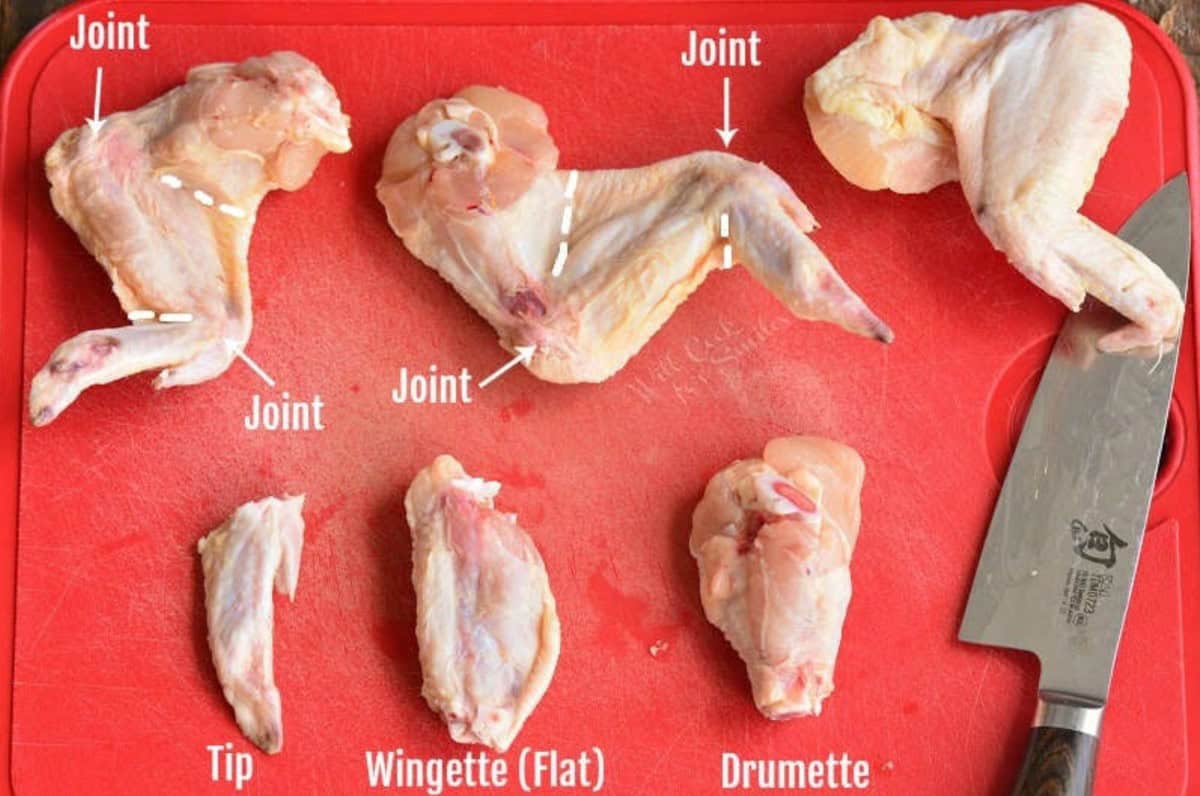
When shopping for chicken wings, you can buy whole chicken wings or ones already separated into flats and drumettes. So if you don’t want to cook the whole chicken wings, you can easily break it down:
- First, pull the wing apart to clearly see where each part is attached at the joint.
- Then, make a cut through the skin and meat between the drumette and the flat, right to the joint. Pick up the wing and move it up and down at the joint to pop the bone out of the joint. Cut through the remaining meat and skin to separate the wing.
- Finally, do the same at the joint of the tip and the flat. And there you have it, three separate parts of the wing. (Discard tips or save for chicken stock.)
Key Ingredients and Notes
Chicken wings – get chicken wings that are whole or already broken down. I have instructions to bread down the whole wings if needed. Although, you can always keep the whings whole and cook them.
Non-aluminum baking powder – this baking powder doesn’t add a metallic/bitter taste to baked goods and most importantly, aluminum-free baking powders are typically single-acting, goes into effect immediately when in contact with liquid.
Seasoning – this is a base recipe for chicken wings, no crazy seasoning. It’s meant that way because you can toss them in sauce or dip them in sauce if you wish.
How To Bake Chicken Wings
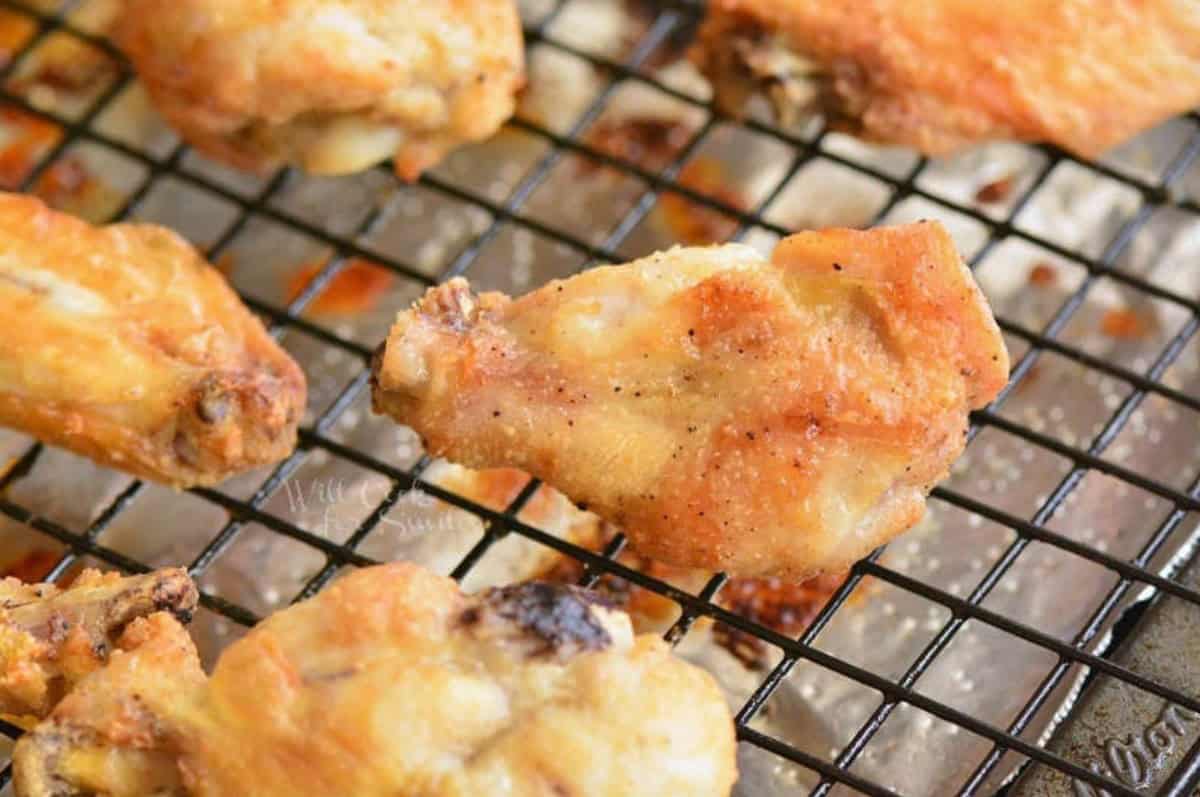
Preheat the oven to 425°F, line a baking sheet with aluminum foil to catch the drippings. Place a wire rack inside the baking sheet to raise the wings in order for the heat to circulate all around them while cooking. Rub the wire rack with some oil to prevent sticking.
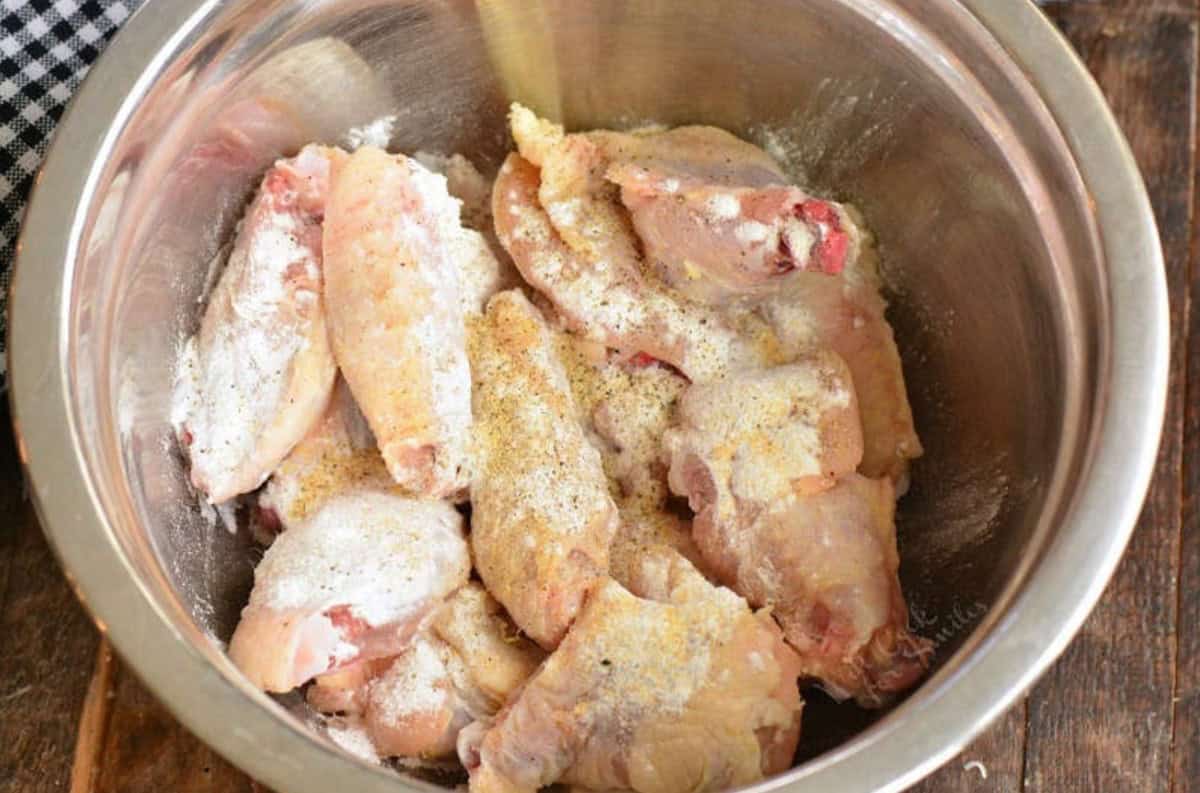
First: make sure to dry the wings with a paper towel to remove any excess moisture. This is important for the crispy skin because extra moisture will steam the skin rather than roast it.
Next: toss the wings with non-aluminum baking powder, salt, pepper, and garlic powder. Make sure the sings are coated evenly and there are no clumps anywhere.
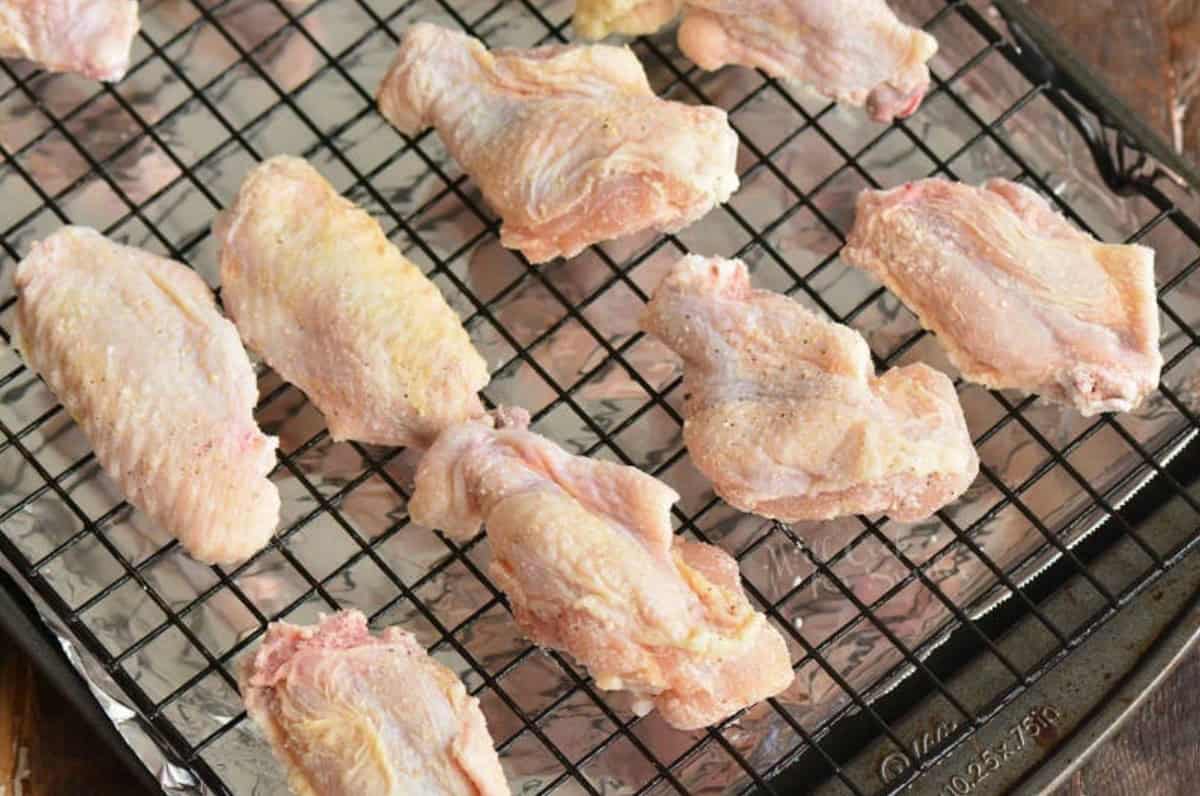
Bake 1: Spread chicken wings in one even layer on the wire rack and bake for 20 minutes. They are not done yet, don’t stop after this step!
Bake 2: Take the baking sheet out of the oven and close oven door. Flip each wing and bake for additional 15 minutes. (For small wings, bake a few minutes less and for large wings, bake a few minutes more.)
Expert Tip: if you wish yo see darker roast on the skin, you can turn on the broil on low for a minute or two. Make sure to watch it!
Tips: The Secret to Crispy Baked Wings
- I tested two methods: coating wings in baking powder or rubbing them in oil. For crispy skin results, baking powder was definitely the winner.
- I’ve tested both regular baking powder and non-aluminum baking powder just in case and it does matter. Use non-aluminum baking powder for best results.
- Lastly, I’ve tested different baking temperatures, results below, keep reading!
How Long To Bake Chicken Wings?
- Depending on the size of wings, at 425°F wings will bake for 35-40 minutes. (If baking at 450°F, wings will take a few minutes less so check them at 35 minutes.)
- Smaller wings will be done faster and larger wings will take a few extra minutes.
- TIP: If you have a wide variety of sizes, you may want to separate the wings in two batches, the smaller ones and the larger ones, that way they will be baked more evenly.
Best Oven Temperature For Baking Wings
I’ve tested three most recommended temperature settings and each one has its own benefit and drawback.
- 400°– results in the least crispy skin but the juiciest meat in the middle. Takes a few minutes longer than other cook times as well.
- 425°– the skin is crispier and the middle is still juicy. This is the winner for me personally because I like to have juicy chicken meat.
- 450°– crispiest skin but also meat in the middle is more dry. Takes a few minutes less to cook.
- Remember that once you coat the wings in sauce, the skin will only stay crispy for a few minutes and then it will soak up the sauce and loose the crisp.

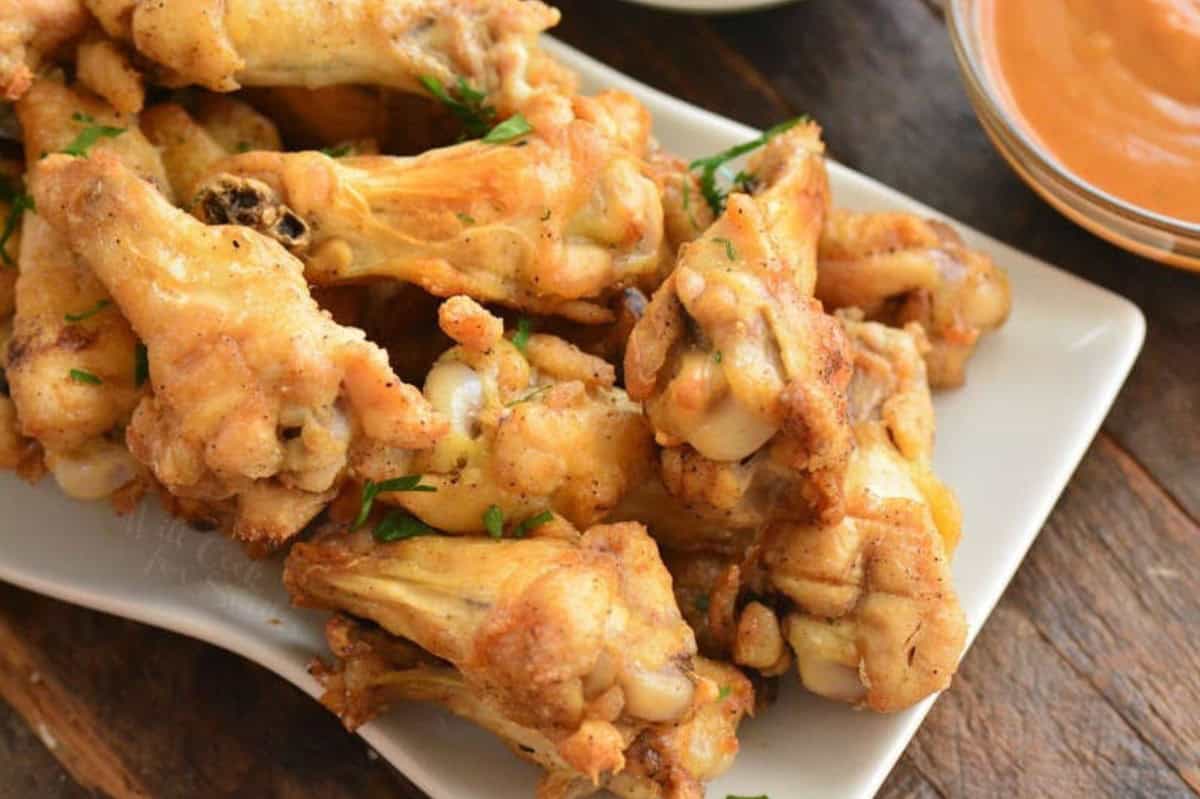
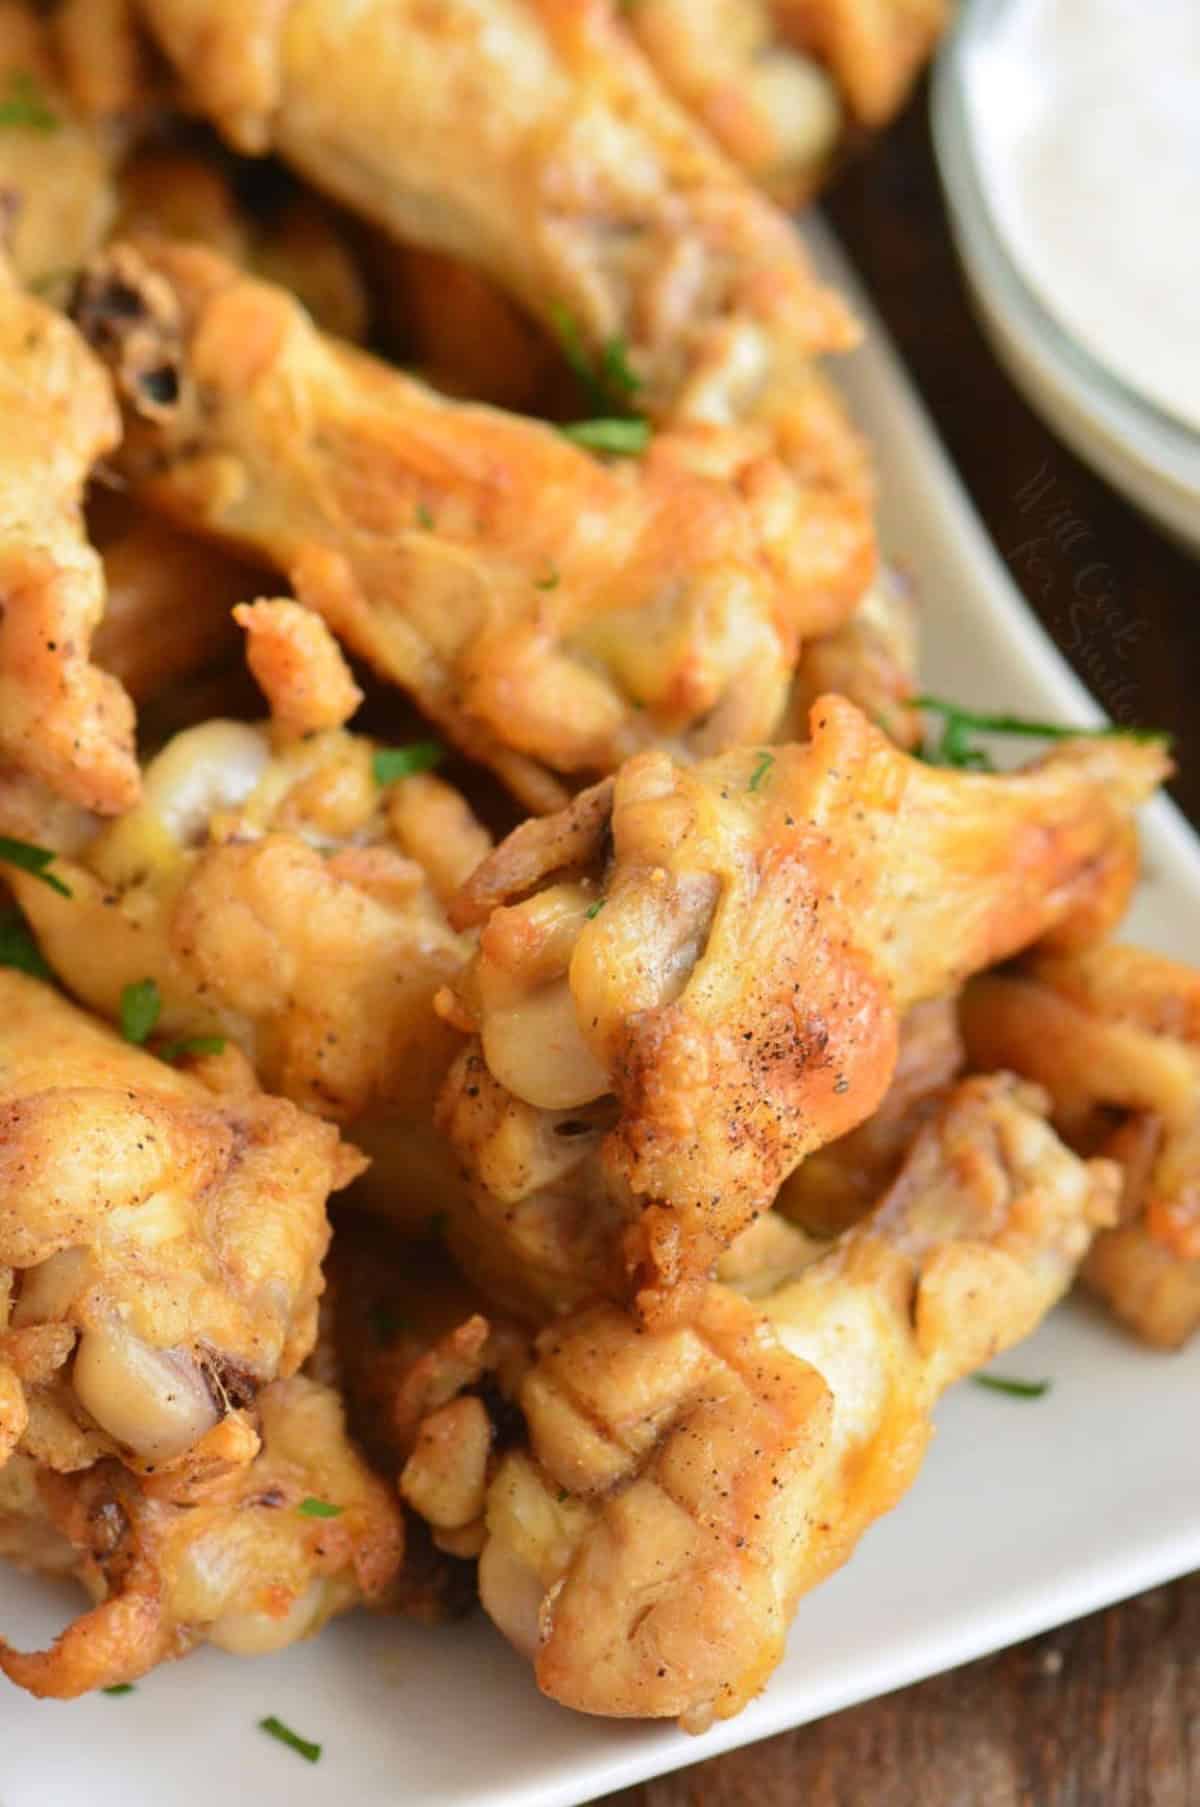
Flavor Your Way: Sauce and Seasoning Variations
- Get some celery sticks and carrots sticks to serve along the wings with spicy sauce. Celery and carrots help put out that “fire” in your mouth after biting into a spicy wing.
- As far as coating sauces, buffalo sauce and BBQ sauce are probably the post popular ones. But there are so many wing sauces available.
- Don’t forget ranch and blue cheese to dip the wings!
- I have a wonderful garlic parmesan butter sauce to add to the wings in my air-fryer wings recipe.
- If no sauce it planned, you can always check out my recipe for dry rub chicken wings and use my ultimate dry rub recipe.
Storing and Reheating Recommendation
Storing: store leftovers in an air-tight food storage container, in the refrigerator. Wings should last for 3-4 days.
Reheating: I’ve tested reheating chicken wings in the microwave, oven, and air-fryer. I found it best to reheat chicken wings in an air fryer. Reheat them at 360°F for 3-4 minutes, depending on size. If air fryer is not available, you can reheat them in the oven at 350°F for 10-15 minutes. Sadly, reheating in the microwave left them soft so it’s okay only if coating wings in sauce. In the oven, the wings are actually more likely to overcook when reheating and become more dry.
FAQs About Baked Chicken Wings
Can I use frozen wings? Yes, you absolutely can but make sure to thaw them first in the refrigerator. Once thawed, drain off excess liquids and pat the wings dry. Process per recipe.
Do you put sauce on the wings before baking? No, normally you would toss the cooked chicken wings in sauce. Cooking the wings in sauce will not make the skin crispy.
Is it okay to do 2 baking sheets in one oven? Normally, I don’t recommend that unless you have a convection oven. Convection setting is good for cooking multiple items because the fan circulates air to ensure even heating and cooking across all racks. Warning: this recipe is not meant for convection setting since it will require temperature and timing adjustment. If you are very familiar with your oven’s convection setting, you can try.
What is the correct internal temperature for chicken wings? This is a hard piece of meat to track exact internal temperature because the meat amount is so small around the bone. Since this is chicken, proper internal temperature of cooked chicken should be at 165°F.
DID YOU MAKE THIS RECIPE? PLEASE leave a 🌟 star rating! Let me know how you liked it by leaving the 📝 comment below or share and tag me on social media @willcookforsmiles. DON’T FORGET to subscribe to my newsletter!
Baked Chicken Wings Recipe
Ingredients
- 2 lbs* whole chicken wings or a mix of drumettes and flats
- 2 tsp non-aluminum baking powder
- 1 1/2 tsp garlic powder
- 1/2 tsp fresh cracked black pepper
- salt to taste
- oil to rub the wire rack
Instructions
- Preheat the oven to 425°F, line a baking sheet with aluminum foil to catch the drippings and place a wire rack inside the baking sheet. Rub the wire rack with some oil to prevent sticking.
- Blot the wings with a paper towel to remove any excess moisture.
- Place wings in a large mixing bowl and toss them with non-aluminum baking powder, salt, pepper, and garlic powder.
- Spread chicken wings in one even layer on the wire rack and bake for 20 minutes.
- Take the baking sheet out of the oven to turn the wings and close oven door. Flip each wing and bake for additional 15 minutes. (For small wings, bake a few minutes less and for large wings, bake a few minutes more.)
Notes
- Double the recipe: Feel free to double or triple the recipe. Make sure to still bake the wings in one even layer with a little space in between each wings.
- Storing: store leftovers in an air-tight food storage container for 3-4 days.
- Reheating: I find it best to reheat chicken wings in an air fryer. Reheat them at 360°F for 3-4 minutes, depending on size. If air fryer is not available, you can reheat them in the oven at 350°F for 10-15 minutes.
- More flavor: since this is the base recipe for the chicken wings, feel free to toss them or dip them in sauce when done. If you don’t want sauce, you can add some more seasonings of choice or try my dry rub.
Nutrition
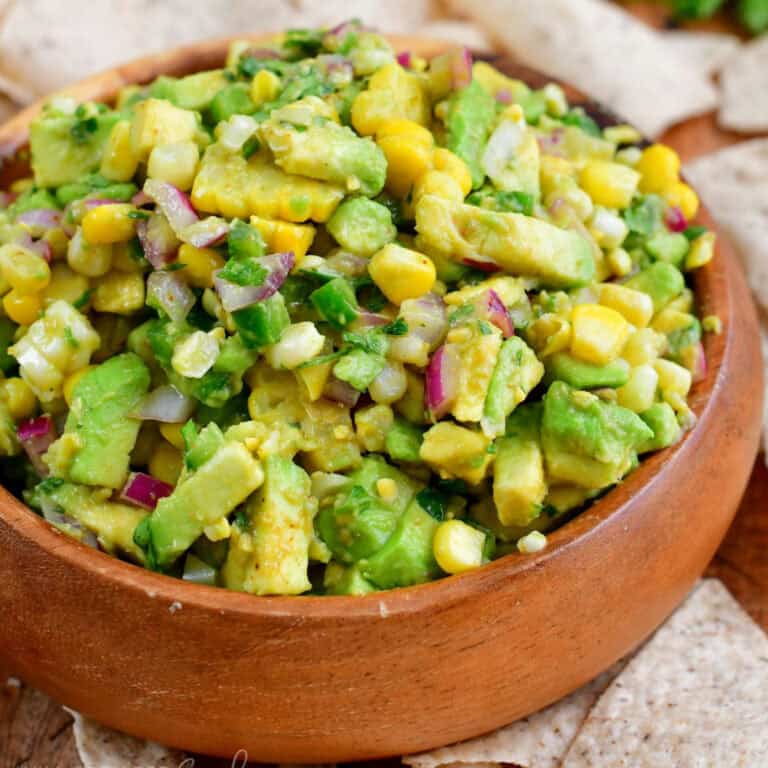
More Game Day Appetizers To Make
Originally published on Will Cook For Smiles in January 2020.
Would you like to save this recipe?
All images and text ©Lyubov Brooke for ©Will Cook For Smiles. Please do not use my images without prior permission. If using my posts in collections and features, please link back to this post for the recipe.
Disclaimer: Nutrition information shown is not guaranteed to be 100% accurate as most ingredients and brands have variations.


Wow! Is this good! Crispy wings! I didn’t know the best temperature to cook at and the baking powder secret is the best! Thank you! We will be having this again. I topped with Aldi’s Burman’s Medium Buffalo Wing Sauce for some zing AFTER wings came out of the oven. I served with fresh cut celery with some Marzetti’s Blue Cheese dressing for dip and some Ore-Ida Golden Tater Tots sprinkled with Larry’s Seasoned Salt and a side salad with shredded cabbage and carrots with a bit of the leftover blue cheese dressing-yum! We are having it again!
I didn’t know the best temperature BEFORE reading your post. Thanks for all the info about the results at the different temps. I baked at 425* with two minutes of broil at the end. They came out perfect! I also didn’t know the trick of putting on a baking rack to get the air circulating.
Wow, this made me smile!! I LOVE hearing how you turned this into a full meal, those sides sound perfect. And yes, the baking powder trick is such a game changer for getting those crispy wings! Thank you so much for taking the time to share all of this… and the fact that you’re already making them again is the biggest compliment! 😊
Dreadful!! I wasted several pounds of fresh wings!
The Baking Powder thing is baloney! I’m going back to using my Presto deep fryer!
I’m sorry they didn’t turn out for you. Without knowing exactly how you prepared them, it’s hard for me to pinpoint what went wrong. I’ve made this recipe many times myself, and many readers have as well, with great results. Just keep in mind that baked wings will never have the exact same texture as fried wings — I mention that in the post because the crispiness is different. If you were expecting a true fried-style texture, that may be why they seemed off. I’m happy to help troubleshoot if you can share a few more details about what happened.
Good basic recipe… but enhanced the coating flavor with some sprinkles of chili lime powder; & turned on the broiler at the end to create a more browned appearance.
That sounds delicious! 😍 I love the idea of adding chili lime powder for a little kick, and finishing under the broiler is such a great way to get that extra golden color. Thanks for sharing your twist, I’ll have to try it!
By far the best baked chicken wing recipe i have found. Thanks for sharing.
Aw, thank you! So happy the wings were a hit!
This is the best baked chicken wing recipe by far. Thanks for sharing.
Can I put the non-aluminum baking powder in with the dry rub for the other chicken wings?
Hi, Terry! Yes, you definitely can! Hope it turns out well 🙂
Love these wings!
Thanks, Carlie! I am so glad you liked them! 🙂