
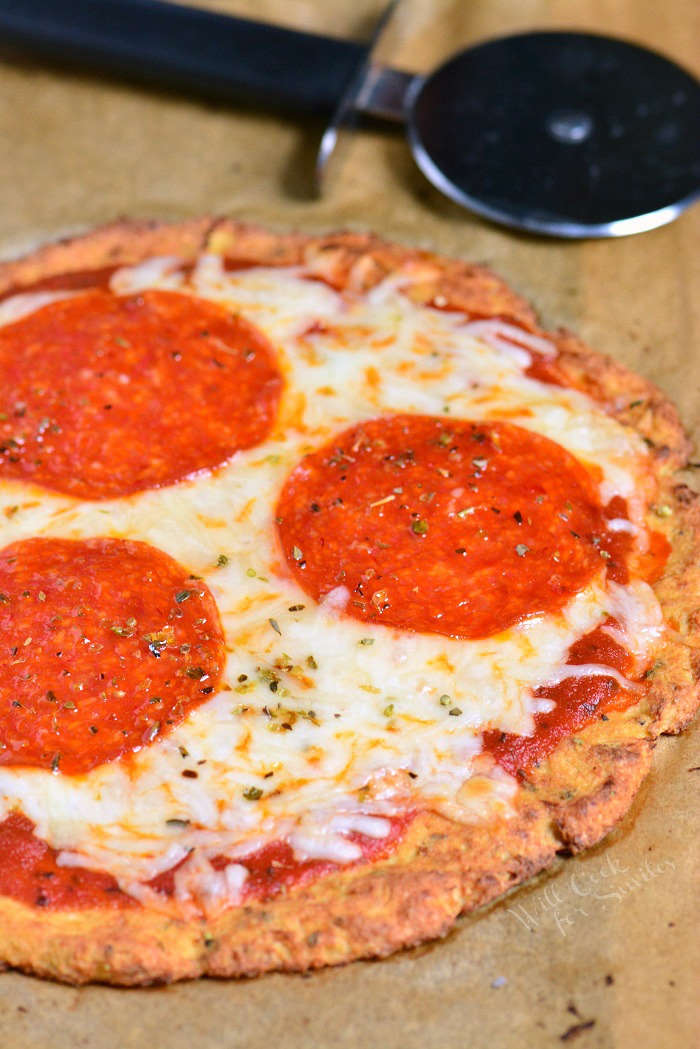
Cauliflower Pizza Crust
Cauliflower Pizza Crust is made entirely out of cauliflower with addition of some Parmesan cheese and egg. This pizza crust is completely gluten free and tastes so much better than any typical gluten free pizza crust. Making Cauliflower Pizza Crust is very easy and it can be made ahead of time and frozen. Learn how to make it using fresh cauliflower or frozen riced cauliflower.
Cauliflower is a wonderful healthy substitute for many vegetables that are high is carbohydrates. Try substituting cauliflower rice and mashed cauliflower for rice and potatoes.

CAULIFLOWER PIZZA CRUST
Pizza is one of my absolute favorite things to eat and I don’t actually know anyone who wouldn’t agree with me. People love pizza, that’s as simple as that.
As much as we would love to have pizza every day, it’s not exactly the healthiest choice. Those of us with gluten allergies can’t indulge in good pizza at all. It’s actually been a struggle for me to find gluten free pizza crust that doesn’t taste like a shoe box.
That’s why I’m so grateful for cauliflower. It doesn’t just taste amazing when it’s simply roasted, it’s also great mashed and cauliflower rice. And, it makes a fantastic pizza crust.
There are really three simple ingredients – cauliflower, Parmesan cheese, and egg. Additional ingredients are just for extra flavor like oregano, salt, garlic powder, and parsley.
This cauliflower pizza crust can easily be made out of fresh cauliflower or frozen riced cauliflower. Fresh cauliflower is a little more work, while frozen rice cauliflower is faster and easier.
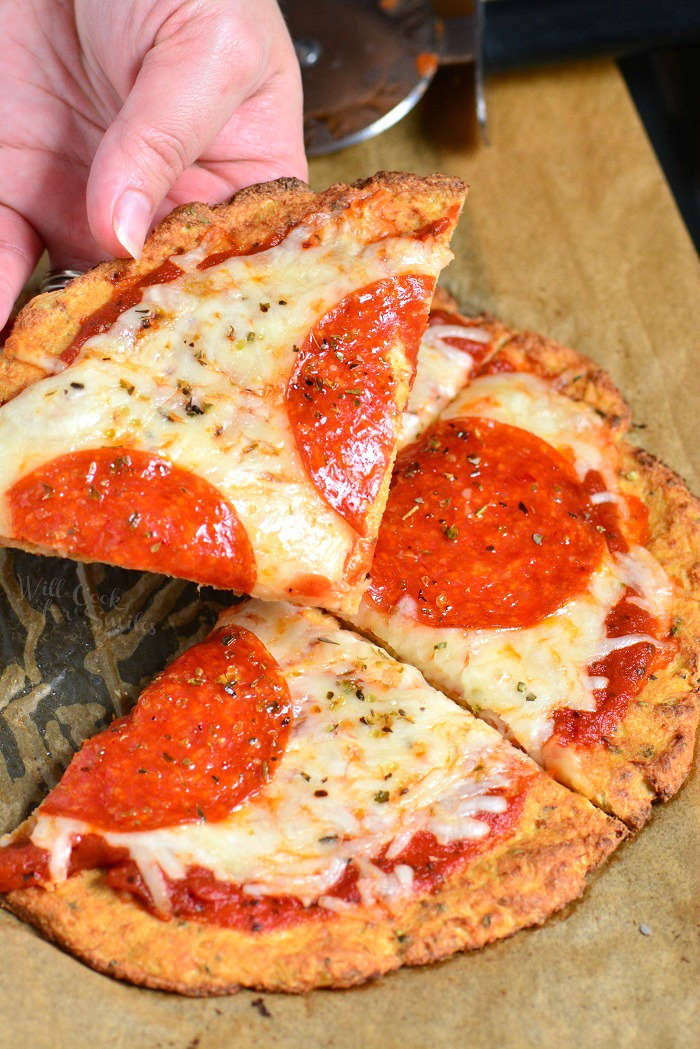
You can add any toppings you could possibly want on your cauliflower crust pizza. Cooked crust can also be topped and baked right away or frozen for later.
HOW MUCH CAULIFLOWER NEEDED FOR PIZZA CRUST
An average, 2 lb head of cauliflower will yield an individual pizza crust that it about 7-8 inches in diameter.
For a slightly larger pizza that’s about 9 inches, use a large 3 lb head of cauliflower.
If using frozen riced cauliflower, 20 oz of riced cauliflower will yield a pizza that’s about 9-10 inches in diameter.
If doubling amount of cauliflower, remember to double remaining ingredients as well.
HOW TO MAKE IT
To make cauliflower crust, you have to pulse cauliflower florets in a food processor to rice it, cook it soft, squeeze out the liquid, and mix with other pizza crust ingredients. All together, it can take up to an hour to make, so I included a few shortcuts.
Using fresh cauliflower
To make cauliflower pizza crust with fresh cauliflower, start by cutting the head of cauliflower into florets, discarding the thick stem.
Pulse cauliflower florets into coarse crumbs and transfer into a bowl. You can steam riced cauliflower in a microwave fast and easy. Cover the bowl with a microwave plastic plate cover, or use a microwave steam bowl.
*If you don’t have a microwave plate cover, you can use a ceramic plate to set on top of the bowl to cover it.
Cook riced cauliflower for about 6 1/2 minutes. Let the bowl stay in the microwave for another minute or so before taking it out. Use a towel to take out he bowl because it will be hot.
The goal is to steam riced cauliflower until it’s very soft.
Let the cauliflower cool down a bit so it’s not too hot to handle. Transfer riced cauliflower into doubled cheese cloth or a mesh vegetable bag and squeeze out all the liquid.
Place squeezed cauliflower into a mixing bowl and mix it with egg and fresh grated Parmesan cheese. Add salt, garlic powder, oregano, and a little dry parsley and mix the dough well.
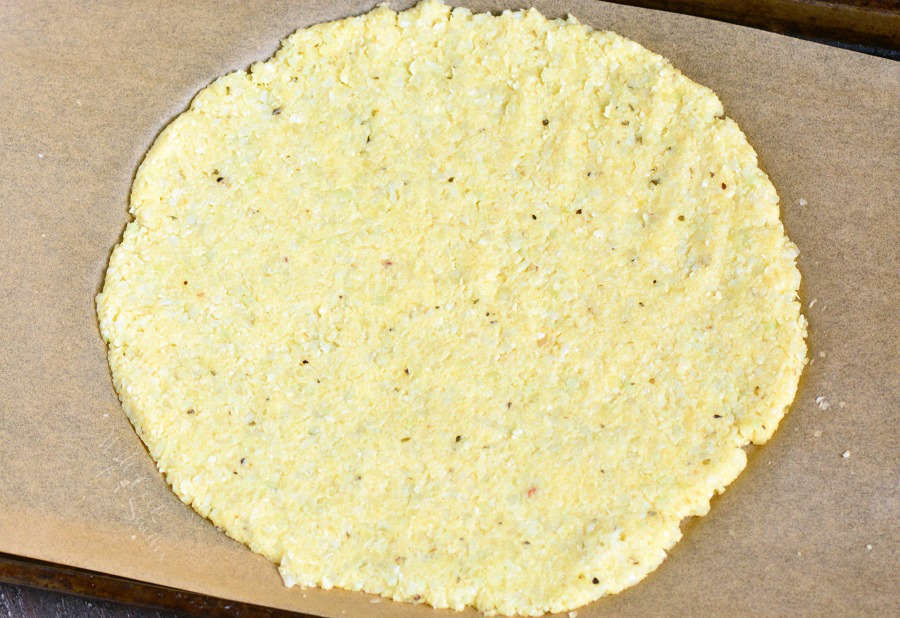
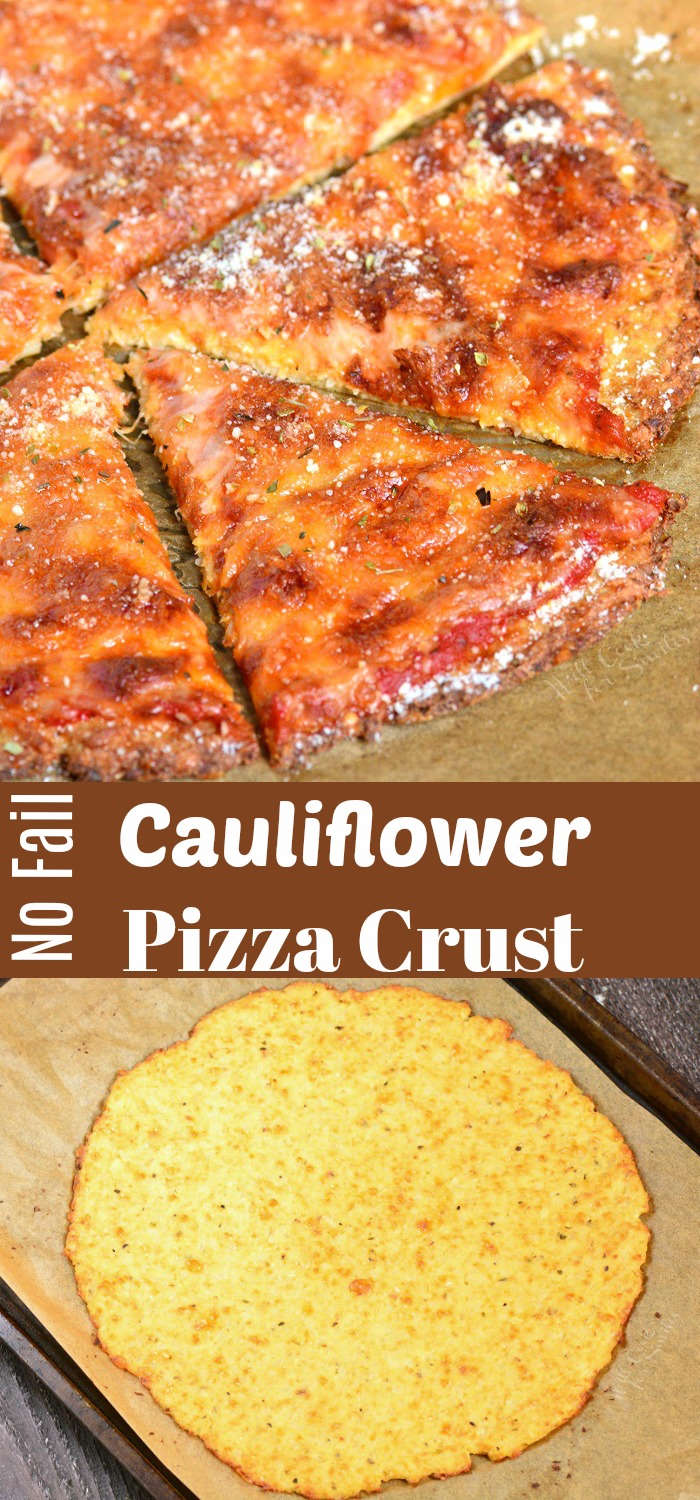
Transfer the dough onto a baking sheet lined with parchment paper. Make sure the baking sheet is wide enough for the size pizza you’re making. Pat the cauliflower dough out into a circle that’s about 1/4 inch thick or even a little bit thinner. Shape the edges to make them smooth if it’s cracking.
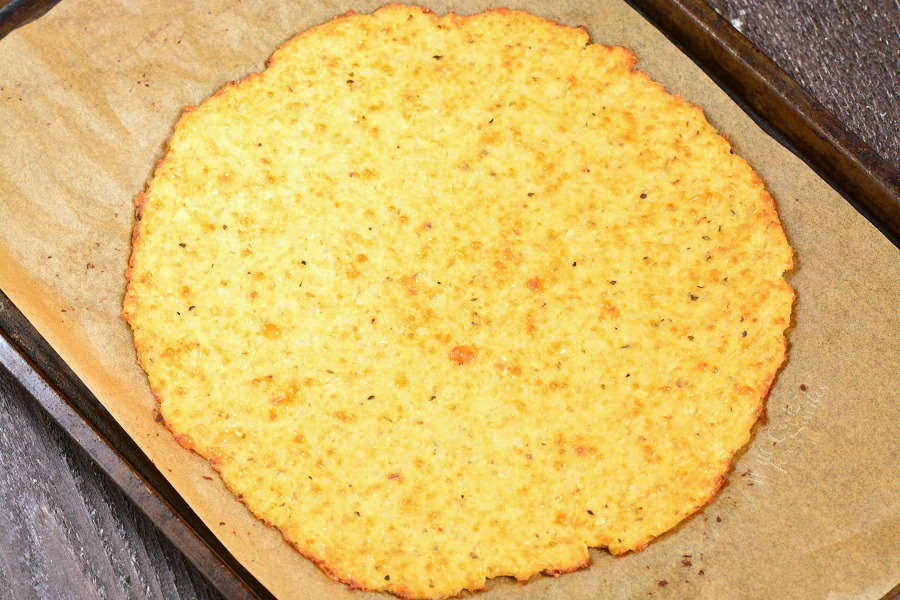
Bake the crust at 400° for 22-24 minutes, depending on the size.
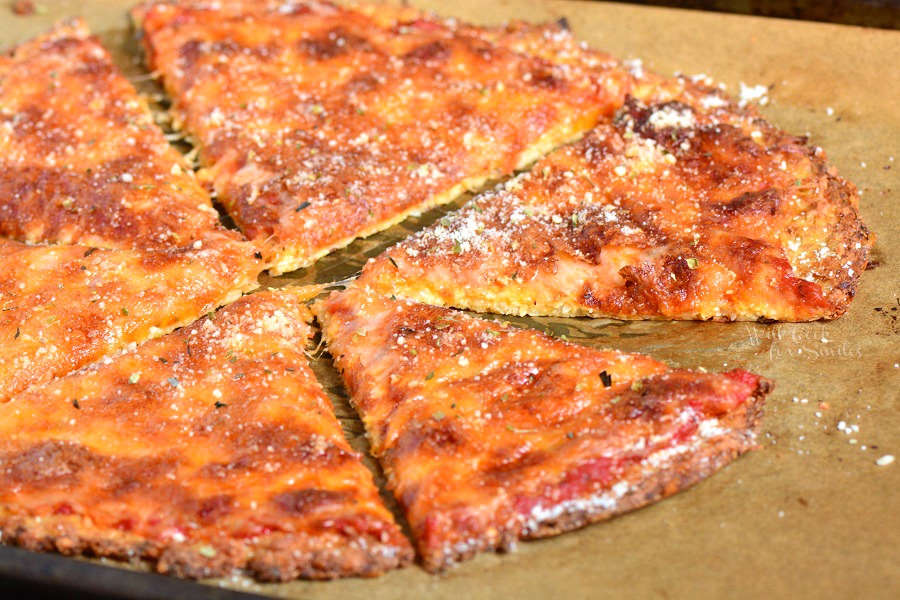
Add your favorite toppings and bake for another 10 minutes or until cheese is melted and golden.
Using frozen riced cauliflower
You can definitely save a couple of steps and use frozen riced cauliflower to make pizza crust.
Riced cauliflower found in stores often varies in cooking instructions and even how it’s riced. Try to find a brand that has small, even pieces because that will result in a more even crust.
Some packaged frozen riced cauliflower comes in a bag that can be easily put in a microwave to steam cauliflower right in the bag. Some packages are not safe to be used in a microwave. So make sure to read cooking instructions carefully first.
Steam frozen riced cauliflower according to the package instructions but add extra 30-60 seconds of cooking time. This will make cauliflower softer and easier to mix into a dough.
Let the cauliflower cool down a bit so it’s not too hot to handle. Transfer cooked cauliflower into a doubled cheesecloth or a mesh vegetable bag and squeeze out all the liquid.
Place squeezed cauliflower into a mixing bowl and mix it with egg and fresh grated Parmesan cheese. Add salt, garlic powder, oregano, and a little dry parsley and mix the dough well.
Transfer the dough onto a baking sheet lined with parchment paper. Make sure the baking sheet is wide enough for the size pizza you’re making. Pat the cauliflower dough out into a circle that’s about 1/4 inch thick or even a little bit thinner. Shape the edges to make them smooth if it’s cracking.
Bake the crust at 400° for 22-24 minutes, depending on the size.
Add your favorite toppings and bake for another 10 minutes or until cheese is melted and golden.
HOW TO FREEZE CAULIFLOWER PIZZA CRUST
You can make several cauliflower pizza crusts at one time and and freeze them. This will make it easy to grab and make cauliflower pizza during the week.
Prepare pizza crust according to the instructions and bake it. Once baked let pizza crust cool and then place it onto the cutting board right with the parchment paper it was cooked with. Freeze it for about an hour.
Once frozen, carefully stack one pizza crust on top of the other with a sheet of parchment paper in between. Place stacked pizza crusts into a large freezer bag, let the air out, and seal. Label and place the bag back into the freezer.
You can make several full size pizza crusts at a time or make smaller, individual sized crusts.
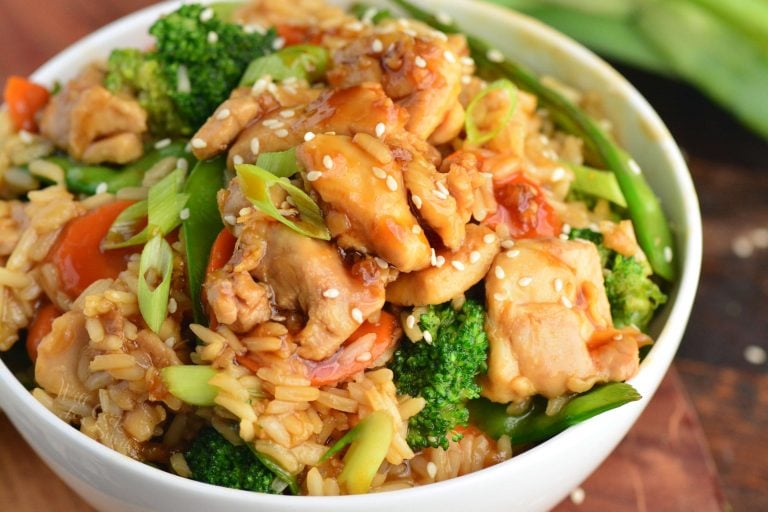
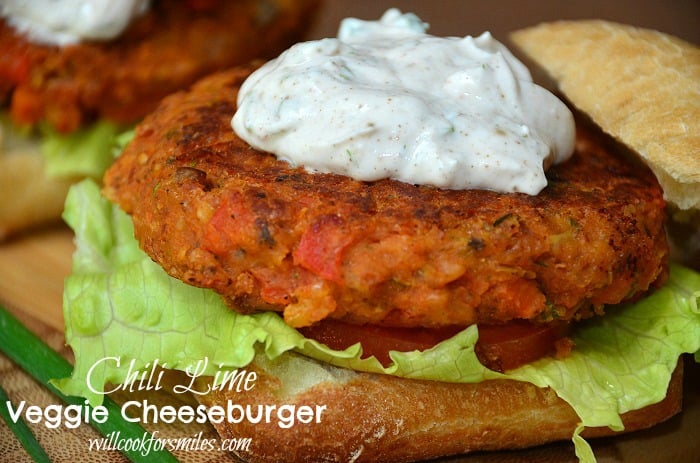
SOME MORE RECIPES TO TRY:
If you made any of my recipes and shared them on Instagram, make sure to tag me @willcookforsmiles and #willcookforsmiles so I can see all the things you tried!
Connect with Will Cook For Smiles!
Be sure to click below and follow me on my social media, so you never miss a recipe.
![]()
![]()
![]()
![]()
Don’t forget to sign up for email, so you won’t miss any new recipes.
Cauliflower Pizza Crust
Ingredients
Using Fresh Cauliflower:
- 2 1/2 - 3 lbs head of cauliflower
- 1 egg
- 2/3 cup fresh grated Parmesan cheese
- 1/2 tsp dried oregano
- 1 tsp dried parsley
- 1/2 tsp garlic powder
- salt
Using Frozen Riced Cauliflower:
- 20 oz frozen riced cauliflower
- 1 egg
- 2/3 cup fresh grated Parmesan cheese
- 1/2 tsp dried oregano
- 1 tsp dried parsley
- 1/2 tsp garlic powder
- salt
Instructions
Using Fresh Cauliflower:
- Cut the head of cauliflower into florets, discarding the thick stem.
- Pulse cauliflower florets into coarse crumbs and transfer into a bowl. You can steam riced cauliflower in a microwave fast and easy. Cover the bowl with a microwave plastic plate cover, or use a microwave steam bowl. (If you don’t have a microwave plate cover, you can use a ceramic plate to set on top of the bowl to cover it.)
- Cook riced cauliflower for about 6 1/2 minutes. Let the bowl stay in the microwave for another minute or so before taking it out. Use a towel to take out he bowl because it will be hot.
- The goal is to steam riced cauliflower until it’s very soft.
- Let the cauliflower cool down a bit so it’s not too hot to handle. Transfer riced cauliflower into doubled cheese cloth or a mesh vegetable bag and squeeze out all the liquid.
- Place squeezed cauliflower into a mixing bowl and mix it with egg and fresh grated Parmesan cheese. Add salt, garlic powder, oregano, and a little dry parsley and mix the dough well.
- Transfer the dough onto a baking sheet lined with parchment paper. Make sure the baking sheet is wide enough for the size pizza you’re making. Pat the cauliflower dough out into a circle that’s about 1/4 inch thick. Shape the edges to make them smooth if it’s cracking.
- Bake the crust at 400° for 22-24 minutes, depending on the size, until crust is golden brown.
- Add your favorite toppings and bake for another 10 minutes or until cheese is melted and golden.
Using Frozen Riced Cauliflower:
- Some packaged frozen riced cauliflower comes in a bag that can be easily put in a microwave to steam cauliflower right in the bag. Some packages are not safe to be used in a microwave. So make sure to read cooking instructions carefully first.
- Steam frozen riced cauliflower according to the package instructions but add extra 30-60 seconds of cooking time. This will make cauliflower softer and easier to mix into dough.
- Once riced cauliflower is cooked, used the same instructions as above to squeeze the liquid out and mix the pizza dough.
- Bake at 400° for 22-24 minutes, until golden brown.
- Add your favorite toppings and bake for another 10 minutes or until cheese is melted and golden.
Video
Notes
Nutrition
Would you like to save this recipe?
Categories:
Cauliflower Recipes, Dinner Recipes, Gluten Free Recipes, Healthy Dinner Ideas, Pizza Recipes,All images and text ©Lyubov Brooke for ©Will Cook For Smiles. Please do not use my images without prior permission. If using my posts in collections and features, please link back to this post for the recipe.
Disclaimer: Nutrition information shown is not guaranteed to be 100% accurate as most ingredients and brands have variations.


Awesome pizza crust!
I’ve used this recipe before and think it tastes like a great regular pizza crust!
I am glad you like it so much! Thanks for stopping by to let me know. 🙂
Save the larger stems and core for cauliflower “potato” salad
That’s such a great idea! Thanks for sharing!”
Yum… it was perfect, can’t wait to make a batch and freeze for easy dinners! Ps I added a teaspoon of chia seeds…
I’m so glad you loved it! Freezing a batch for easy dinners is such a smart idea—perfect for those busy nights. And adding chia seeds sounds like a fantastic twist! I’ll have to try that next time I make it. Thanks so much for sharing your tip!
This is something new for me
AMAZING. I followed your recipe exactly, with the exception of flipping the crust when the timer beeped, to give the other side a bit of time to brown. I doubled the recipe and put it on a 15″ pizza stone. I did extend the cooking time and bumped the temperature up a bit to accommodate for the bigger pizza. We will be eating this again on Friday! Thank you again for a great recipe!!!!
So glad you liked it! 🙂
Wonderful recipe! I wish I could add a picture to this but I cannot figure out how to do that!
Thanks, Pam! I am so glad you liked this recipe! 🙂
Plan to make this…..please advise how much parmesan cheese…..also some idea of how much of the seasoning suggestions
Thank you
Hi, Halina! In the recipe card you will see the amount of cheese and which herbs to use, please let me know if you can’t see it.