
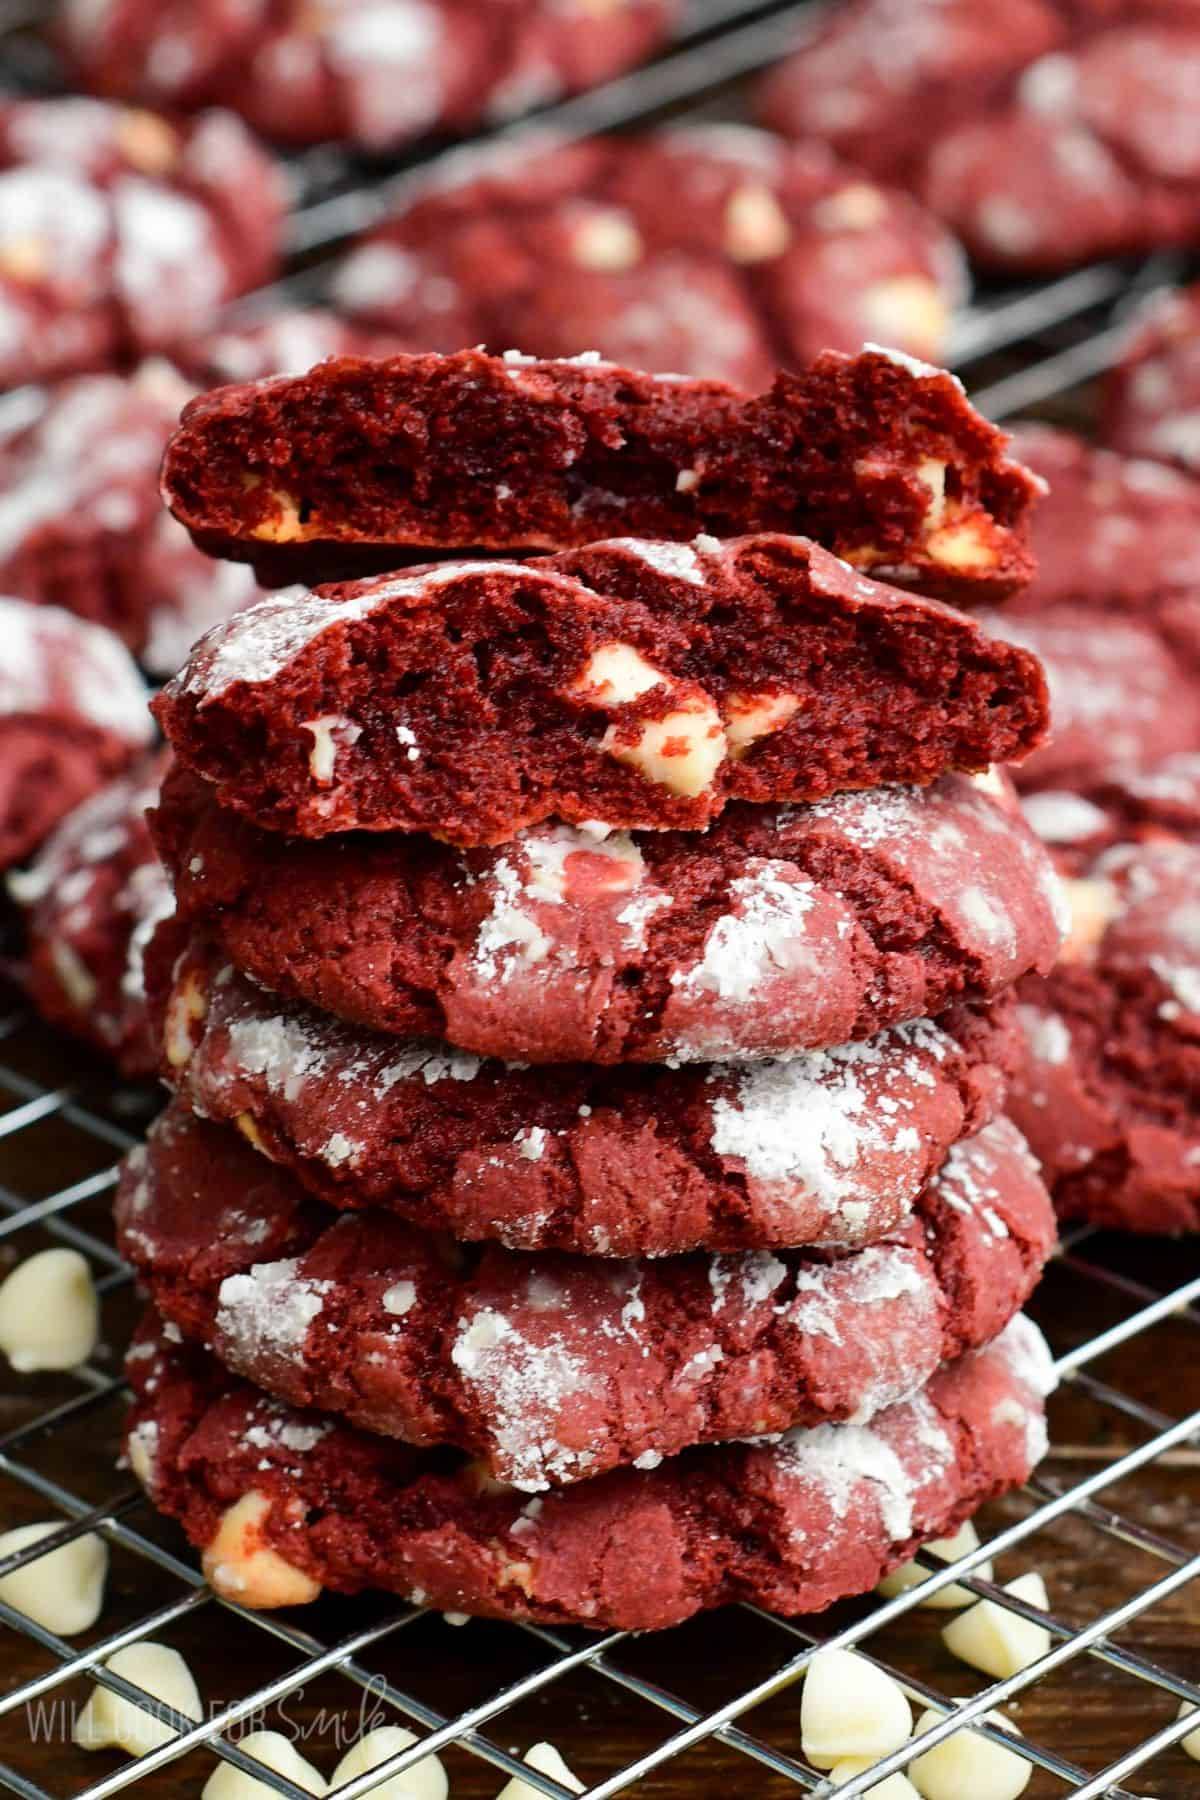
Red Velvet Cream Cheese Cookies
Why These Red Velvet Cream Cheese Cookies Are SO Special:
These cookies stand out from the rest for a couple of simple reasons:
- Cream cheese makes the difference. I love using it in so many of my cream cheese cookies, like coconut key like cream cheese cookies and white chocolate cranberry cream cheese cookies. It creates a smoother, softer, chewier cookie texture inside with that you don’t get from butter alone.
- Rich flavor without being too sweet. The mix of melted butter and cream cheese gives them a buttery, tender bite.
- No mixer required! That’s my FAVORITE part. Just whisk everything together in one bowl and fold in the dry ingredients, easy-peasy!
- Simple ingredients, amazing results. You get bakery-style cookies with minimal effort.
Table of Contents
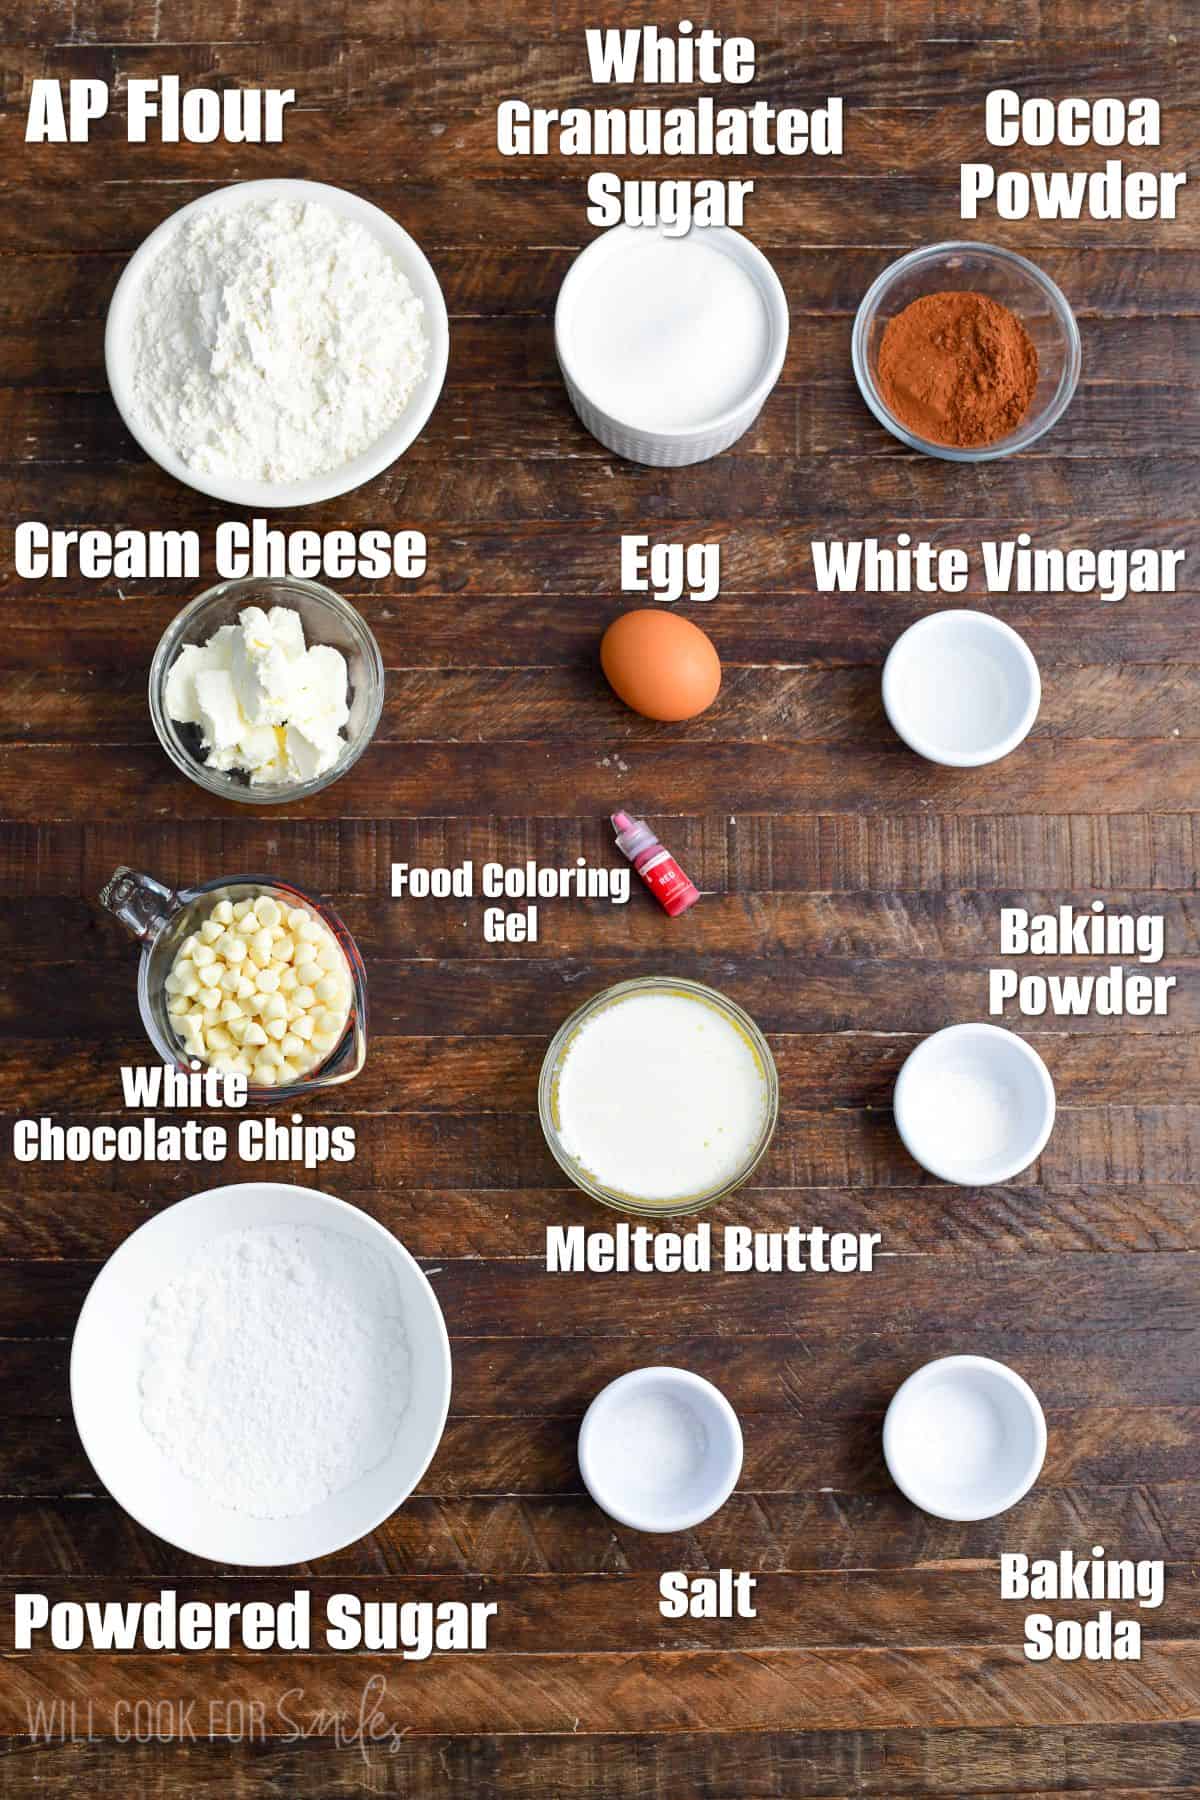
Key Ingredient Notes
- Cream Cheese – Use full-fat brick-style cream cheese. Make sure it’s softened to room temperature so it blends smoothly with the warm melted butter.
- Butter – Melted butter is key to the no-mixer method and contributes to that fudgy texture. Use unsalted so you can control the salt level.
- Red Food Coloring – Gel food coloring works best because it’s more concentrated and won’t thin out your dough. Start with ½ teaspoon and add more if needed to achieve your desired shade.
- Cocoa Powder – Make sure to sift it before adding to avoid lumps. Use either high-quality Dutch-processed cocoa powder for a deep, dark, and fudgy result, or natural cocoa powder for a lighter, more traditional chocolate flavor.
- White Vinegar – This provides the subtle tanginess that’s classic in red velvet recipes. It also reacts with the baking soda to help with leavening.
- White Chocolate Chips – it’s a classic combination in red velvet desserts but you can substitute other chocolate chips if you wish.
- Powdered Sugar – Sift it before rolling the cookies for a smooth, even coating that creates those beautiful cracks.
See recipe card for complete information on ingredients and quantities.
How to Make Red Velvet Cream Cheese Cookies
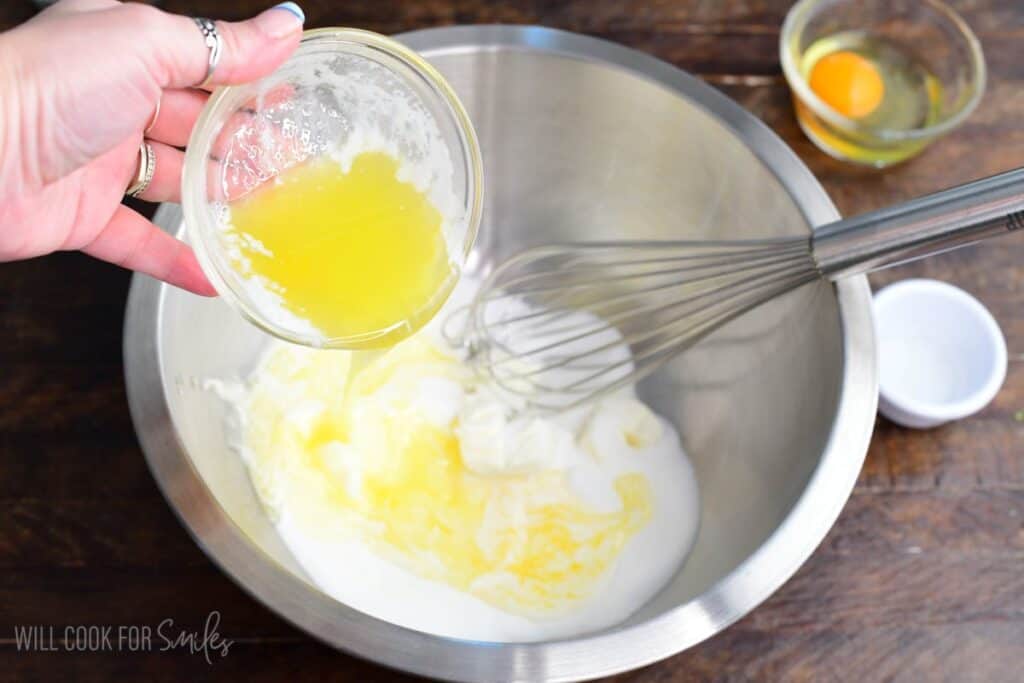
Step 1: Create the base: Add the softened cream cheese and sugar to a large bowl, then pour the warm melted butter over both.
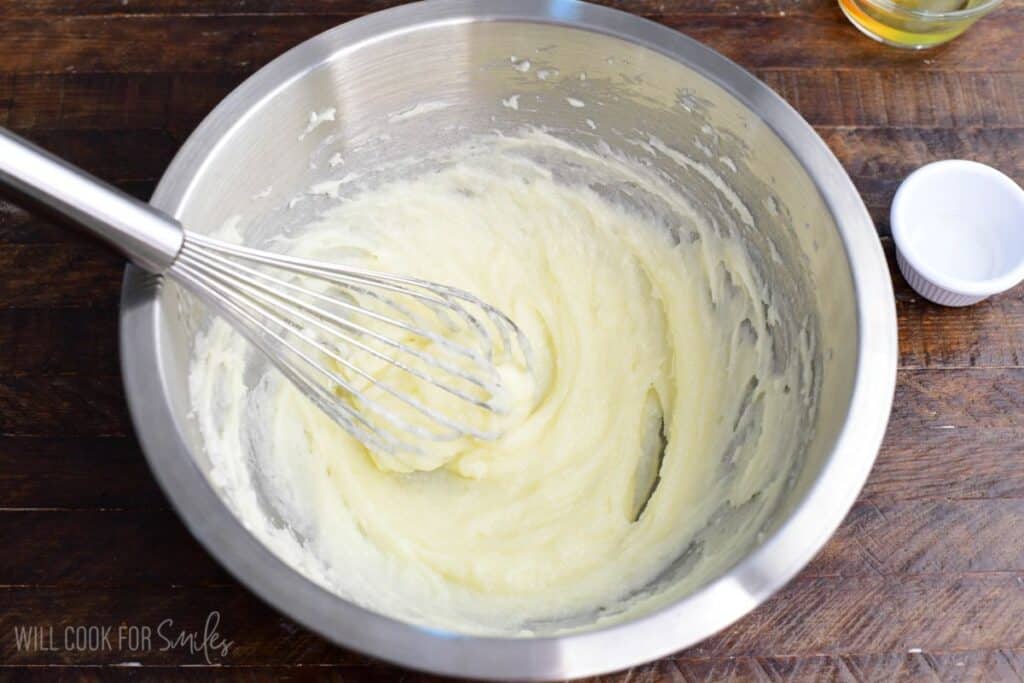
Whisk vigorously until everything is completely combined and smooth. This step is important – you want no lumps of cream cheese remaining.
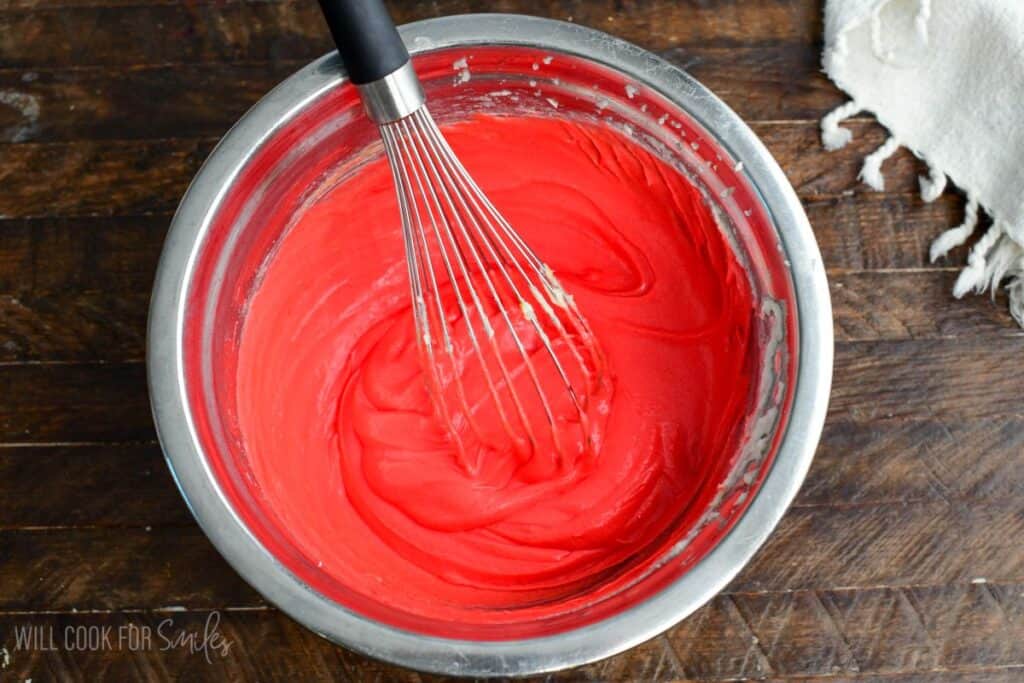
Step 2: Add wet ingredients: Whisk in the egg and white vinegar until the mixture is smooth, then add the red food coloring and whisk until evenly incorporated throughout. It should look smooth and bright with no white streaks.
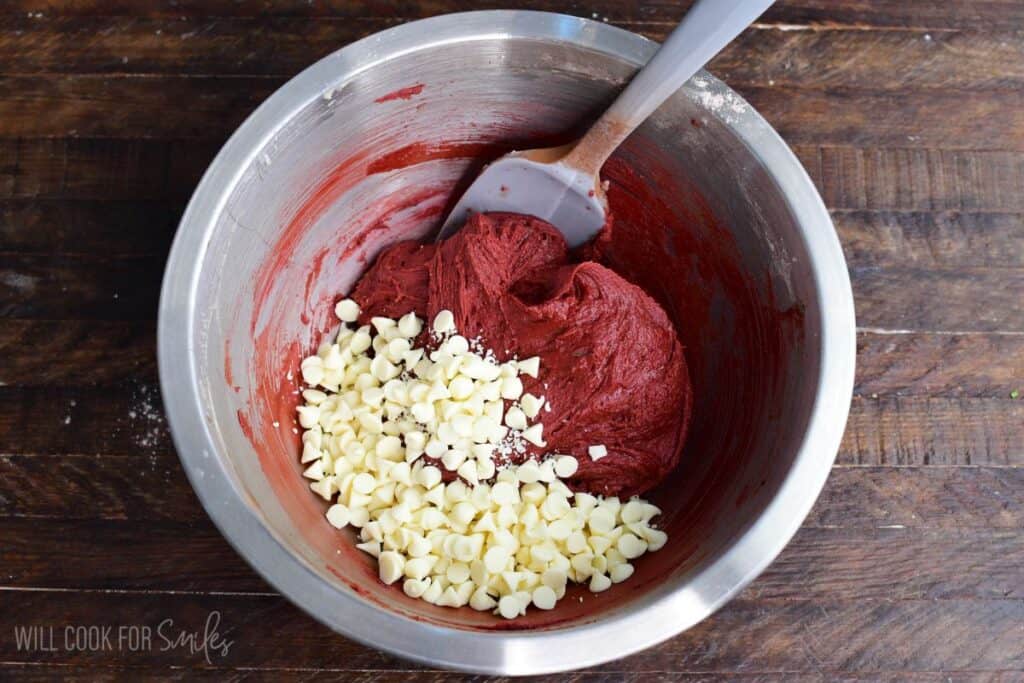
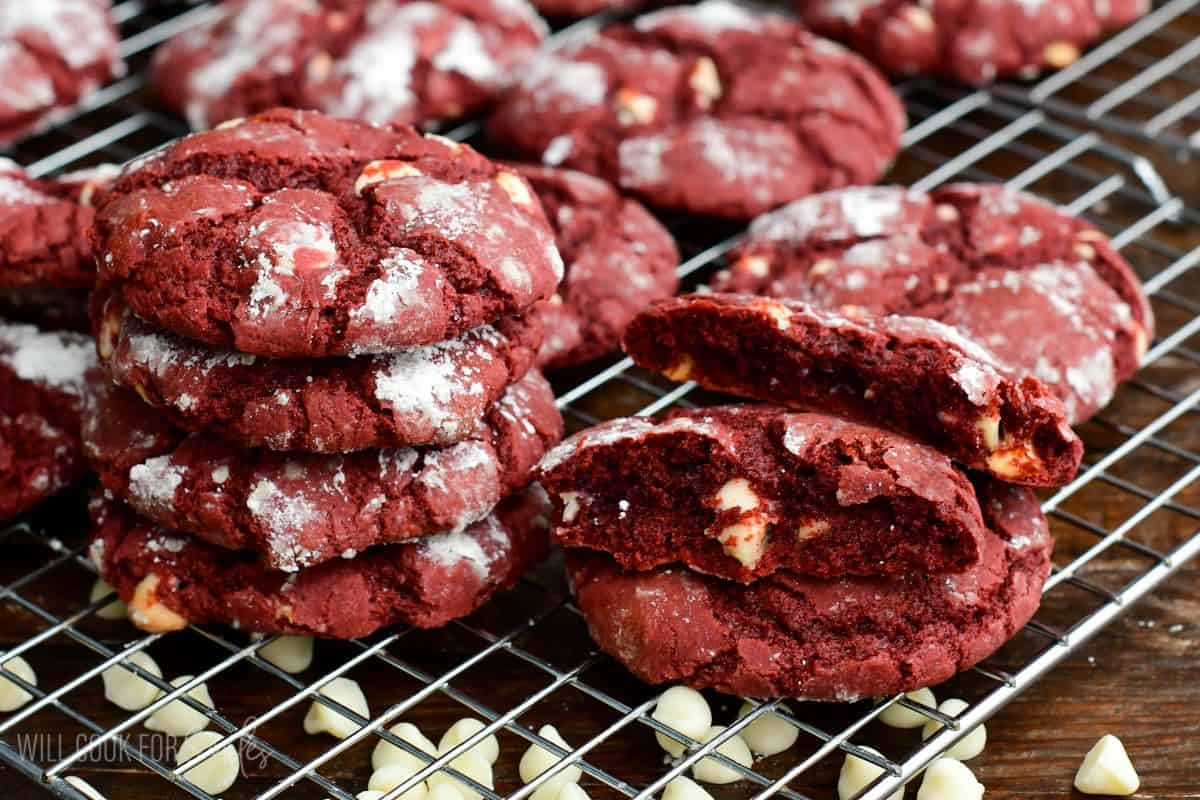
Step 3: Combine dry ingredients: Add the flour, sifted cocoa powder, salt, baking soda, and baking powder. Switch to a rubber spatula and mix just until evenly combined. Don’t overmix! You want to stop as soon as you don’t see any dry flour streaks. Gently fold in the white chocolate chips.
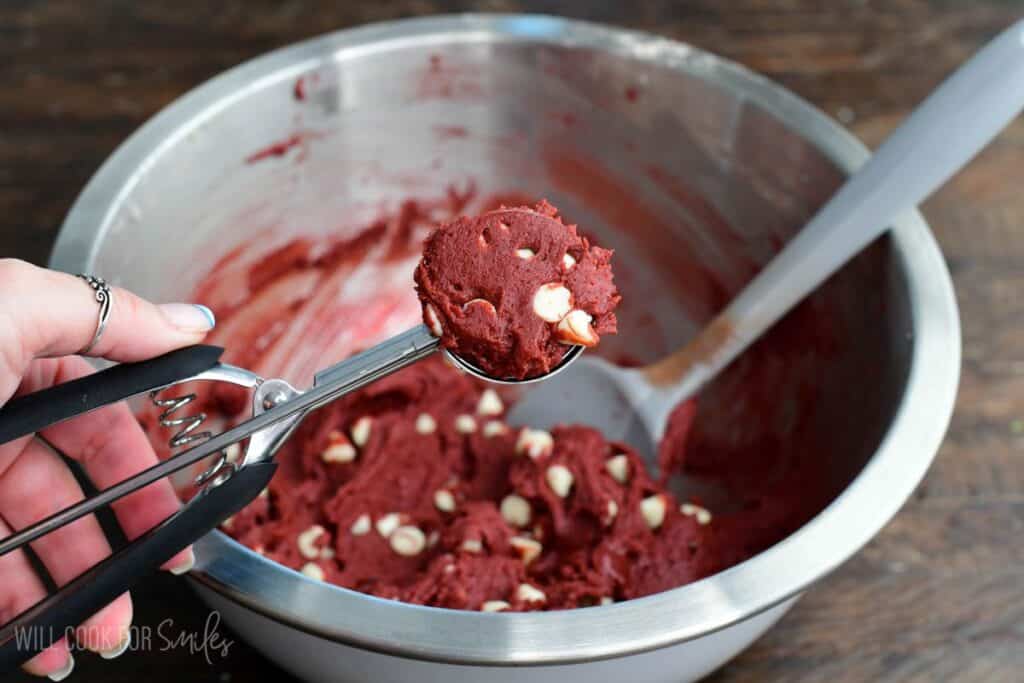
Step 4. Shape the cookies: Using a #40 cookie scoop (1½ tablespoons), form 1-inch balls of dough. Gently roll to shape with your hands. The cookie dough will feel very soft and delicate but not sticky and will roll into a ball very easily.
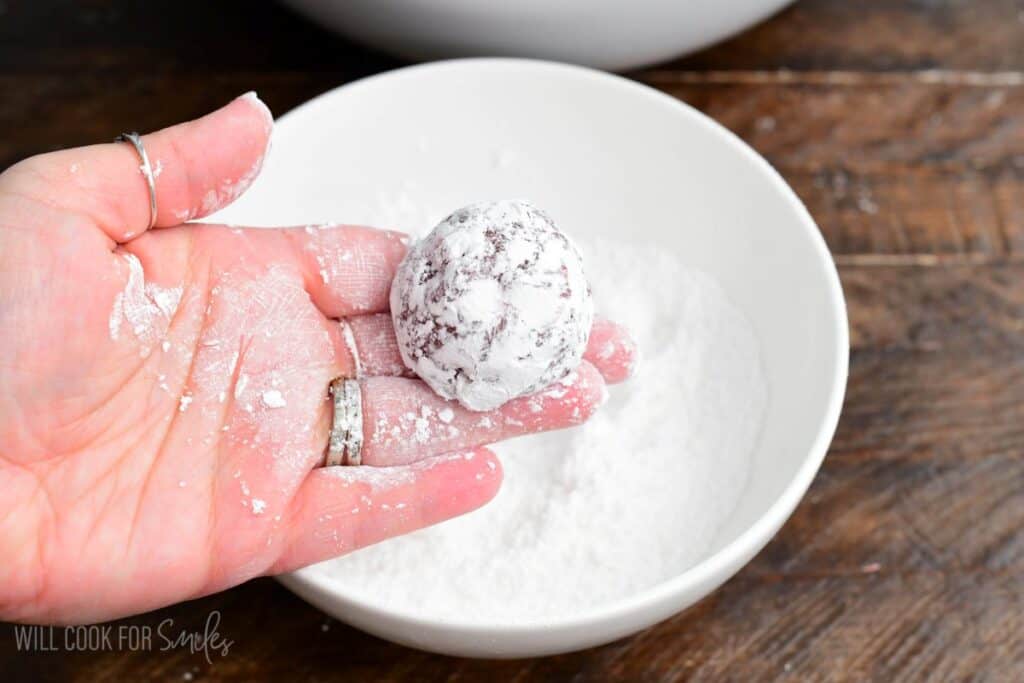
Step 5. Drop each ball into powdered sugar and roll around coating it in powdered sugar.

Step 6. Bake: Place the sugar-coated balls on your prepared baking sheet about 2 inches apart. Bake for 13-14 minutes.
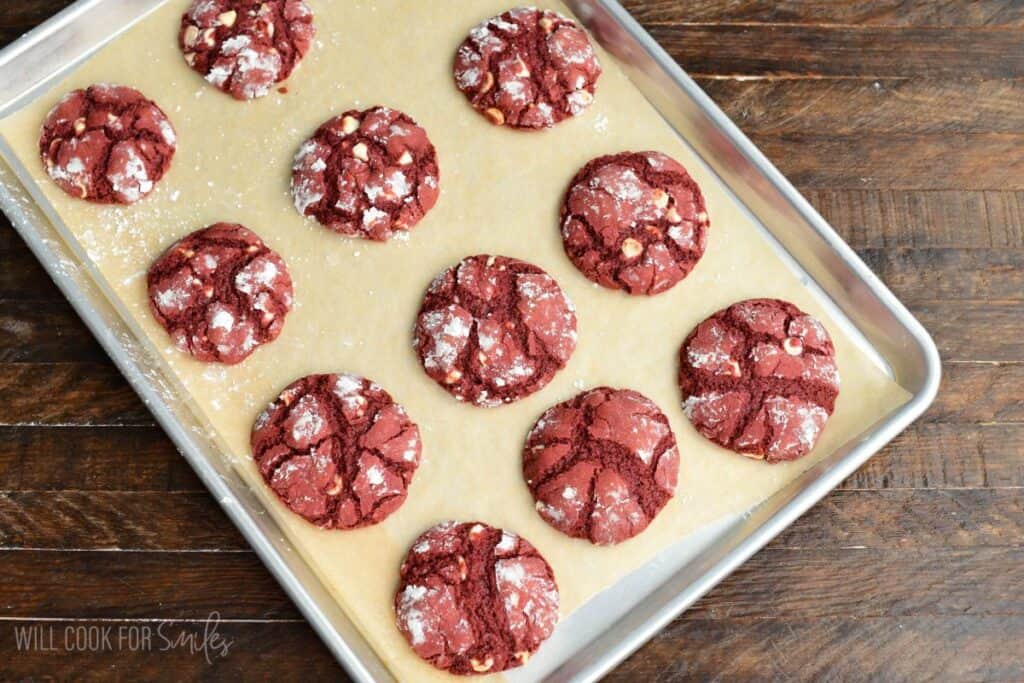
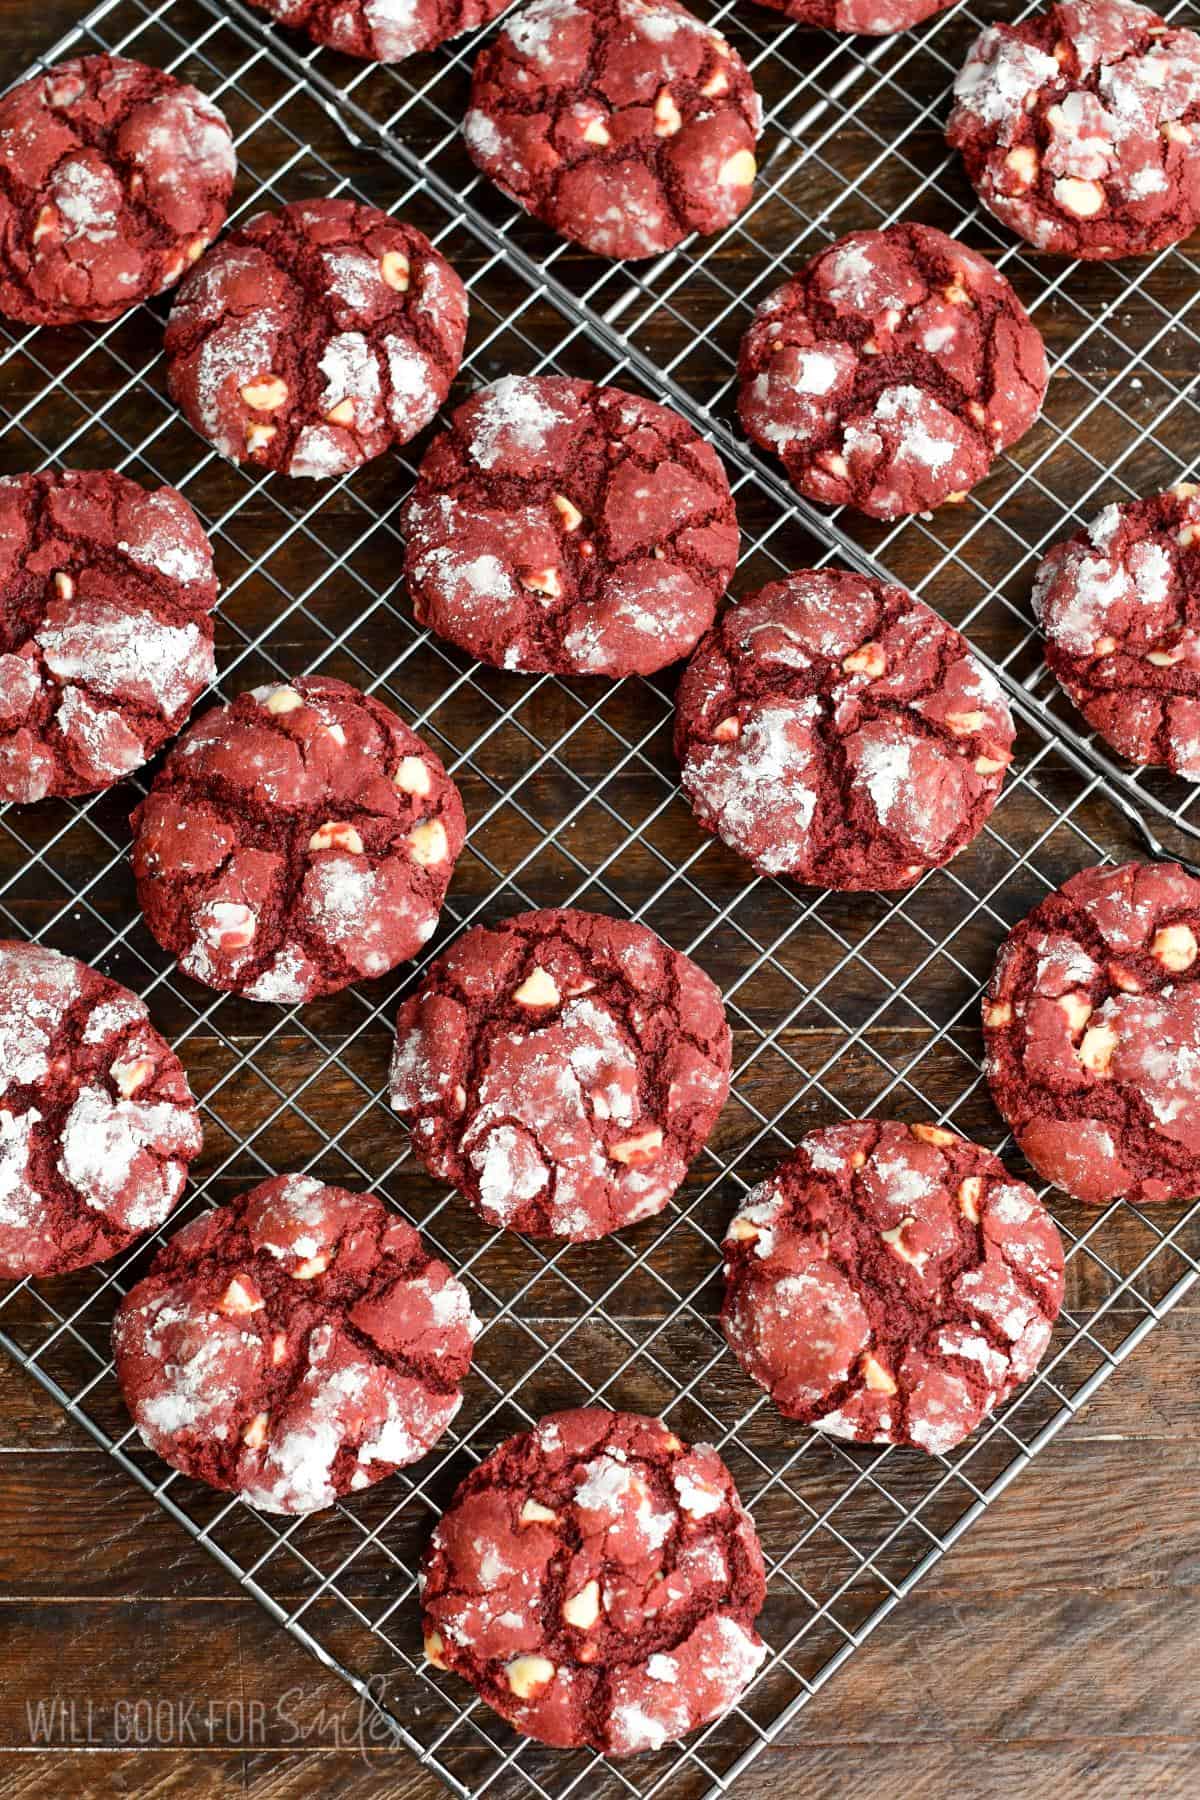
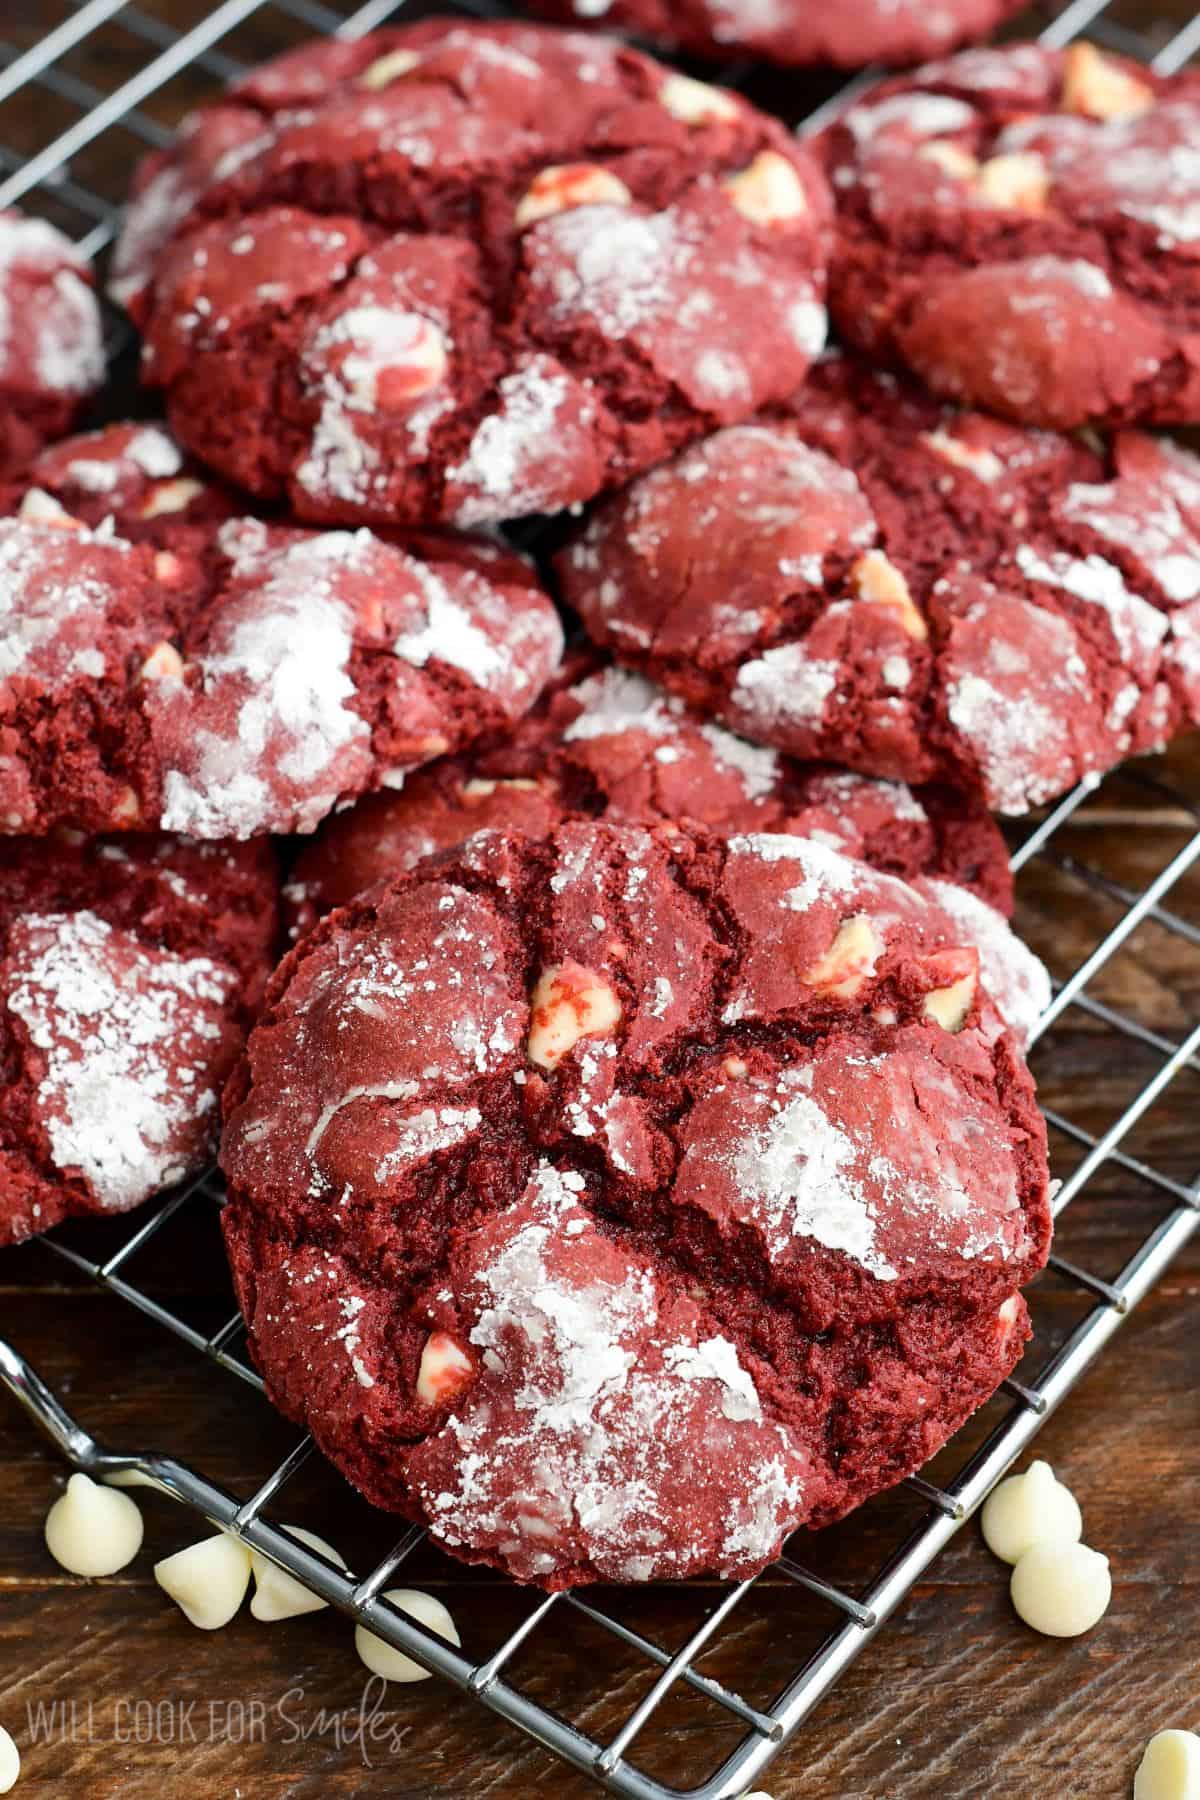
Step 7. Cool: Let the cookies rest on the baking sheet for 5 minutes after removing from the oven. This cooling time is crucial because it lets them set up properly while maintaining that soft, chewy center. Then transfer to a cooling rack for another 5 minutes.
Tips for Perfect Red Velvet Cream Cheese Cookies
- Use room-temp ingredients: Bring your cream cheese and eggs to room temperature before mixing. This helps them blend smoothly and gives you a tender, even texture.
- Don’t overmix the dough: Mix just until the ingredients are combined. Overmixing can make cookies dense or cakey instead of soft and chewy.
- Go with gel food coloring: Gel coloring gives you a richer red without thinning the dough, which helps maintain thickness and color intensity.
- Watch your bake time: Set a timer so you don’t overbake the cookies (been there, it sucks)! Some visual cues: pull cookies from the oven when the edges have set but centers still look slightly soft.
- Uniform sizing matters: Use a cookie scoop to make sure each cookie bakes evenly.
- Make sure your oven temperature is correct: it’s a good practice to have an additional oven thermometer that is not attached to the oven. It will help ensure that your oven runs a correct temperature. With time, oven thermometers that are pre-wired can loose accuracy (drift).
Storing the Cookies
- Store at Room Temperature: Keep the cookies in an airtight container at a cool, dry room temperature for up to 3 days. To help them stay extra soft, place a small piece of sandwich bread in the container and replace it daily. If stacking cookies, add parchment paper between layers to protect the powdered sugar coating.
- Freezing Baked Cream Cheese Cookies: Let the cookies cool completely, then place them on a baking sheet and freeze until firm, for about 2 hours (set a timer!). Transfer them to a freezer-safe bag or airtight container. Layer parchment paper in between and remove as much air as possible. Seal and freeze for up to 3 months.
- To Thaw and Serve: Thaw cookies at room temperature for 30-45 minutes. The powdered sugar may be absorbed but it’s not a big deal.
- To warm, microwave a cookie for a few seconds.
Recipe FAQs
Yes, but you’ll need to use more to achieve the same vibrant red color. Gel food coloring is more concentrated and doesn’t add extra liquid to your dough, which is why it’s preferred. (You can add another tablespoon or two of flour if using up to a tablespoon of liquid food coloring.)
Yes! Cream cheese is a great trick for extra soft, chewy cookies with great mouthfeel, it also it adds tenderness and a slight tang that balances the sweetness.
Absolutely! They’ll still taste like red velvet because of the cocoa powder and acidity. Without coloring, expect a chocolate-brown tone instead of bright red.
Overbaking is usually the culprit. The best soft, chewy cookies come out when the edges are just set and centers still look slightly shimmery and underdone, they’ll finish cooking on the sheet as they cool.
I do not recommended, this dough is meant to bake immediately. Resting/chilling can reduce spread and dampen the crinkle effect. Refrigerating ahead will most likely affect the texture. Freezing would be better.
You don’t need to refrigerate them unless you plan on storing them for longer than 3 days. If you want them to last longer, freeze the cookies in an airtight container for up to three months.
This can happen if the butter was too warm or there was accidentally too much liquid added. Make sure the melted butter is warm but not hot, and the cream cheese is softened but still holds its shape, and measure everything well.
Yes, you can freeze unbaked dough balls and bake from frozen with an extra minute or two. Note, there will be a texture difference as well compared to prepared and baked fresh.
DID YOU MAKE THIS RECIPE? PLEASE leave a 🌟 star rating! Let me know how you liked it by leaving the 📝 comment below or share and tag me on social media @willcookforsmiles. DON’T FORGET to subscribe to my newsletter!
Red Velvet Cream Cheese Cookies Recipe
Ingredients
- 3 oz full fat cream cheese softened
- 1/2 cup unsalted butter melted
- 1 1/4 cup white granulated sugar
- 1 egg room temperature
- 1 Tbsp white vinegar
- 1/2-1 tsp red food coloring gel
- 2 cups all purpose flour
- 1/4 cup cocoa powder sifted
- 1 tsp baking powder
- 1/2 tsp baking soda
- 1/4 tsp coarse kosher salt
- 1 cup white chocolate chips
- 1/2 cup powdered sugar for rolling cookies, sifted
Instructions
- Preheat the oven to 350℉ and line a large cookie sheet with parchment paper.
- Add sugar and softened cream cheese into a large bowl. Pour in warm melted butter over sugar and cream cheese and whisk vigorously until all combined and smooth.
- Add egg and white vinegar and whisk well, until smooth.
- Whisk in the red food coloring until evenly incorporated.
- Add flour, sifted cocoa powder, salt, baking soda and baking powder. Mix with rubber spatula until just evenly combined. Fold in white chocolate chips.
- Gently form 1-inch balls and roll them in powdered sugar. The dough should be soft and delicate but easily shapes into a ball and not sticky. (I highly recommend using a cookie scoop to get even cookies. I use #40 cookie scoop, which is 1½ Tbsp.)
- Place the cookies on the baking sheet about 2 inches apart.
- Bake for 13 to 14 minutes. Take the baking sheet out of the oven and let the cookies rest on the baking sheet for 5 minutes. Take the cookies off the baking sheet and onto a cooling wire reck to rest and cool another 5 minutes or so. Now dig in!
Notes
- Food coloring notes: it’s best to use gel food coloring because it takes much less amount to get a rich color, less diluting of the batter/dough, and it combines with other ingredients better. Some brands take a little more or a little less to achieve the color, so start with 1/2 tsp and then add more if needed.
- Sift cocoa powder and powdered sugar: cocoa powder and powdered sugar tend to clump with storing, so to incorporated it better into the recipe and to have a smooth coating, sift them through a fine mesh strainer before using.
- Storage: store baked cookies in an airtight container, at room temperature for up to 3 days; freeze up to 3 months.
Nutrition
More Easy Cookie Recipes to Try
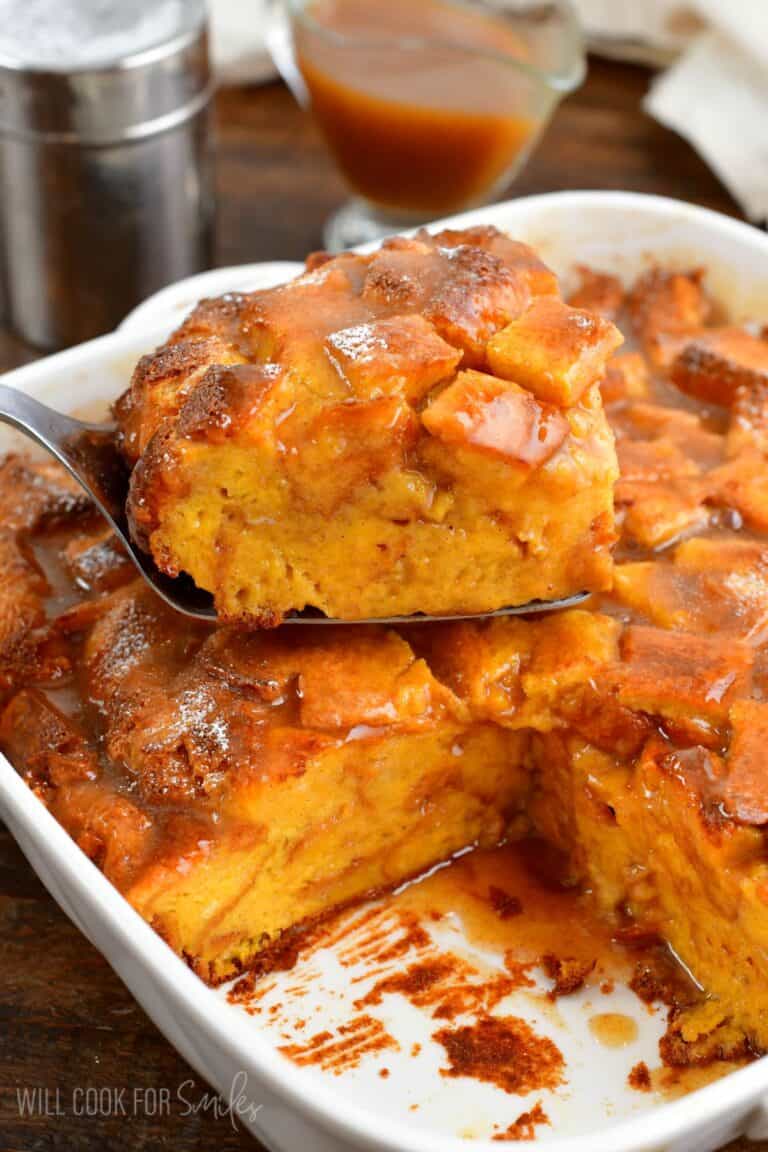
If you love these red velvet cream cheese cookies, you’ll want to check out some of my other favorite cookie recipes! My soft sugar cookies and chocolate cookies are another no-chill cookie recipe that comes together in under 30 minutes. For something rich and chocolatey, try my salted brown butter chocolate cookies and Nutella cookies. For snickerdoodle fans, my brown butter snickerdoodles are a major hit with everyone.
Would you like to save this recipe?
All images and text ©Lyubov Brooke for ©Will Cook For Smiles. Please do not use my images without prior permission. If using my posts in collections and features, please link back to this post for the recipe.
Disclaimer: Nutrition information shown is not guaranteed to be 100% accurate as most ingredients and brands have variations.


My wife is the red velvet fan in our house, but it ended up being me that ate them all. Another winner! Love this site, gives us new joys in the kitchen 🙂
Thank you so much! That made me laugh! I’m so glad you enjoyed them and that they brought some new joy to your kitchen. Thank you for being here and trying the recipes! 🙂
Soft, flavorful, and dangerously addictive. You can taste the care that went into this recipe. Easily one of the best homemade cookies I’ve had!! 🍪👏
Wow! What a sweet complement, thank you so much! I am so glad you liked the recipe!
I made these for Super Bowl Sunday and they were a huge hit! We will be making them again for Valentine’s Day.
Yay! I love that you liked them! 🙂