Dry Brine Steak
Quick Look: Dry Brine Steak
- What it is: A technique of salting steak and letting it rest uncovered in the refrigerator before cooking.
- Why it works: Salt draws out surface moisture, which is then reabsorbed back into the meat, carrying seasoning deep into the muscle fibers and drying the surface for a better crust.
- 🕐Time: 12 hours minimum, up to 3 days.
- 🥩Best cuts: Ribeye, NY strip, filet mignon, T-bone, sirloin. Works on virtually any steak.
- 🧂 What you need: Coarse kosher salt, a wire rack, a rimmed baking sheet
- 👀 What you’ll see: A tacky, slightly darker coating on the steak after a few hours. That’s exactly what you want.
- 🍳 Cooking method: Pan seared with butter baste, finished with a shallot and garlic topping.
SUMMARIZE & SAVE THIS CONTENT ON
Table of Contents
What is Dry Brining?
- Dry brining is the process of salting meat directly and letting it rest before cooking. No liquid, no container, no mess. (Great for many meats, I use it to make our roasted turkey breast and whole smoked turkey for the holidays too.)
- Here’s what’s happening inside: the salt initially draws moisture out of the meat to the surface. That moisture dissolves the salt into a concentrated brine, which is then slowly reabsorbed back into the steak. This pulls seasoning deep into the muscle fibers rather than leaving it only on the crust. It also tightens and dries the surface of the steak, which is exactly what you need for a hard, golden-brown sear.
- The result is a steak that is seasoned all the way through, noticeably more tender, juicier, and with a dramatically better crust than a steak seasoned right before cooking.
Key Ingredients and Notes
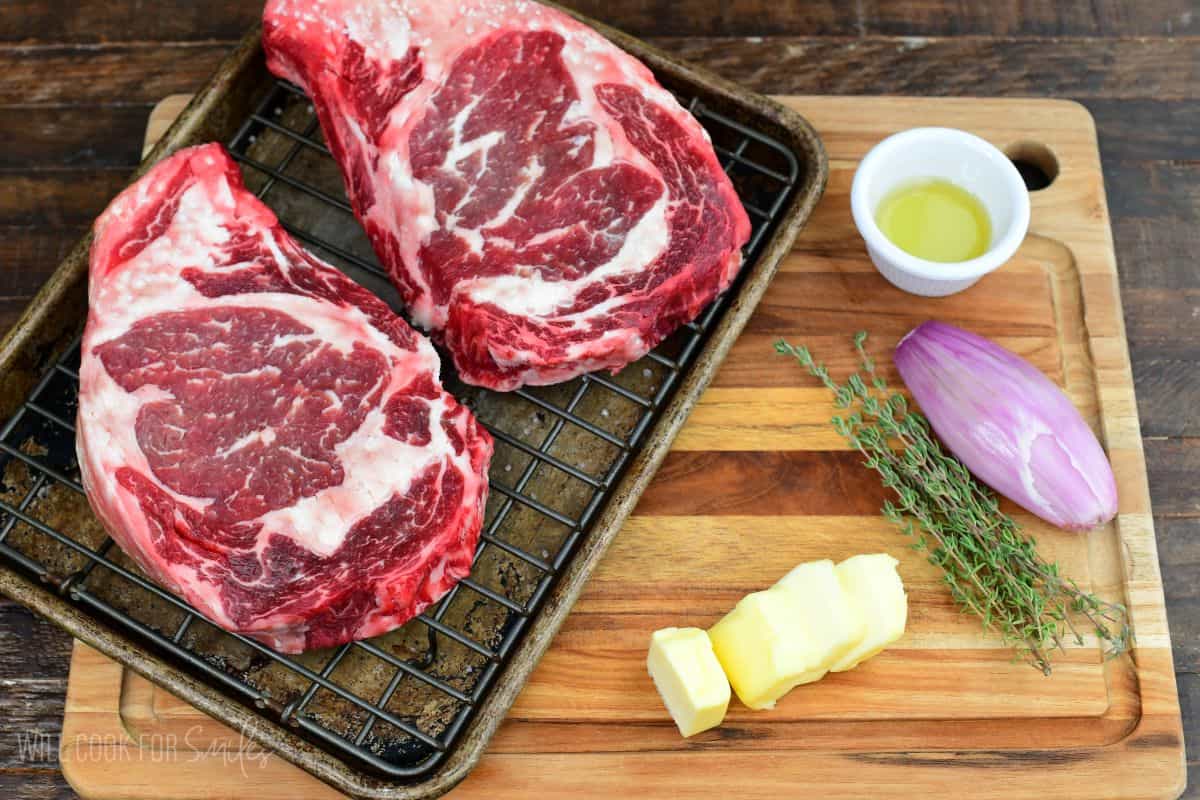
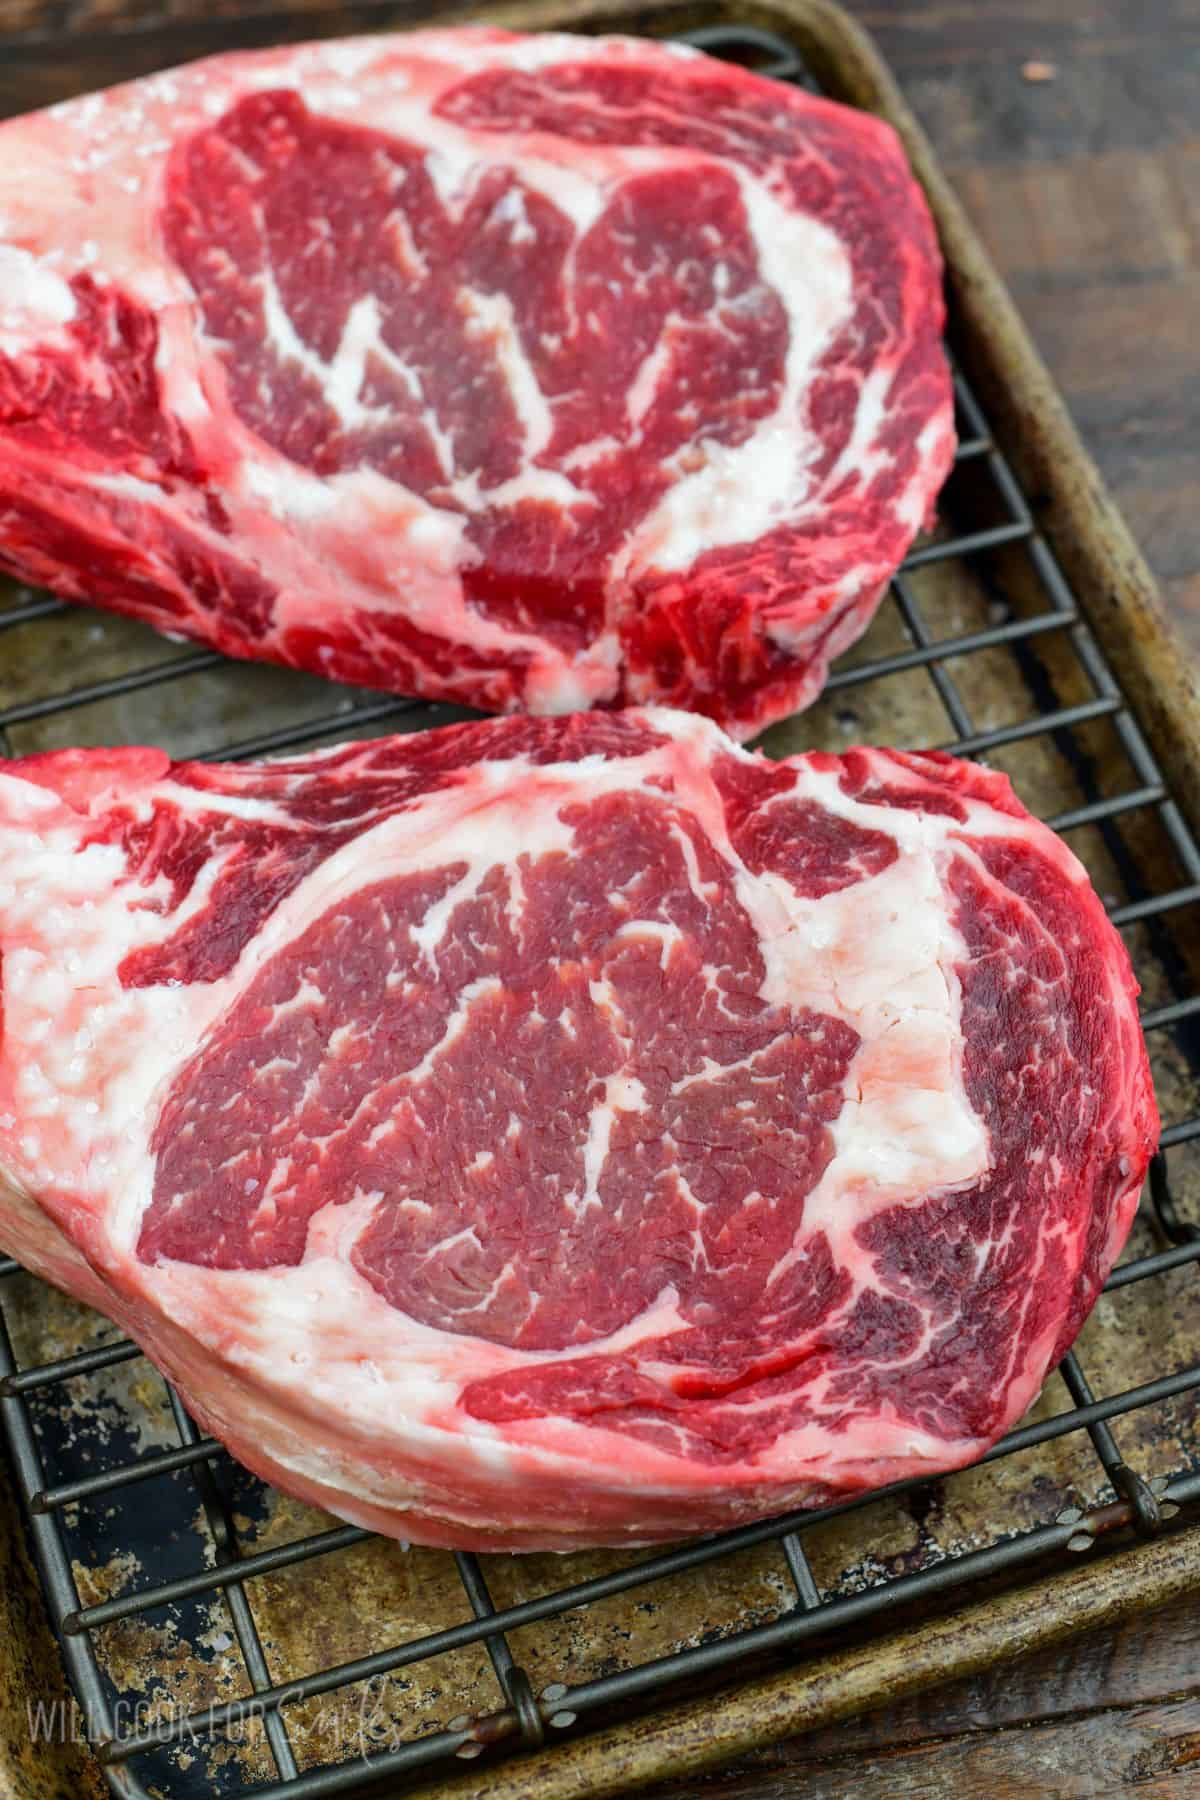
- Steaks: I used ribeye for this recipe, but dry brining works on virtually any steak cut. NY strip, filet mignon, T-bone, sirloin, top sirloin, and flank all respond beautifully to this technique. The only thing to adjust is timing: thinner cuts need less time (12-24 hours is plenty), while thicker cuts benefit from the full 48-72 hours.
- Coarse kosher salt: Coarse crystal size matters here. Use coarse sea salt or kosher salt for best taste and results. Fine table salt is too dense and will over-salt the steak. Do not substitute regular table salt or fine sea salt.
- Unsalted Butter: Unsalted is important here since the steak is already salted from the brine.
- Herbs: use fresh sprigs of rosemary or thyme, whichever you prefer.
- Shallots: Shallots are milder and sweeter than onion but nicely aromatic. They caramelize faster in the pan drippings. Substitute sweet onion of needed.
- Garlic: it’s best to minced fresh garlic so it doesn’t cook as fast but pressed works too.
How To Dry Brine Steaks: Step by Step Visual Guide
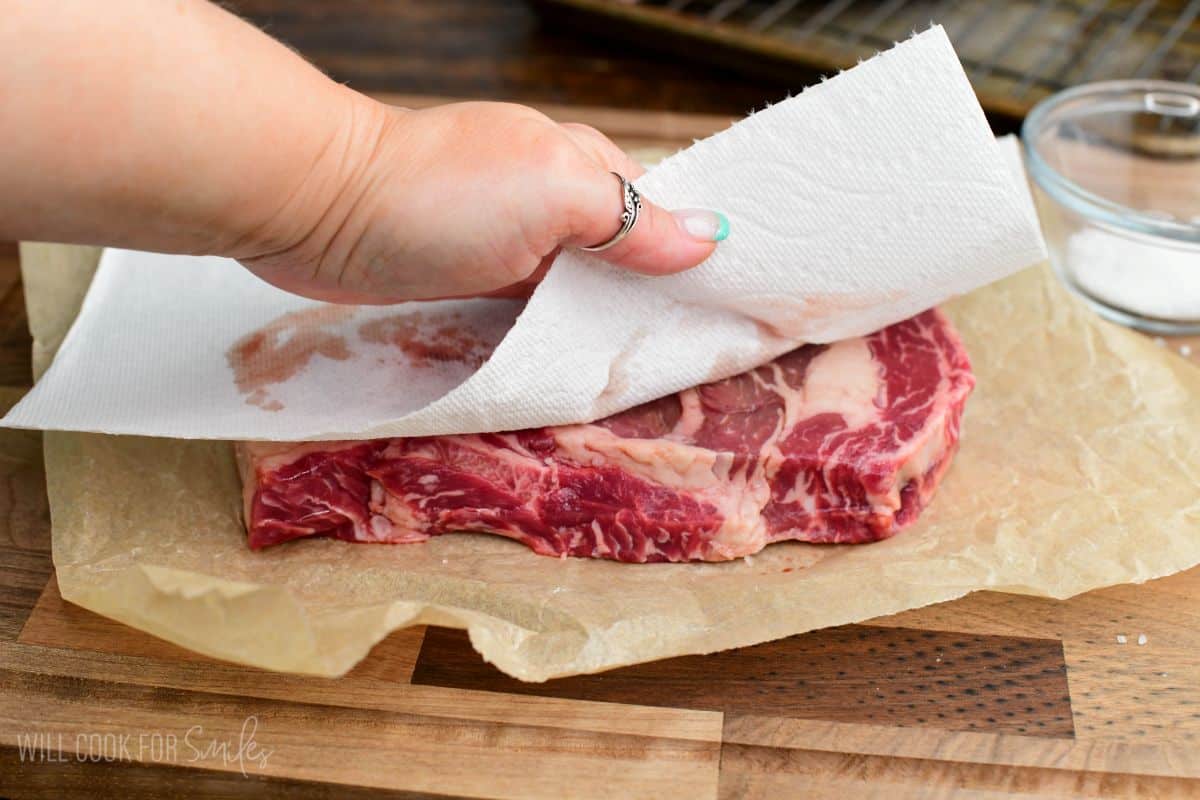
Pat the steaks completely dry with a paper towel before salting. Wet meat means the salt won’t stick properly.
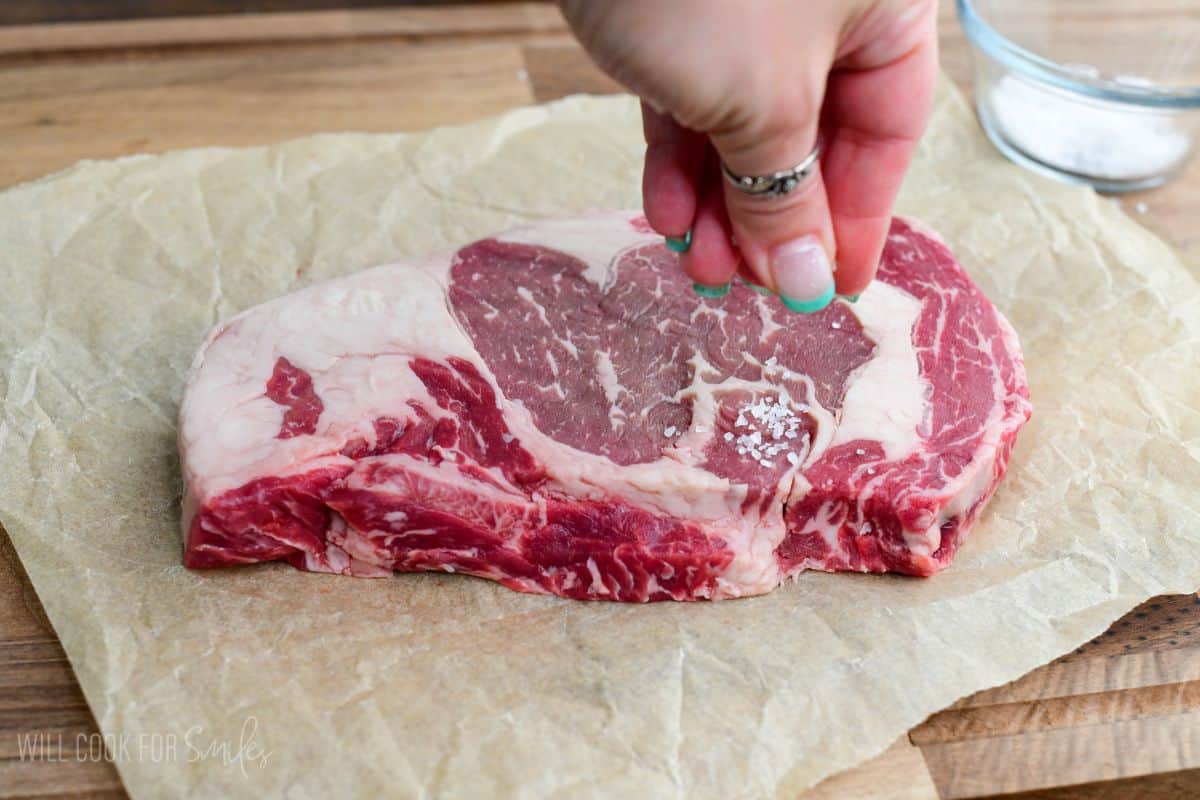
When you season, you want every inch of surface covered but not caked. Hold the salt a few inches above the steak and sprinkle evenly so it distributes well. Spread if needed.
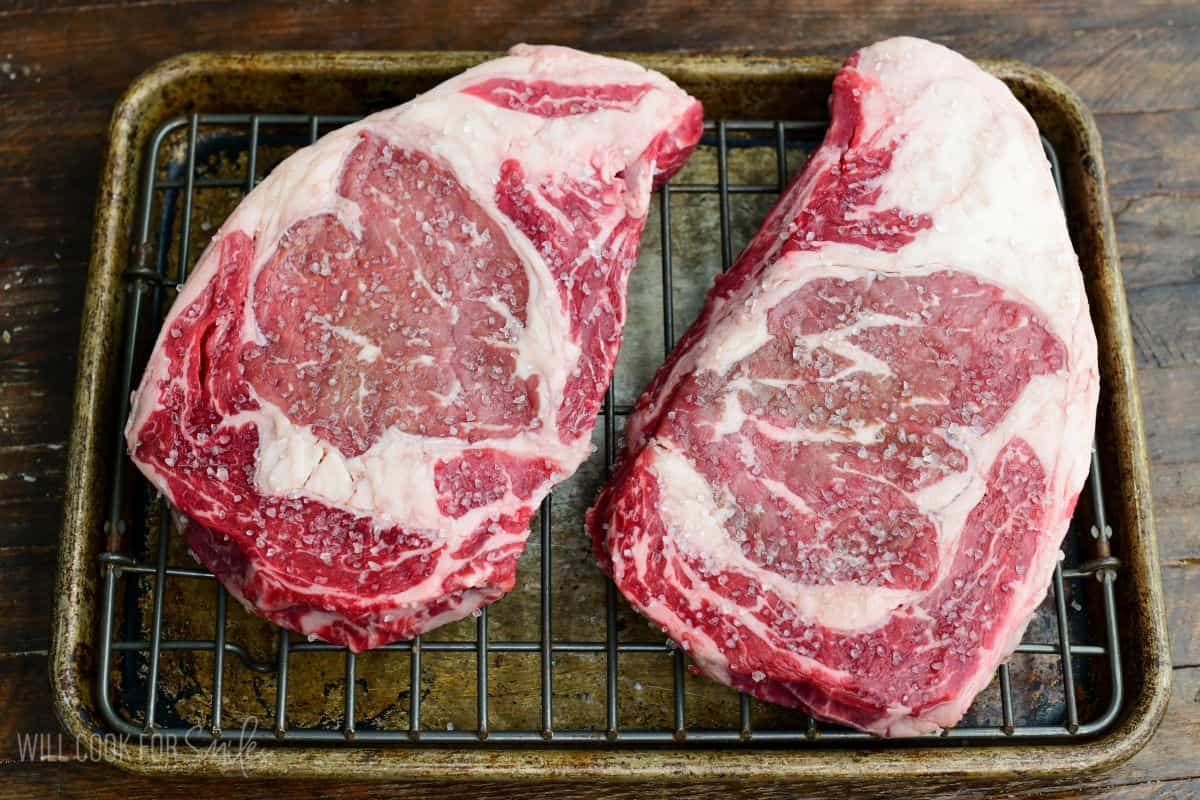
Place your steaks on a wire rack fitted in a baking sheet. The wire rack is non-negotiable. It keeps the bottom of the steak off the pan so air can circulate underneath and both sides dry evenly.
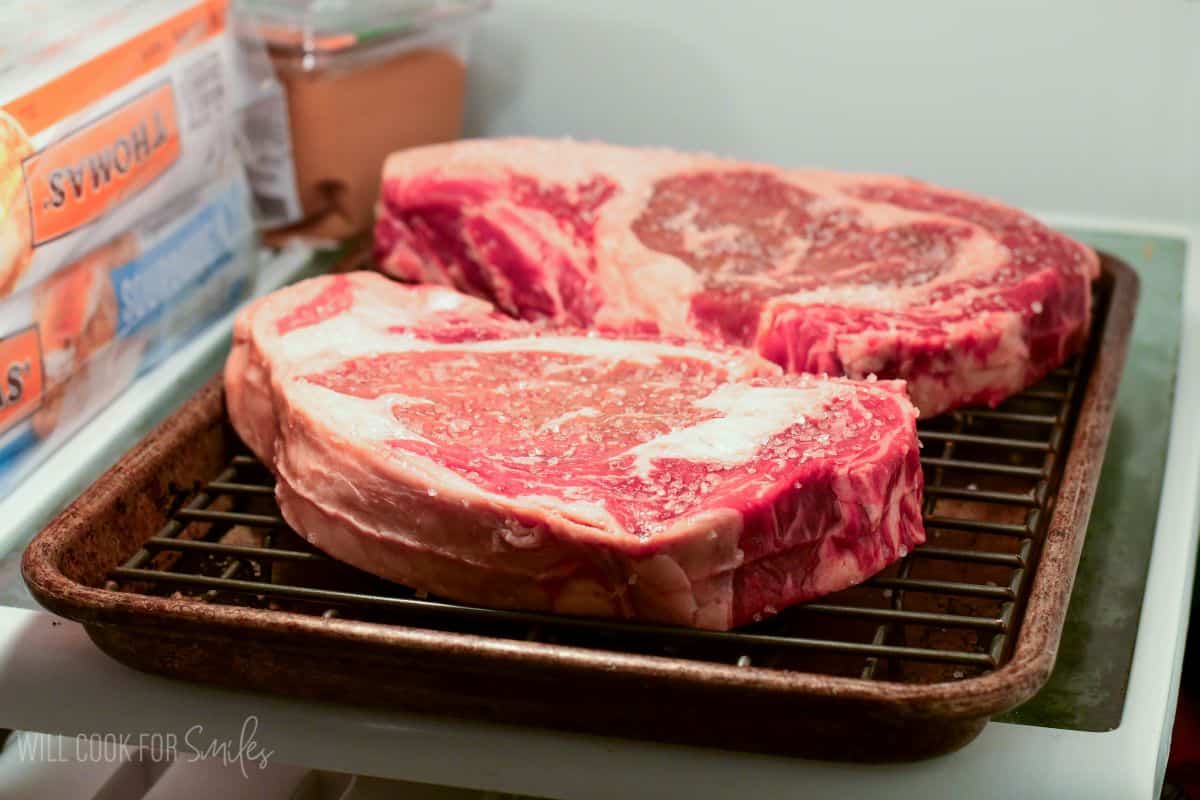
Slide the tray into the refrigerator uncovered and leave it alone.
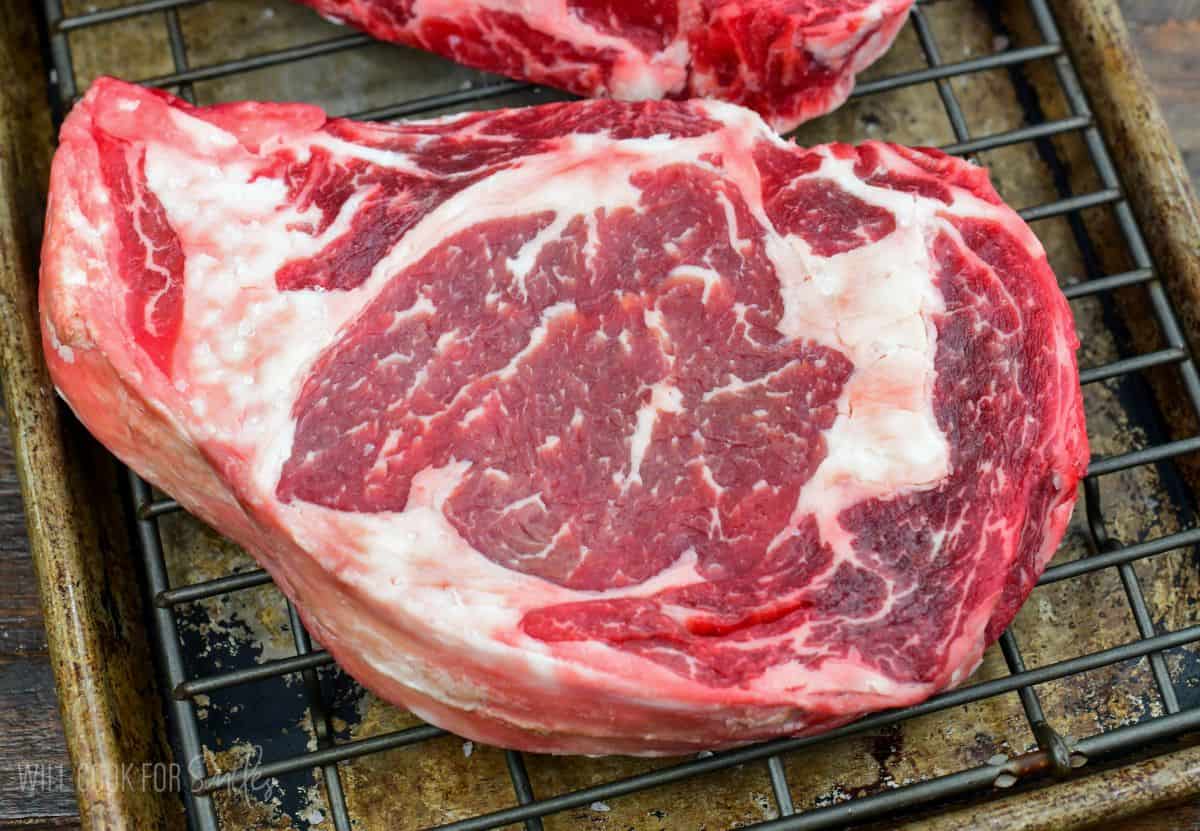
After a few hours you’ll notice the surface looks tacky and slightly glossy. That’s the salt pulling moisture out. By the time you’re ready to cook, the surface should look dry and noticeably darker.
Don’t do anything to the steaks before cooking! They are ready to go in the pan.
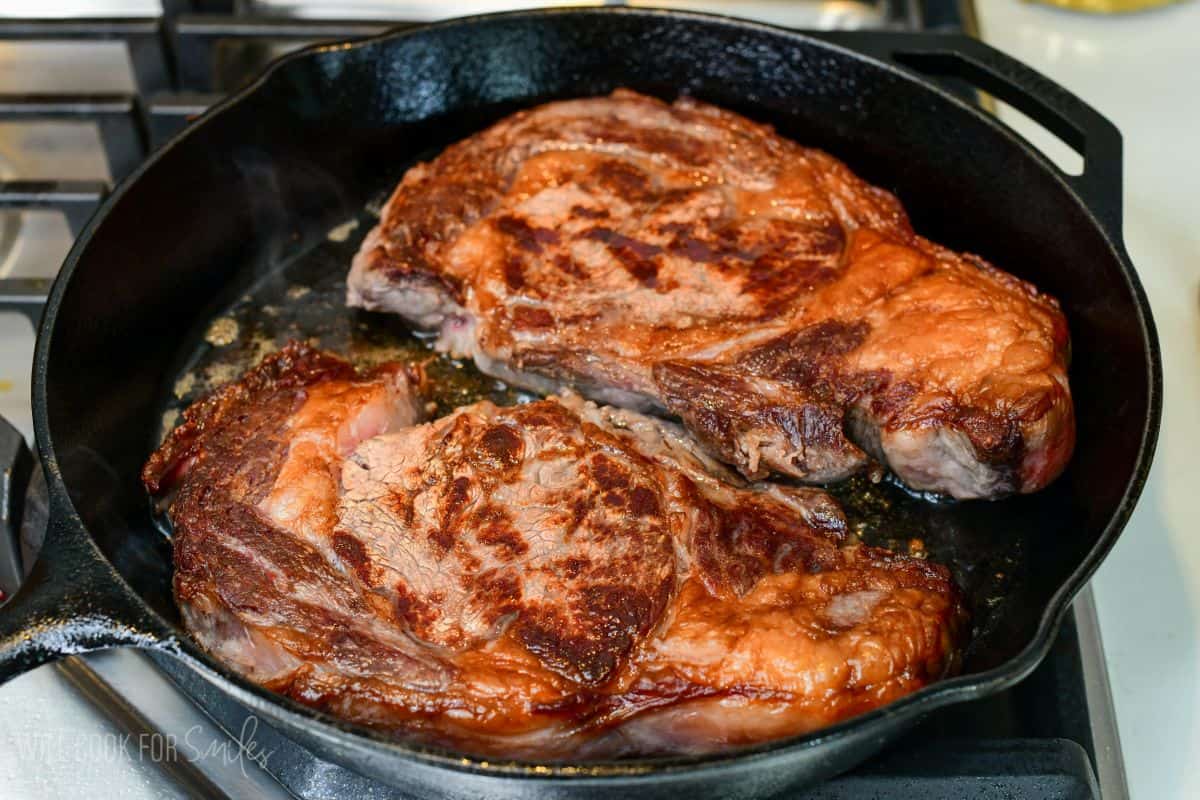
Make sure your pan is properly preheated before the steaks go in. You want to hear a strong sizzle the moment they hit the oil. A pan that isn’t hot enough steams instead of sears.
Flip frequently rather than leaving the steaks undisturbed. This promotes even cooking all the way through.
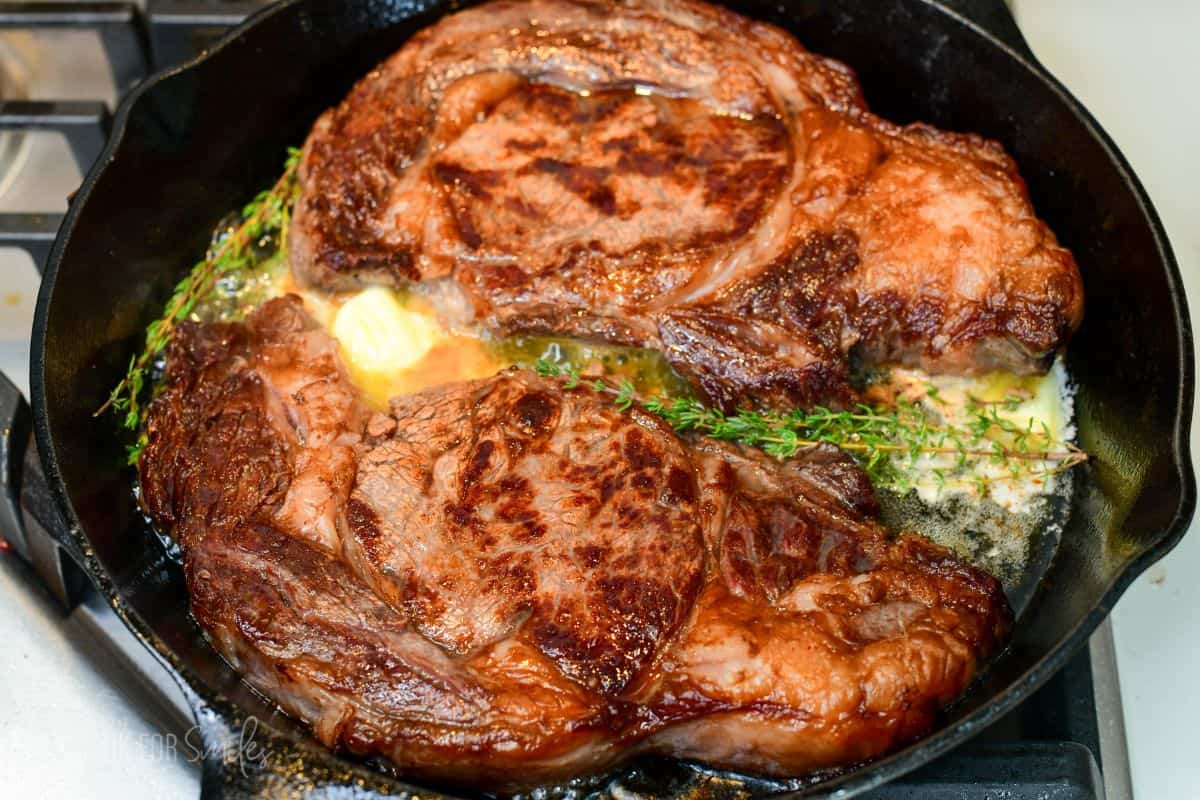
When the steaks are about 10°F away from your desired doneness temperature, add the butter and thyme to the pan. Let it melt and gently shake the pan to distribute and mix with juices.
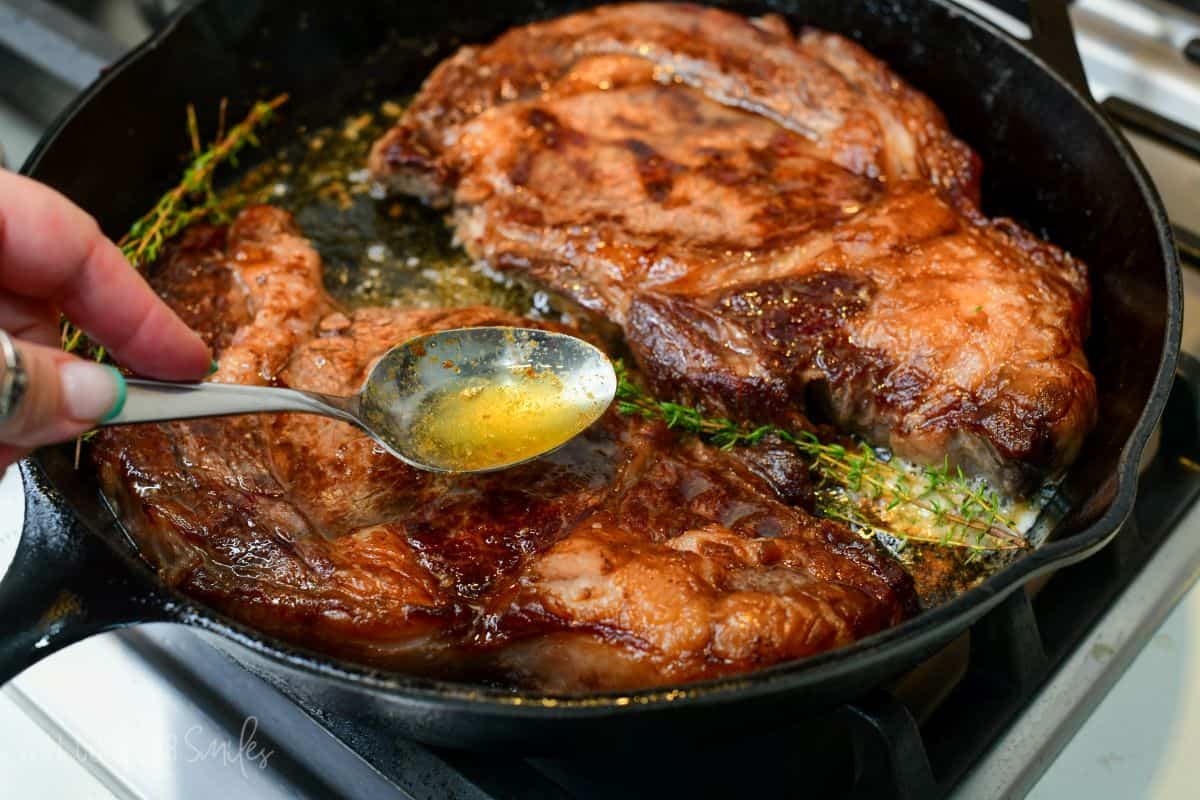
Tilt the pan and spoon the butter pulled at the edge with a large spoon and over the steaks. Baste all your steaks in butter as they finish cooking.
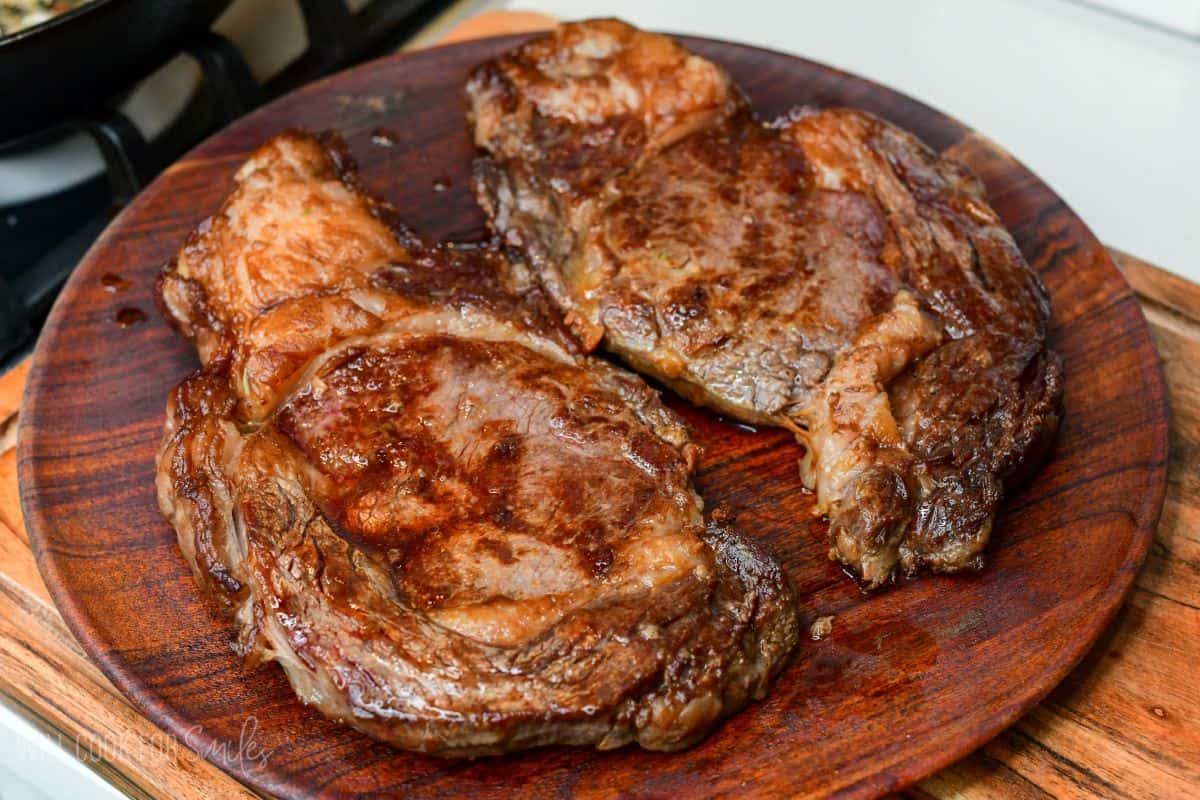
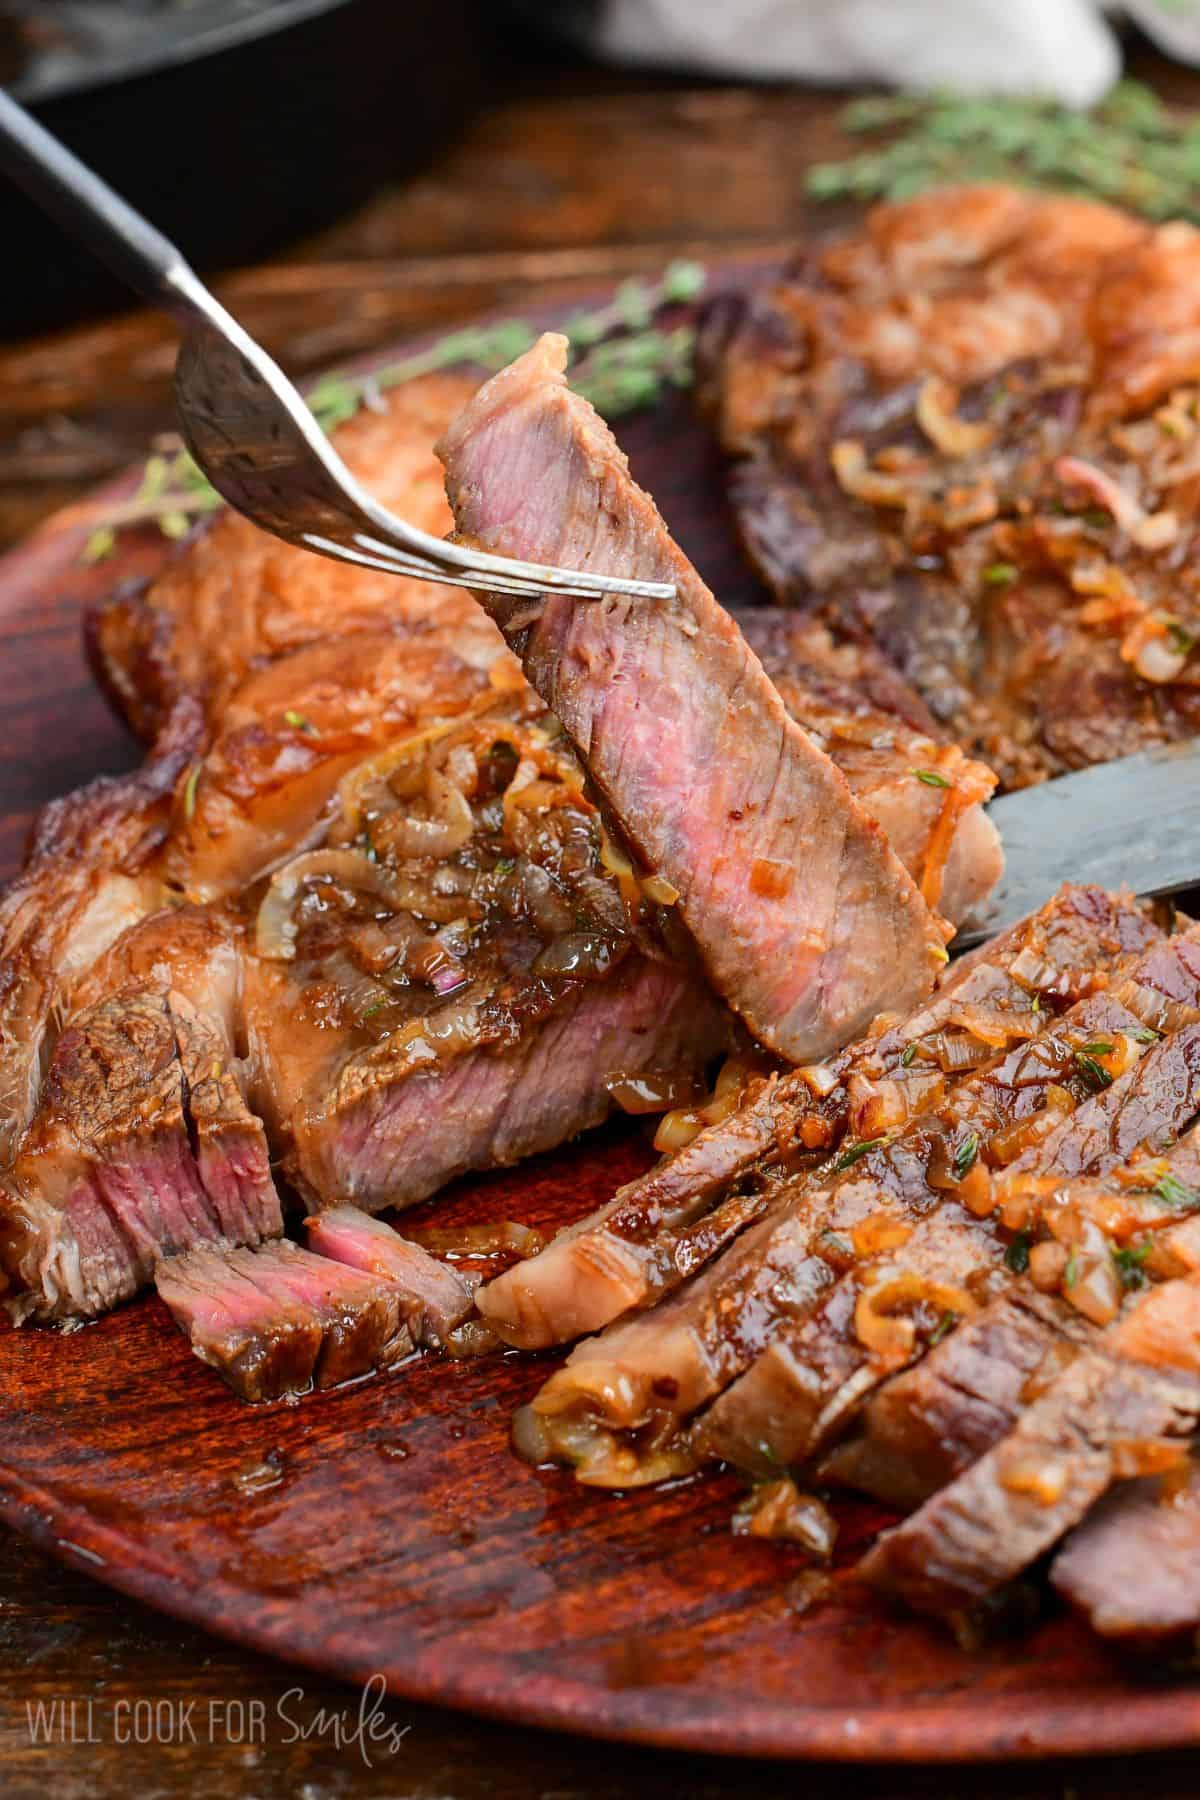
Pull the steaks out of the pan and onto a platter or a grooved cutting board to rest. Pull them at the lower end of the doneness temperature range. Carryover cooking will raise the temperature of the steaks by about 5°F as they rest.
Do not skip the rest. The juices need time to redistribute or they’ll run straight out when you cut in. Leave the thermometer probe in until resting is done.
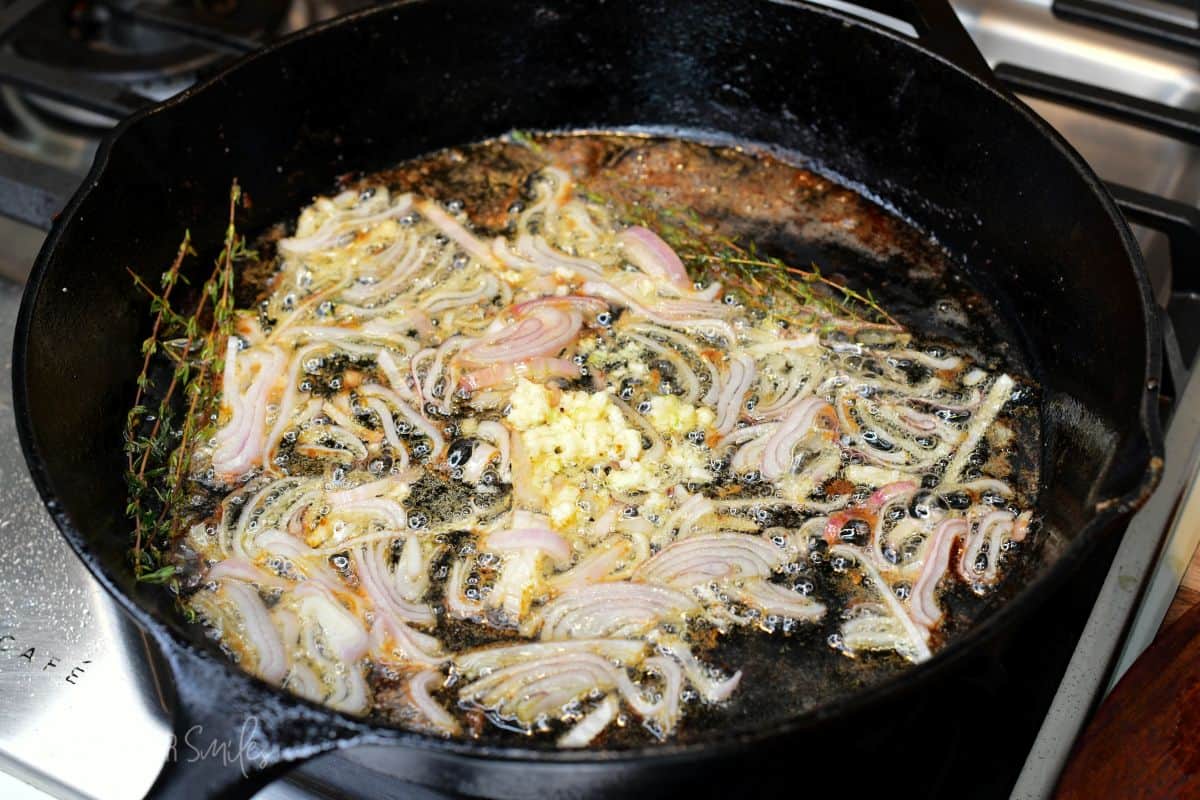
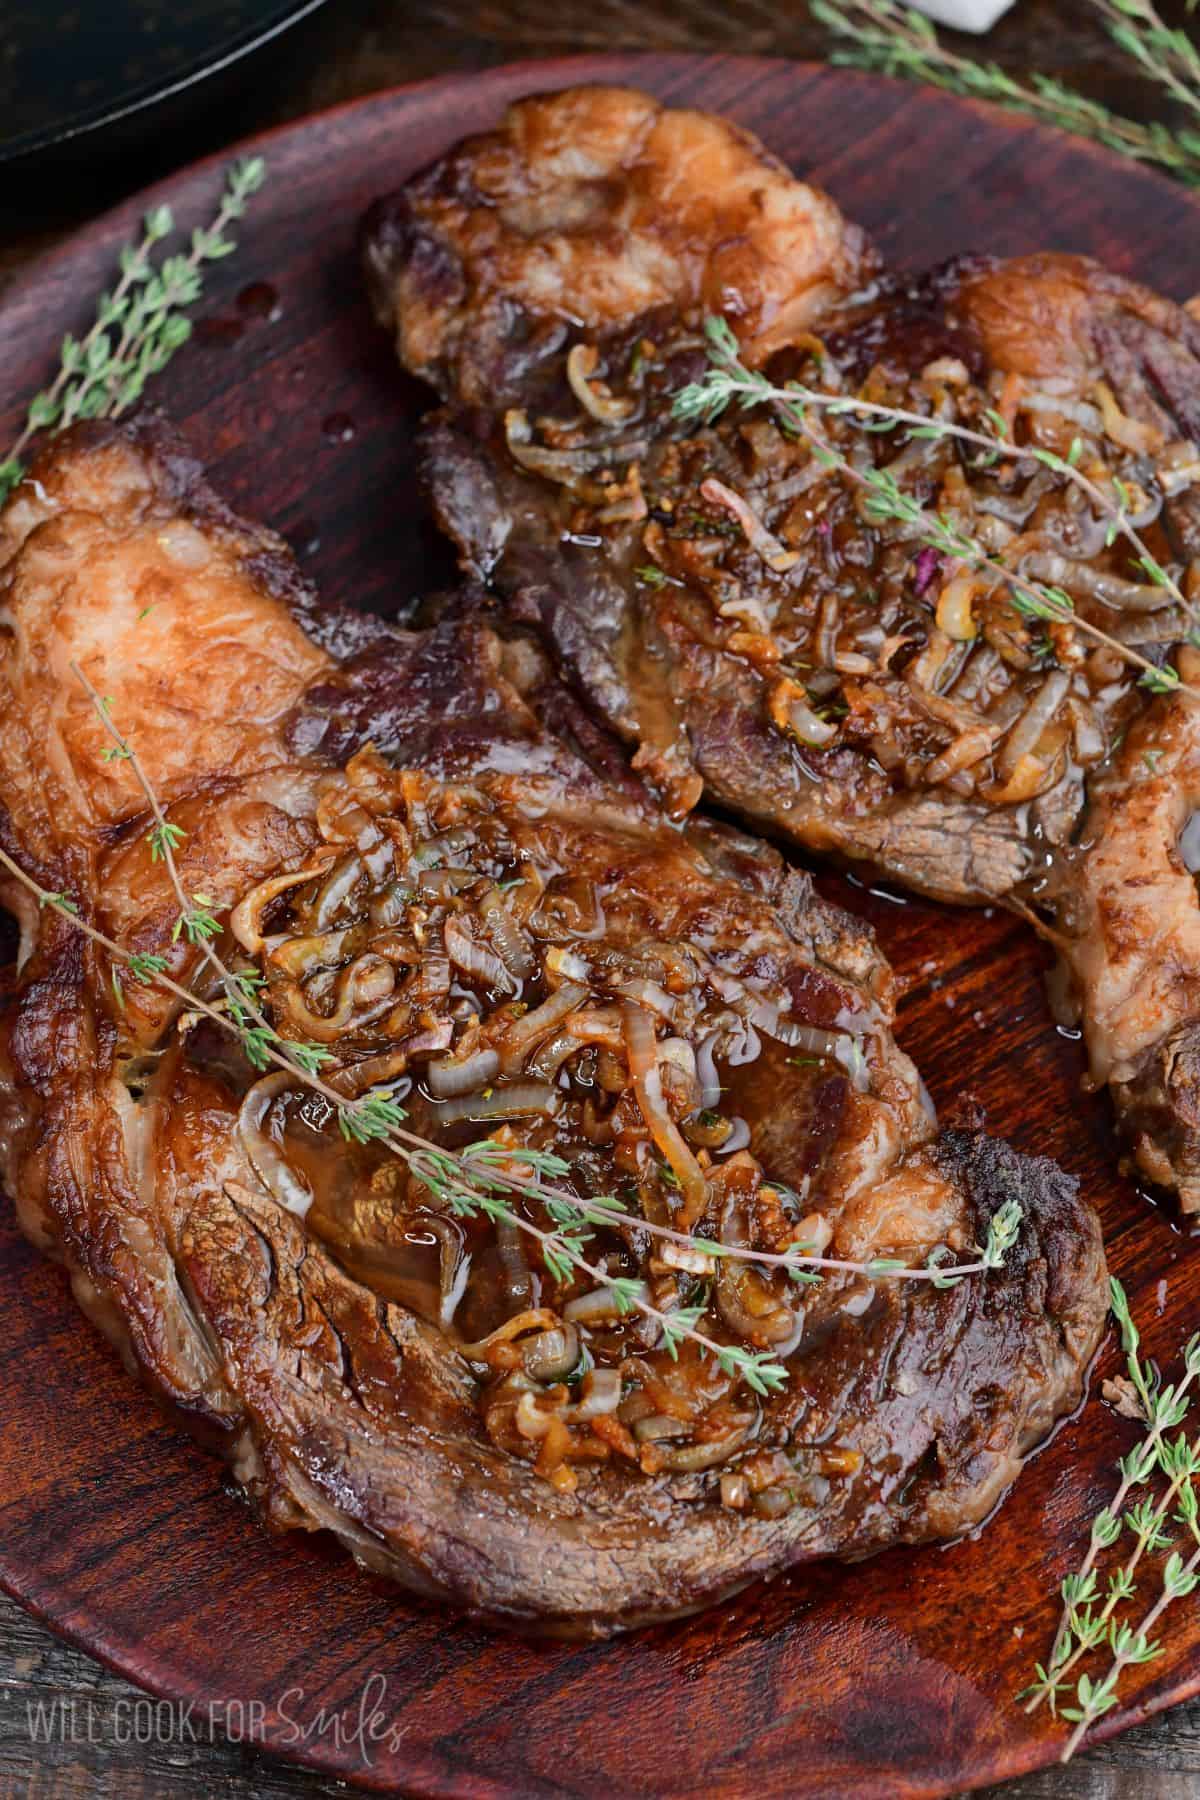
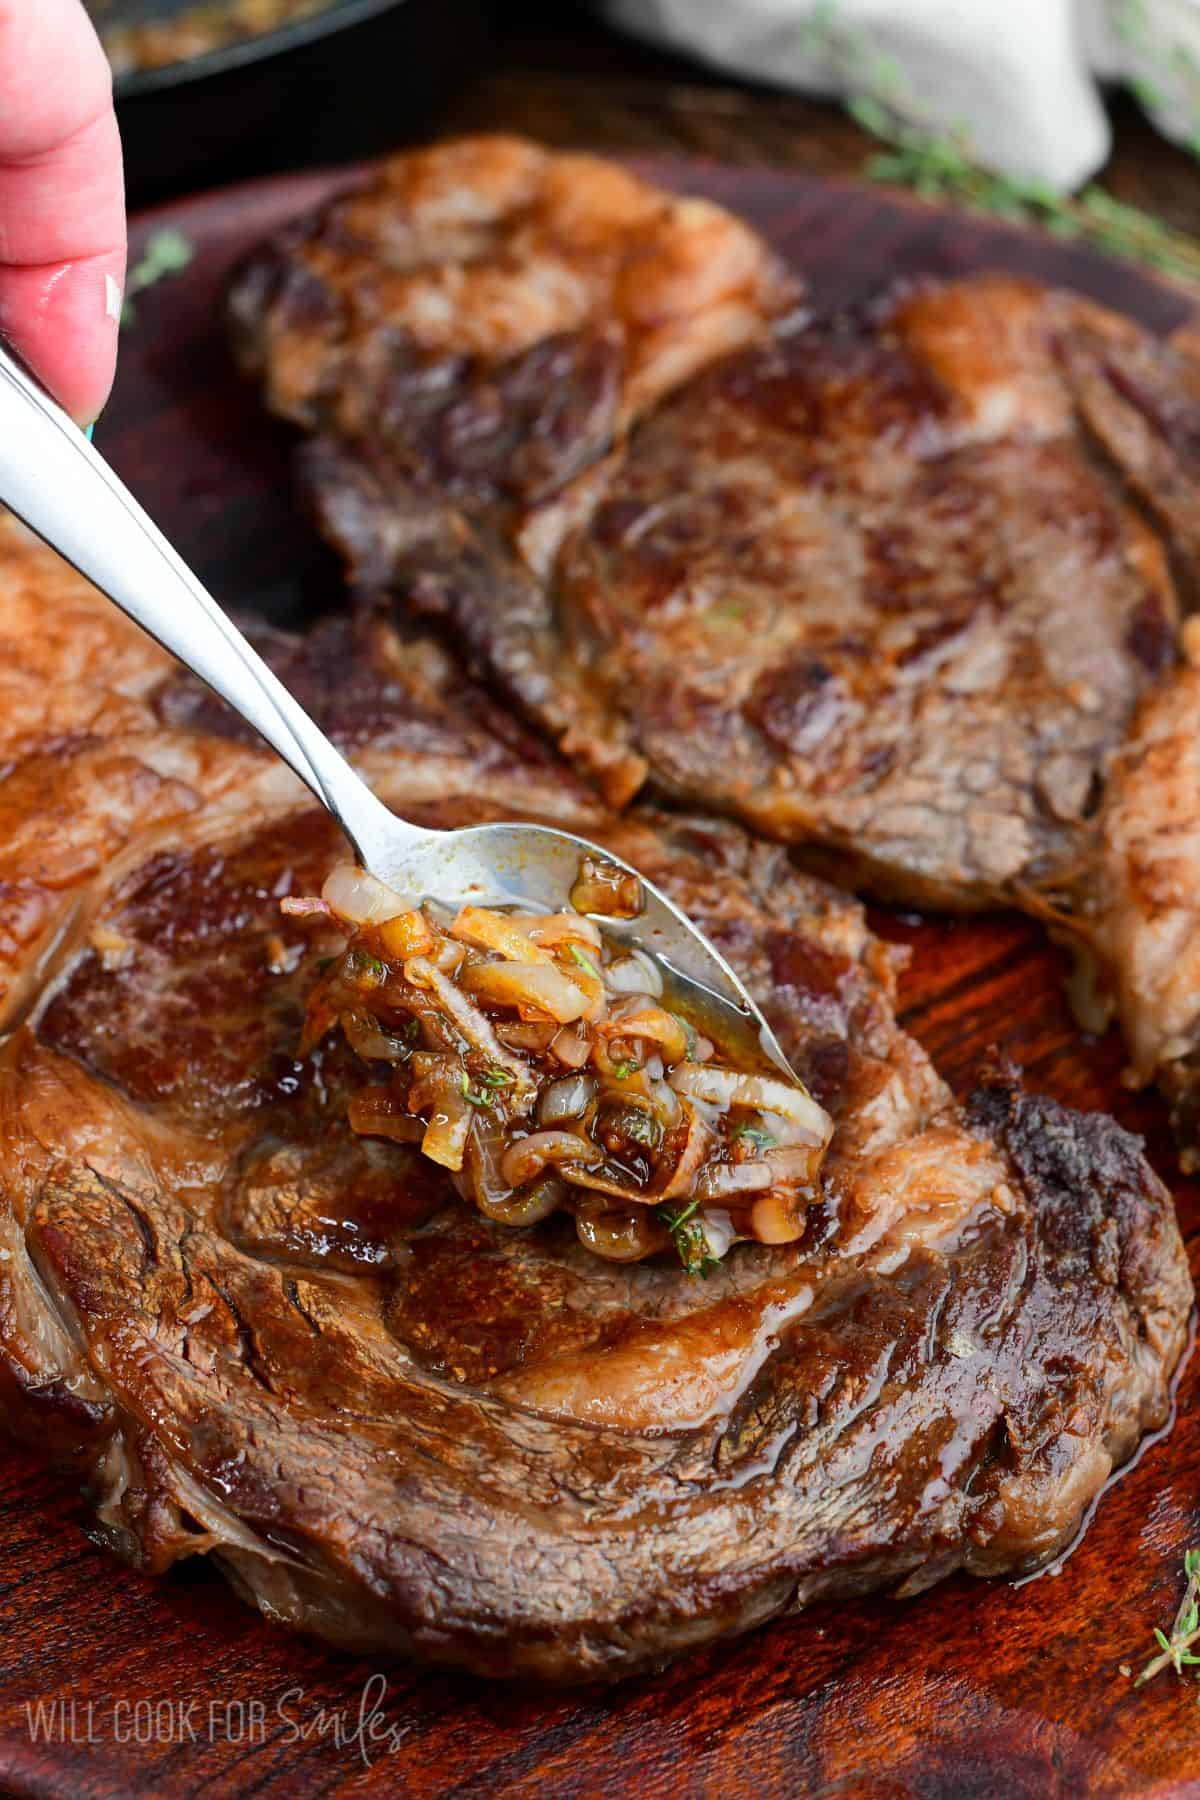
While the steaks rest, make the shallot and garlic topping right in the same pan. The drippings left behind are loaded with flavor. You’ll know the shallots are ready when they’re completely soft and deep golden brown. Spoon the topping over the steaks just before serving.
Measuring When Steak Is Done: Steak Temperature Guide
- Please remember that you cannot cook steak by time alone. Every steak is different in thickness, fat content, and starting temperature, so a meat thermometer is the only way to hit your exact doneness every time.
- Insert the probe through the side of the steak horizontally toward the thickest part of the center.
- Avoid inserting from the top, which gives you a less accurate reading.
- Rare: 120-125°F
- Medium-rare: 130-135°F
- Medium: 135-140°F
- Medium-well: 145-150°F
- Well done: 160°F+
Storing and Reheating Steaks
- Storing: Let the steaks cool completely before refrigerating. Store whole if possible since sliced steak dries out faster. Wrap tightly in plastic wrap or place in an airtight container and refrigerate for up to 3 days.
- To freeze, wrap tightly in plastic wrap, then in foil, and freeze for up to 3 months. Thaw overnight in the refrigerator before reheating.
- Reheating: The best method is low and slow in the oven or in the cooking pan.
- Oven: Place the steak on a wire rack set over a rimmed baking sheet and warm in a 250°F oven until the internal temperature reaches about 110°F. Finish with a quick sear in a hot oiled skillet to bring the crust back to life. Let it rest a few minutes before serving.
- Pan: preheat the pan over medium to medium low heat and then quickly reheat the steak on each side just until warmed through.
- Avoid the microwave if you can. Steak heats unevenly and dries out fast. If it’s your only option, slice the steak first, add a splash of beef broth, cover, and heat at 50% power in 20-second bursts just until warmed through.
Dry Brine Steak Recipe FAQs
A good rule of thumb is about 1/2 teaspoon of coarse kosher salt per pound of meat. For an 8 to 10 oz steak, that works out to roughly 1/4 teaspoon per side. You want an even, generous coating where every inch of surface is covered, but you are not packing on a thick crust. Note that each brand will have slightly different weight and density.
No! By the time the brine period is over, the salt has been reabsorbed into the meat. There is nothing to rinse off. The surface should look dry going into the pan.
No, the steak should be thawed first! Salt cannot penetrate properly through ice crystals, and you want the surface dry and ready to absorb before the brine period begins.
Then you can’t make a dry brined steak. A 30-minute salt is actually the worst window. It pulls moisture to the surface but does not give enough time for reabsorption or excess liquid to evaporate. If you’re short on time, either salt right before cooking (within 5 minutes) or 45-50 minutes before cooking. (At that point, just leave it on the counter, for no more than 2 hours, to salt.)
Yes. Apply the salt first for the brine period, then add any additional dry rub or spices right before cooking. Watch the salt! If your rub contains salt, then add less salt when dry brining. If making your own rub, skip the salt. My coffee steak rub works beautifully, and the ultimate dry rub is another great option for a bolder crust.
Or, you can dry brine in the seasoning rub just increase the amount of salt in the dry rub. Salt is the key to dry brining.
No, I do not recommend it. The rack allows air to circulate under the steak, which helps dry both sides evenly. In a dish, the bottom of the steak sits in any released moisture.
Yes, absolutely, go for it. In fact, dry brining is one of the best techniques for grilling steaks.
More Steak Recipes to Try
DID YOU MAKE THIS RECIPE? PLEASE leave a 🌟 star rating! Let me know how you liked it by leaving the 📝 comment below or share and tag me on social media @willcookforsmiles. DON’T FORGET to subscribe to my newsletter!
Dry Brined Steak Recipe
Equipment
- Rimmed baking sheet with fitted wire rack
- Digital read meat thermometer
Ingredients
- 2 about 1 inch thick steaks-like ribeye steaks can be thicker
- kosher coarse salt
- 2 Tbsp avocado or canola oil
- 4 Tbsp unsalted butter
- 2-3 shallots
- 3-4 garlic cloves
- 3-4 sprigs of thyme or rosemary
Instructions
Before Cooking (1-3 days ahead):
- Make sure to leave enough time to give the steaks at least 12 hours to dry brine. You can dry brine the steaks anywhere between 12 hours and 3 days.
Prepare the Steaks:
- Take the steaks out of the package and pat them dry on all sides. Use coarse kosher salt and season the steaks on both sides, sprinkling evenly all over. You want to apply an even, visible sprinkle of coarse salt on each side. Don't overdo it but don't do too little either. (You can adjust to personal salt needs.)
- Place seasoned steaks on a wire rack fitted inside a rimmed baking sheet. Make sure there is enough space in the refrigerator shelf for the baking sheet to fit comfortably.
- Place the baking sheet with steaks in the refrigerator. Make sure you leave them uncovered.
- Let the steaks just sit there and dry brine for as little as 12 hours or for up to 3 days. You will notice a tacky coating on the steaks forming after a few hours. That's a good thing, that's what you need to see!
Cook the Steaks:
- When you're ready to cook the steaks, take them out of the refrigerator.
- Make sure to preheat your skillet or another cooking pan over medium heat for 3 to 5 minutes.I highly recommend that you use a leave-in thermometer to track the internal temperature of your steaks. Or you can use a handheld meat thermometer and simply pick up the steaks with metal tongs when you need to check the temperature.
- Add oil to the skillet and add the steaks. Let them sear for about 1½ to 2 minutes on each side and then lower the temperature to below medium.
- Let the steaks cook for about 2 minutes and flip them. Let them cook another 2 minutes on that side and flip them. Repeat this flip every 2 minutes until the steaks are about 10℉ away from your desired temperature.
- Add butter and thyme. Let the butter melt and gently shake the pan to mix. Use a spoon to scoop some butter and pour it over the steaks. Baste both steaks with butter as they finish cooking until your desired temperature is reached. (Remember to take them out of the pan on the lower end of the desired temperature spectrum.)
Rest the Steaks:
- Take the steaks out of the pan as soon as they reach your desired temperature and remember that carryover cooking will increase the temperature by about 5℉.
- Let the steaks rest on a platter or on a cutting board with grooves. Do not pull out the leave-in thermometer probe until the steaks are done resting.
Prepare the Topping (Optional but So Tasty!):
- While the steaks are resting, in the same cooking pan add minced garlic and sliced shallots. Sauté until the shallots are completely softened and caramelized brown.
- Take the pan off heat and you can use the butter onion topping to top off the steaks.
Slicing Steaks:
- Remember to slice your steaks against the grain for the most tender results.
Video
Notes
- Nutrition: remember that the nutrition is approximate since each type of steak is different.
- Steaks: I used ribeye steaks for this recipe but you can use this method to cook any cut of steak. I just recommend that you keep 1-1½ inch thickness on your steaks or a little thicker.
- Fridge: up to 3 days, store whole, sir-tight.
- Freezer: up to 3 months, double-wrap to prevent freezer burn.
- Reheating: 250°F oven to 110°F then quick re-sear. Or gently reheat in the pan until warmed.
- Microwave: as a last resort, microwave on half power in 20-second increments just until warm.
Nutrition
Would you like to save this recipe?
Categories:
Beef Recipes, Dinner Recipes, Father's Day Recipe Ideas, Gluten Free Recipes, Mother's Day Recipe Ideas, Steak Dinner Ideas, Valentine's Day,All images and text ©Lyubov Brooke for ©Will Cook For Smiles. Please do not use my images without prior permission. If using my posts in collections and features, please link back to this post for the recipe.
Disclaimer: Nutrition information shown is not guaranteed to be 100% accurate as most ingredients and brands have variations.