Italian Sub Recipe
Lyuba’s Recipe Overview
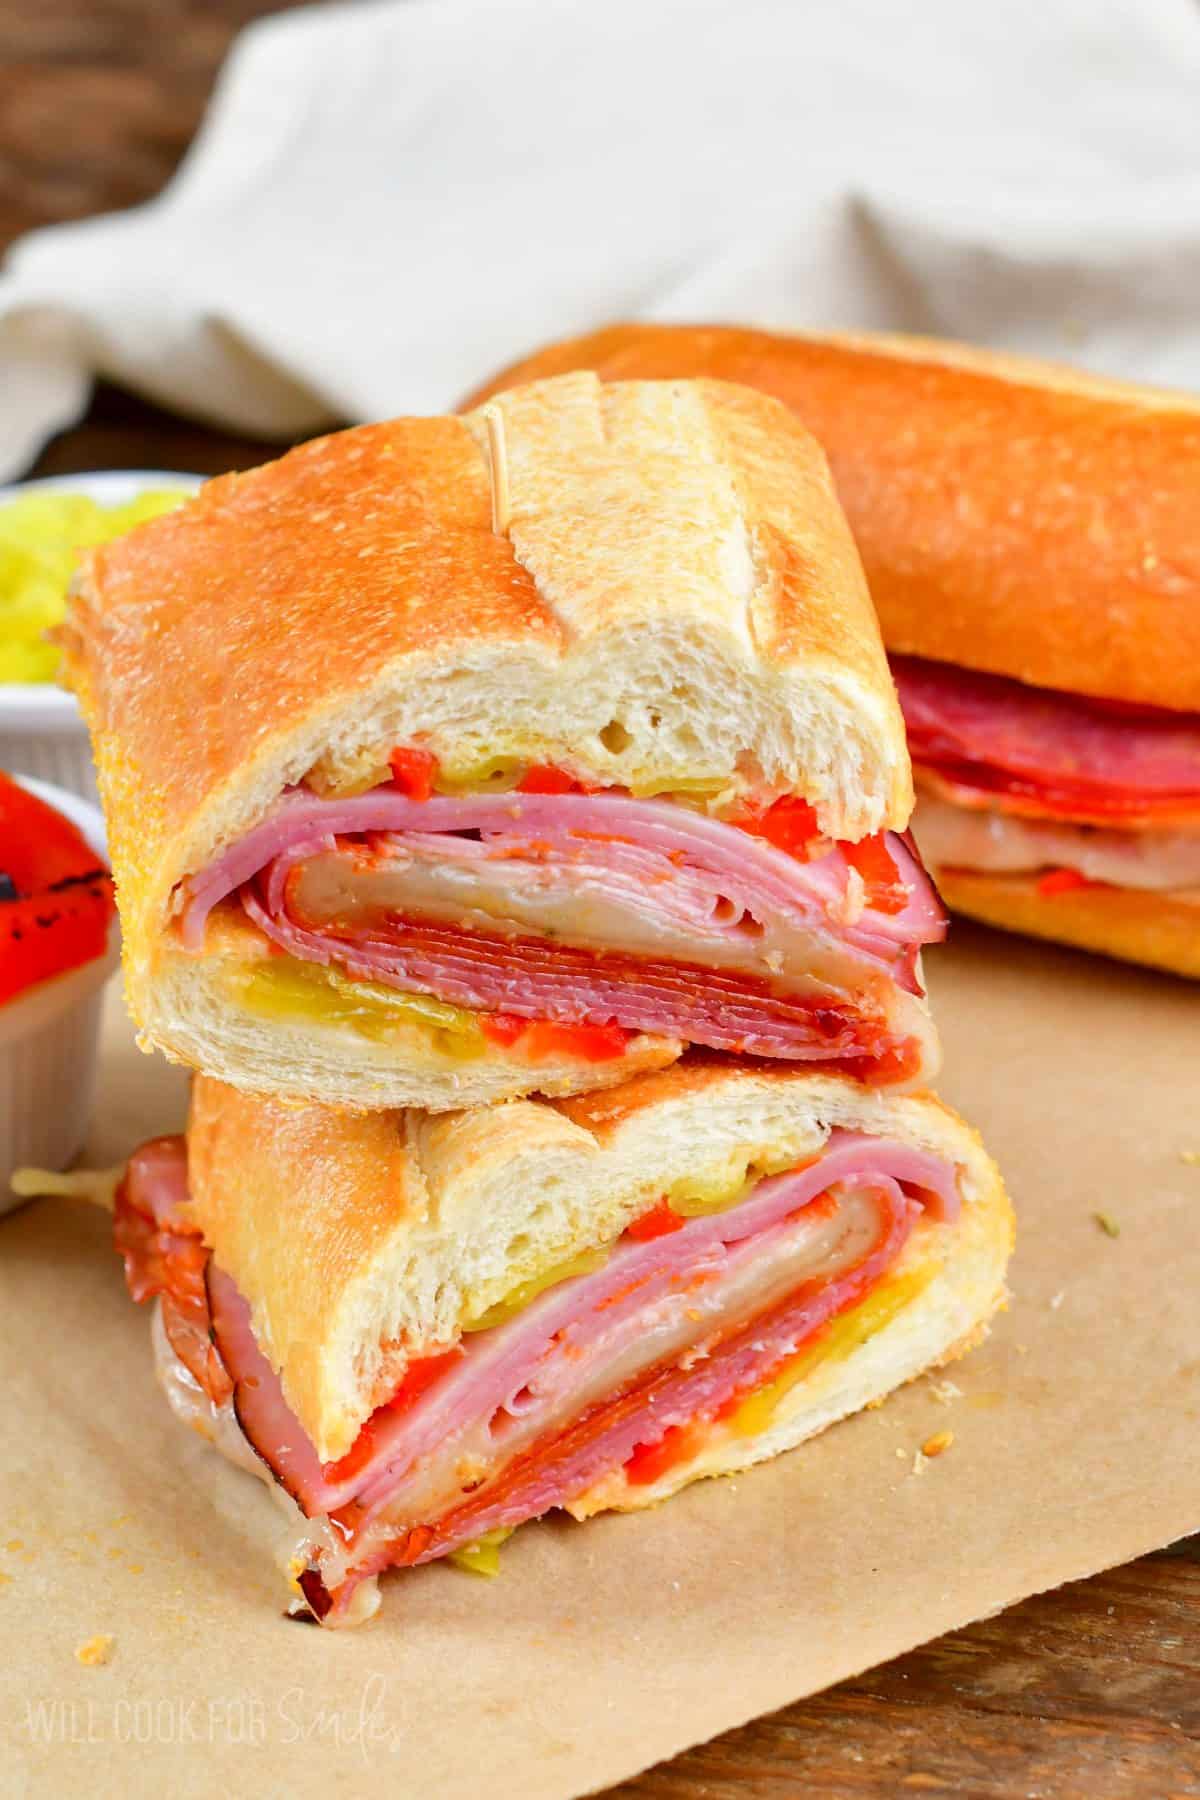
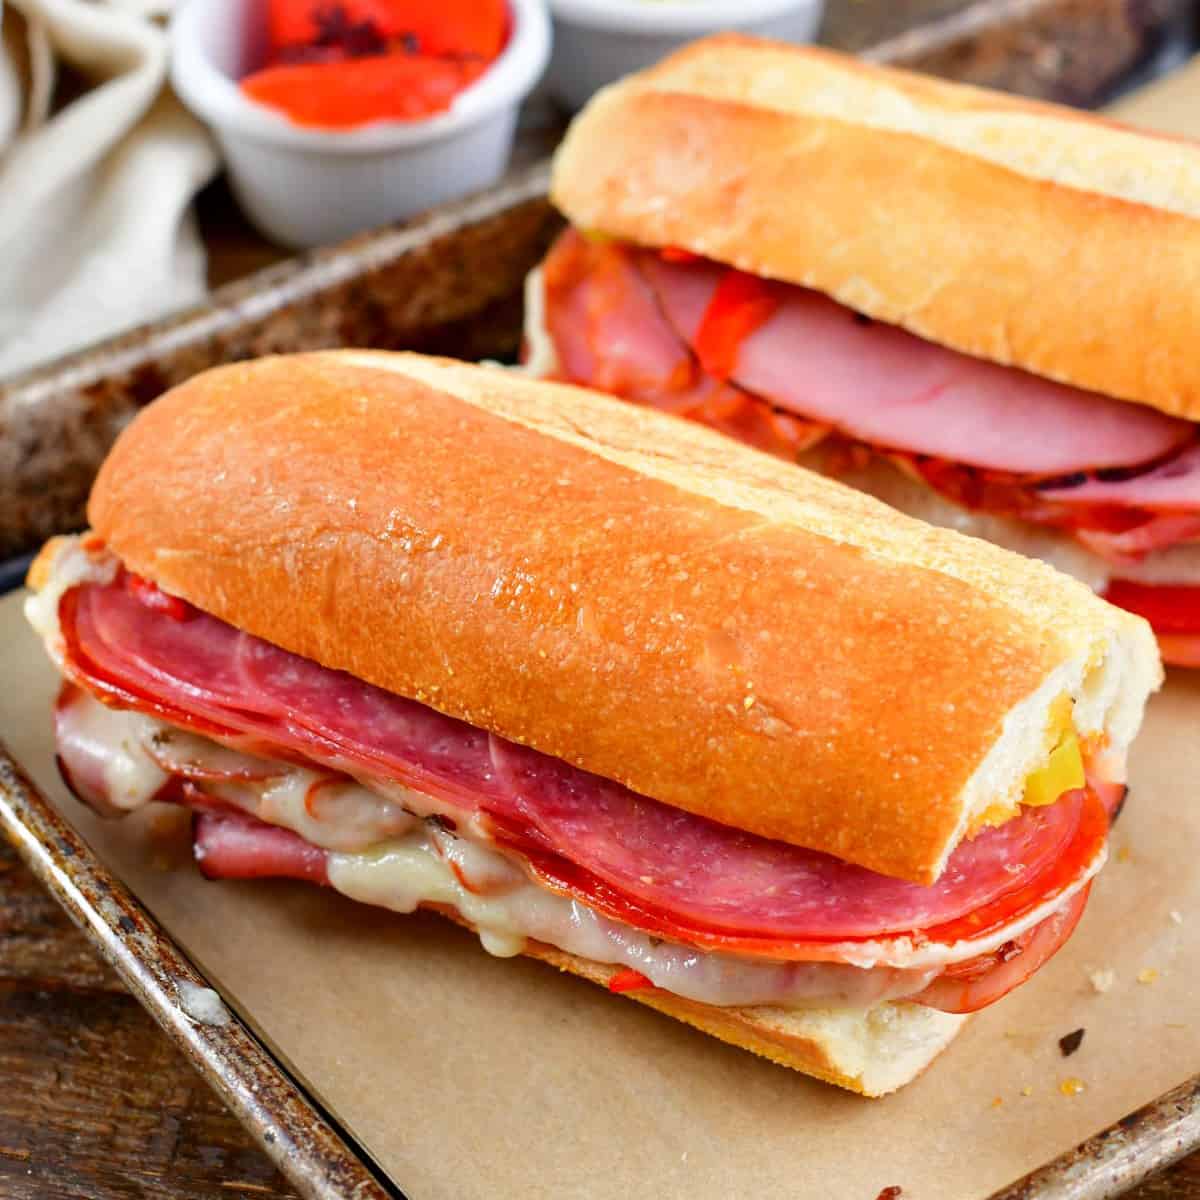
We take our subs and other sandwiches very seriously at my house, that’s why I put extra effort into this sub and the other recipes I have. My Italian sub sandwich recipe has all the flavors of the classic Italian sub PLUS something else to really make the flavors pop:
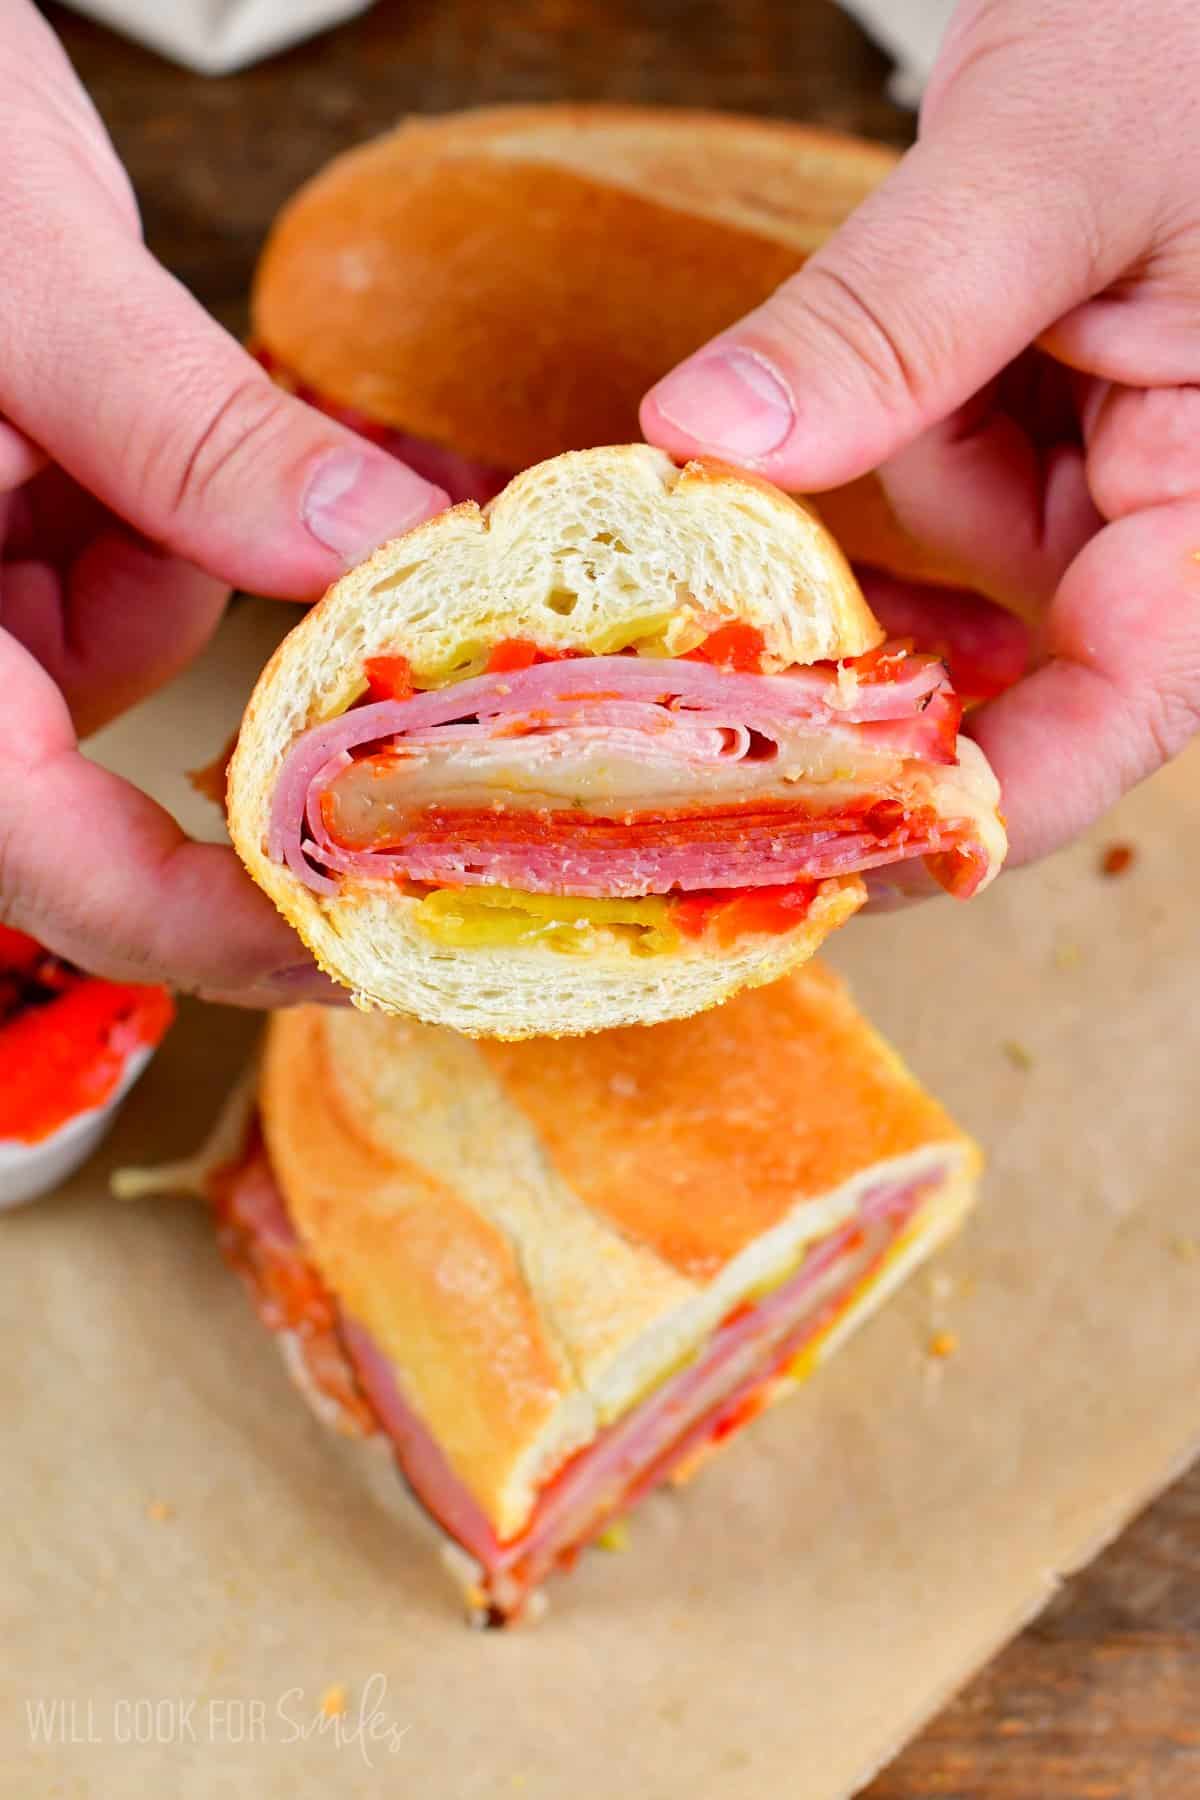
- What makes my recipe extra special is that I add banana peppers, marinated roasted red peppers, and Italian dressing. All three add a lot more flavor and compliment the classic Italian sub meat combination perfectly.
- I also bake my Italian subs to make the hot, gooey, with a toasty crunch on the outside of the bread. The texture combination of this baked sub just can’t be beat. While you technically don’t have to bake it, trust me… You’re going to want to!
What Are Must Have Ingredients In Italian Sub
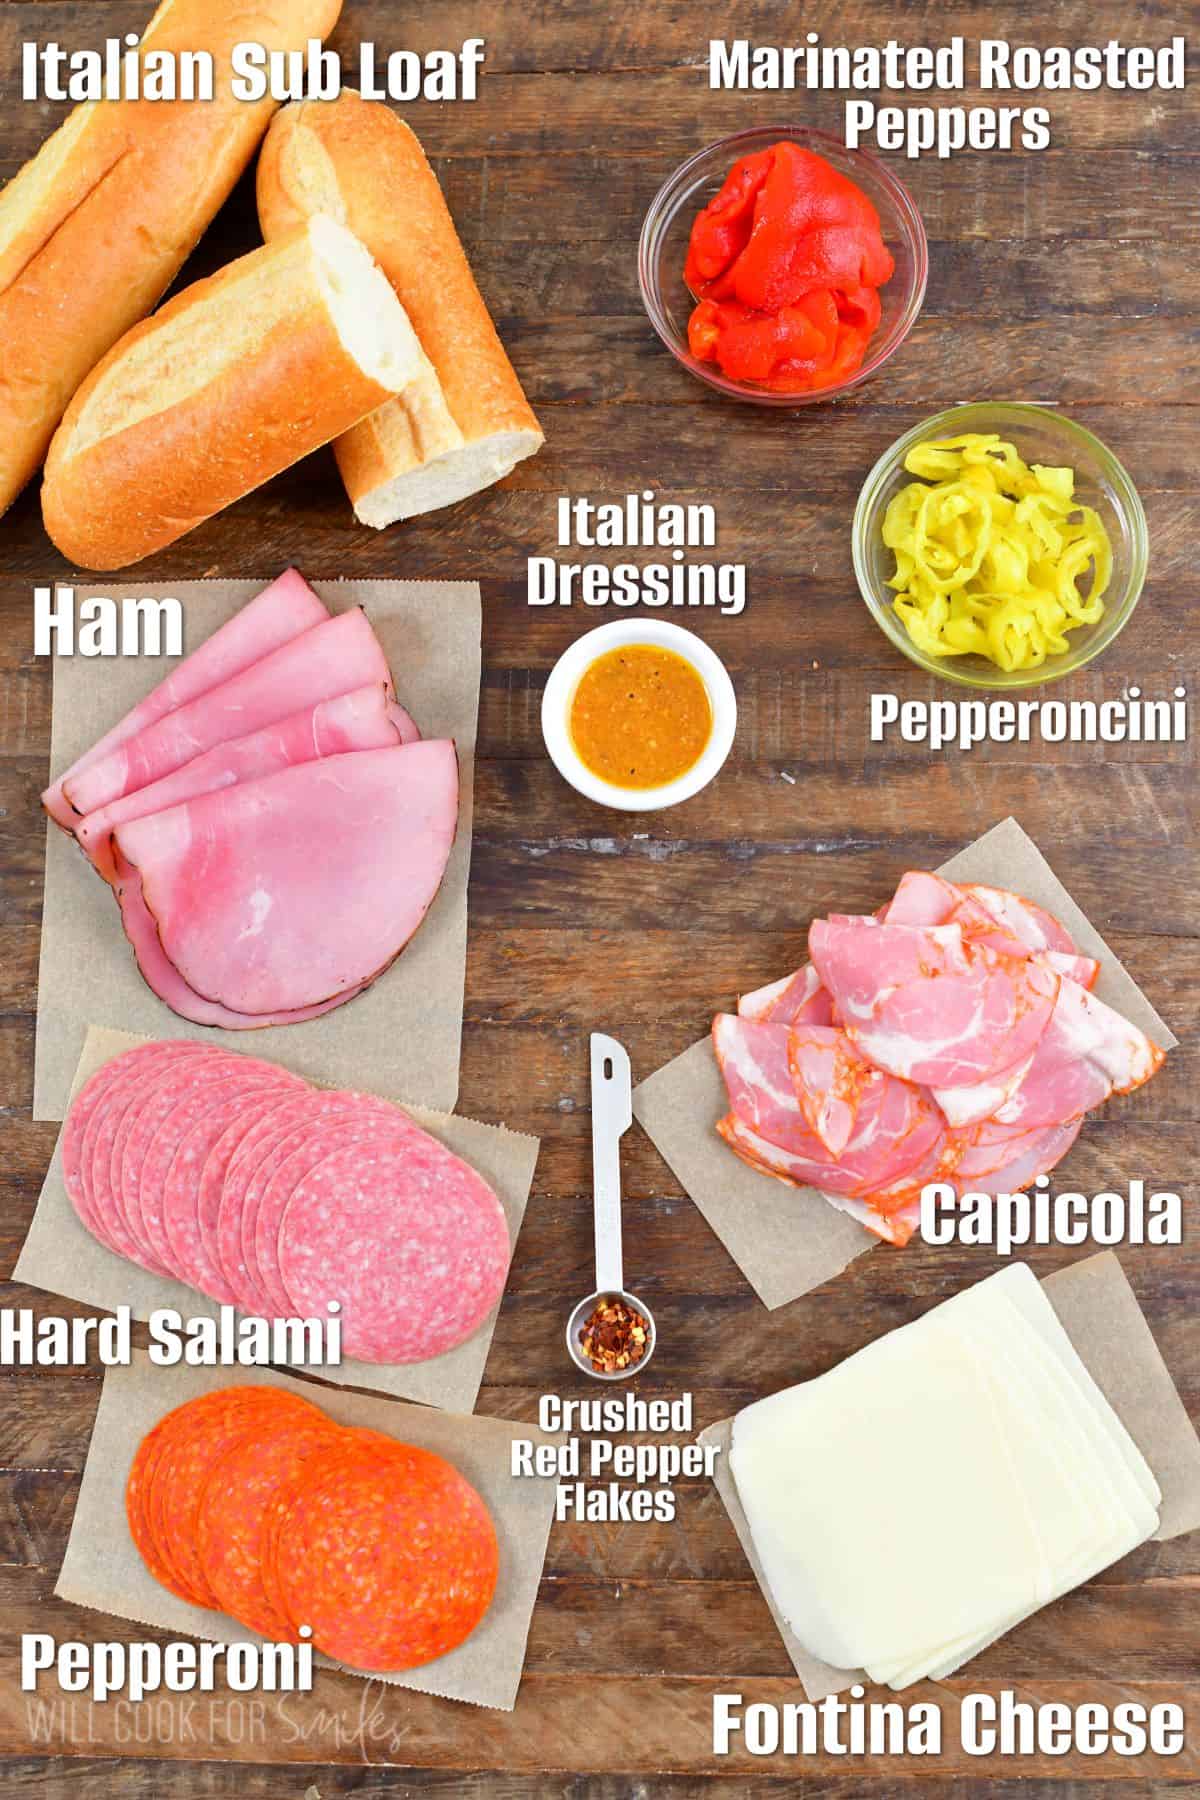
- Sub or hoagie – For the best results, use Italian loaf bread from the bakery section of the grocery store.
- Of course, must have meats are – sliced ham, hard salami, pepperoni and capicola.
- You have some flexibility with cheese, I love to use fontina but you can also use provolone, or sliced mozzarella.
- PRO TIP: For the best results, get your meats freshly sliced from the deli section of your grocery store and get freshly baked sub rolls from the bakery section.
See recipe card for complete information on ingredients and quantities.
Steps and Tips Make an Italian Sub
- Preheat the oven to 350°F and line a baking sheet with parchment paper. Note that you can cut the 12-inch sub loaf into two 6-inch ones to make it easier to work with.
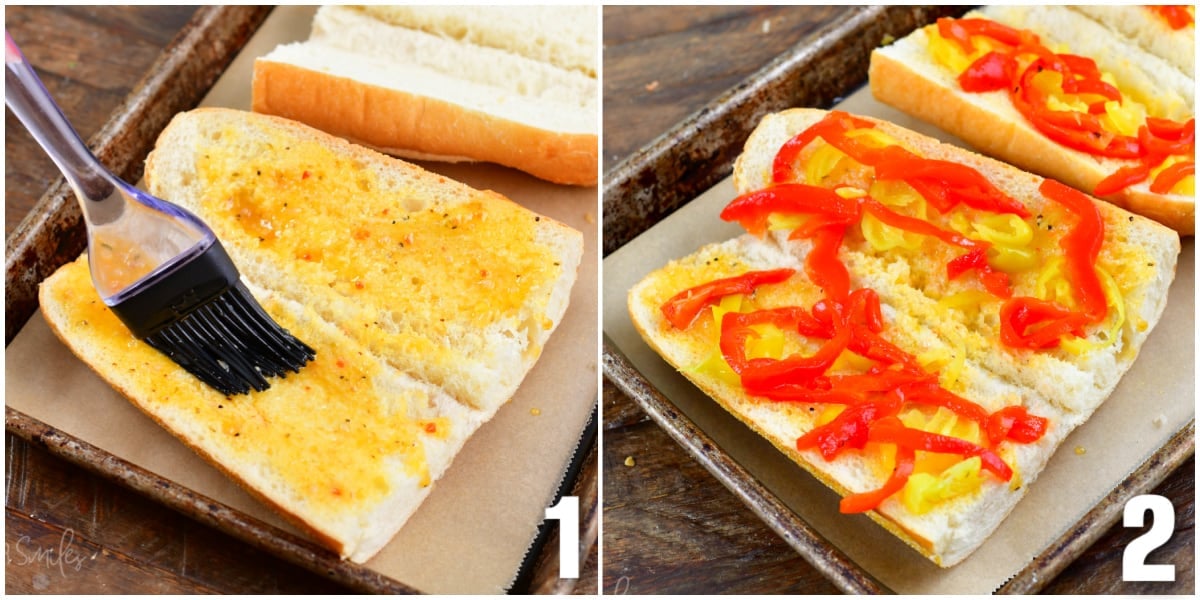
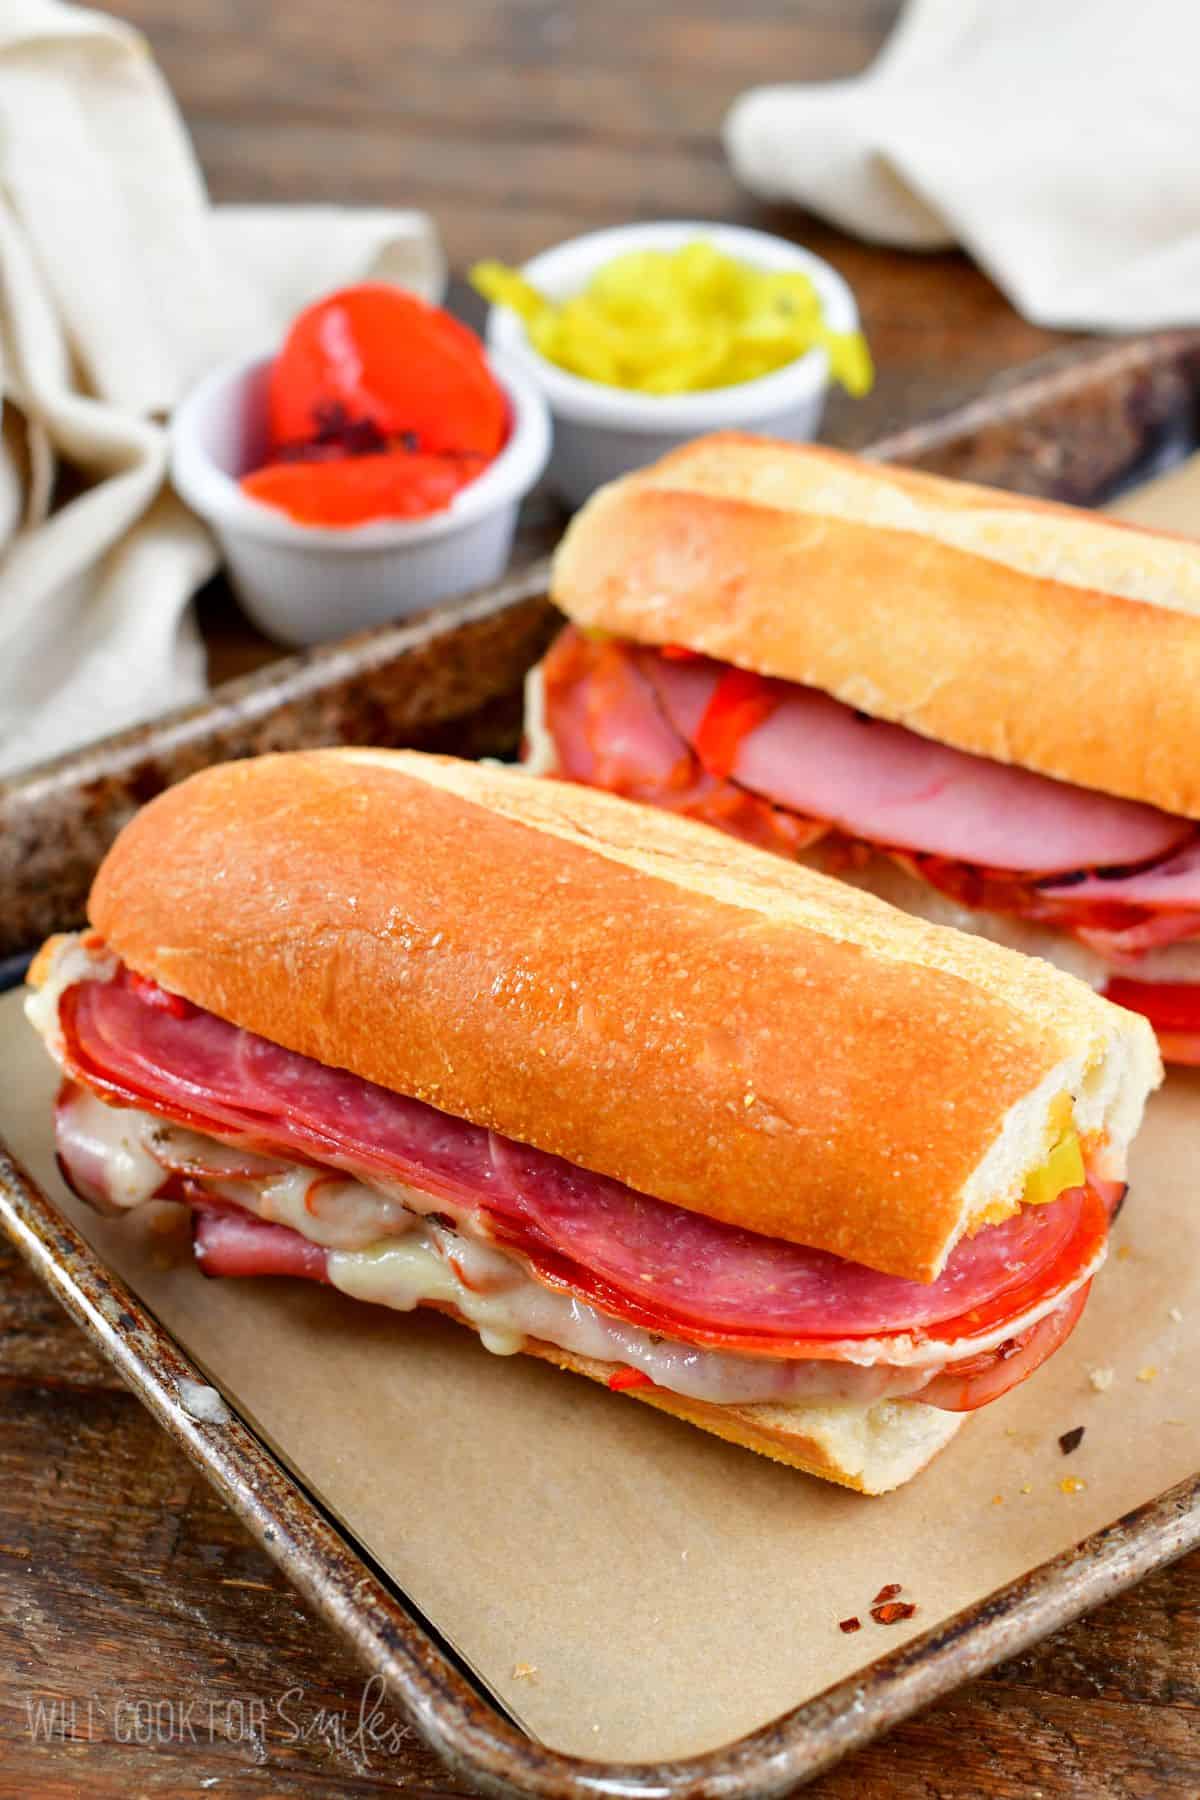
- Slice Italian sub loaves in half, widthwise, to butterfly it but don’t cut all the way through. Pull the halves apart like butterfly wings and brush the Italian dressing over both halves. This will help keep the integrity of the sandwich and help keep the filling inside.
- Spread the sliced pepperoncini peppers and marinated roasted peppers over the halves evenly.
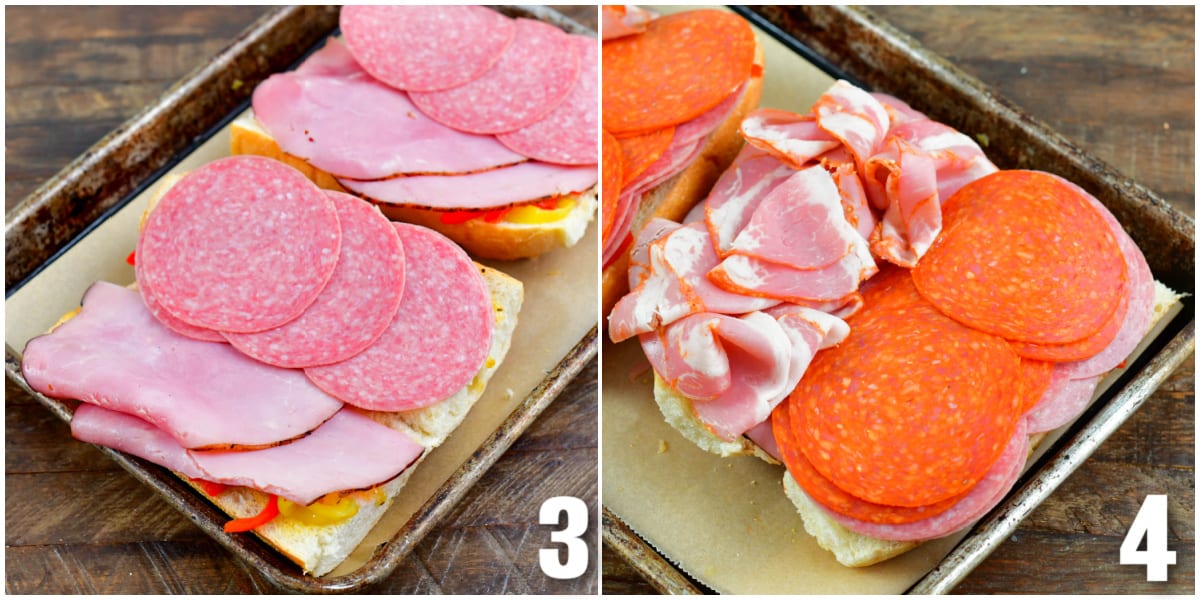
- Layer capicola, ham, salami and pepperoni on the prepared bread.
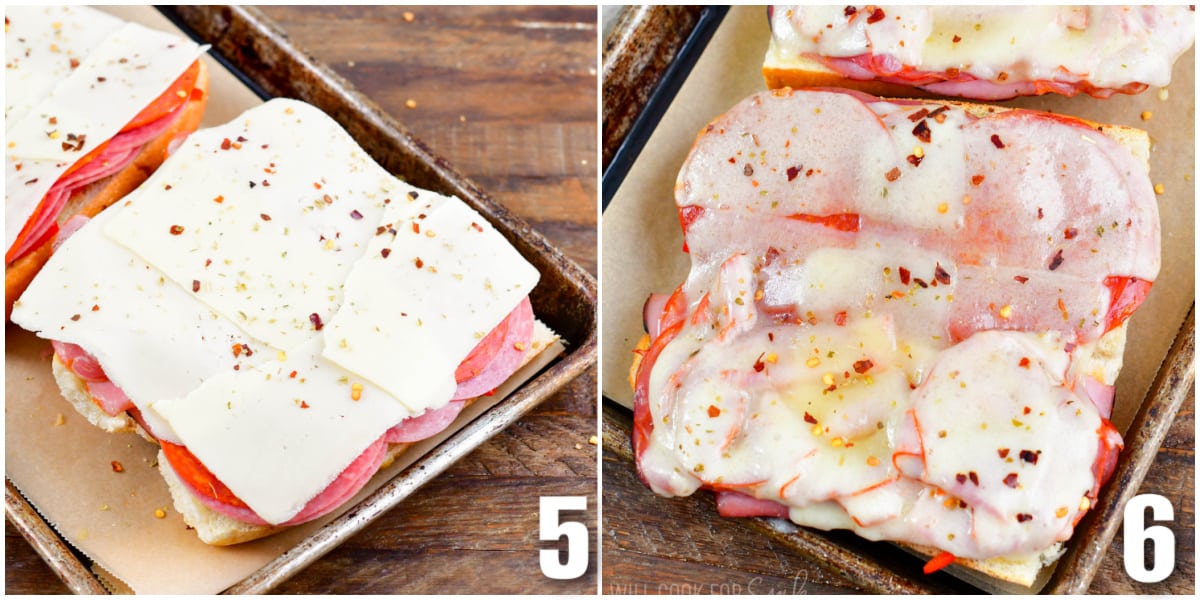
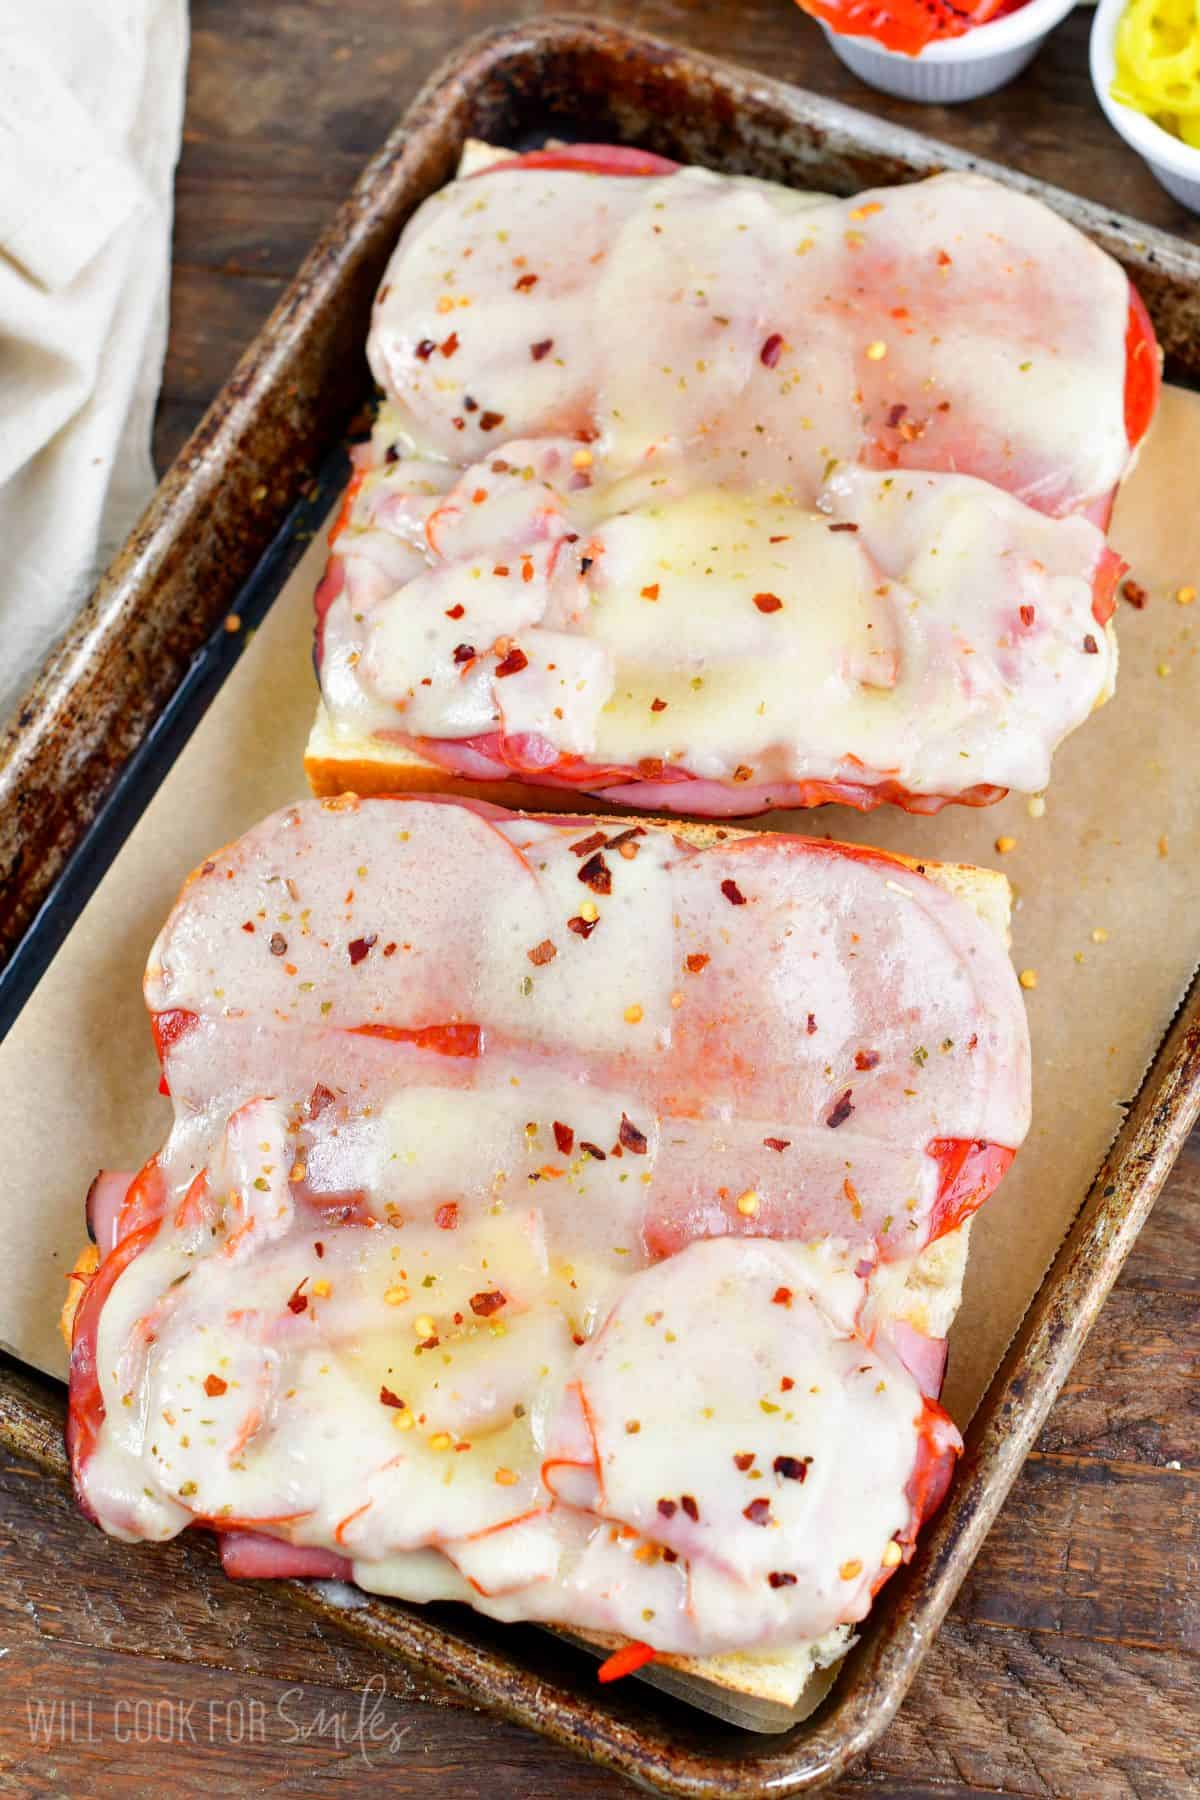
- Add the fontina cheese on top of the meat and however much crushed red pepper flakes you desire.
- Place them carefully on a baking sheet and bake for 10-13 minutes.
DID YOU MAKE THIS RECIPE? PLEASE leave a 🌟 star rating! Let me know how you liked it by leaving the 📝 comment below or share and tag me on social media @willcookforsmiles. DON’T FORGET to subscribe to my newsletter!
Baked Italian Sub Recipe
Ingredients
- 1 12-inch Italian sub loaf get it from the deli, it’s better
- 3-4 tbsp Italian dressing
- 1/4 cup pepperoncini peppers sliced
- 1/4 cup marinated roasted red peppers sliced thin
- 1/4 lb capicola ham thinly sliced
- 1/4 lb ham thinly sliced
- 1/4 lb salami thinly sliced
- 1/8 lb pepperoni thinly sliced
- 1/4 lb Fontina cheese thinly sliced
- Red pepper flakes
Instructions
- Preheat the oven to 350°F and line a baking sheet with parchment paper.
- (You can cut the 12-inch sub loaf into two 6-inch ones to make it easier to work with.) Slice Italian sub loaves in half, widthwise, to butterfly it but don't cut all the way through. Pull the halves apart like butterfly wings and brush the Italian dressing over both halves.
- Spread the sliced pepperoncini peppers and marinated roasted peppers over the halves evenly.
- Layer capicola, ham, salami, pepperoni, and Fontina cheese evenly over the two halves.
- Sprinkle some red pepper flakes on top (amount depends on how spicy you want it). Place them carefully on a baking sheet and bake for 10-13 minutes.
- Take them out of the oven. Close the two halves back up once it's done. Cut each in half if you wish and enjoy!
Video
Notes
- For the BEST results: get your meats freshly sliced from the deli section of your grocery store and get freshly baked sub rolls from the bakery section.
- Make Ahead: You can simply combine the subs and then wrap them tight and refrigerate for about a day. When ready to bake, unwrap the subs, open them, and bake as instructed.
- Storing: you can store baked or unbaked Italian subs in the refrigerator. Just make sure to wrap it airtight in your favorite food storage wrap. I would recommend that you eat them within a day or two at most.
- To reheat the subs: it’s best to do so in the oven. Unwrap the sub first and open it back up to reheat faster. Place it on the parchment paper covered baking sheet and reheat it at 350°F just until heated through, 7-10 minutes.
Nutrition
Variations To Try
- If you like your sub to have a fresh, juicy bite of vegetables you can add a little lettuce, tomatoes, onion, and/or fresh bell peppers.
- You will want to use either Italian Dressing or a combination of olive oil and balsamic vinegar. If you want a little stronger balsamic or vinegar flavor, you can also use Balsamic Vinaigrette or a Balsamic Reduction instead of just vinegar.
- Meats: You can also play around with salami, prosciutto, capicola, mortadella, pepperoni, soppressata.
- Cheese: if you want a sharper cheese flavor, try sliced Asiago cheese, or Provolone cheese. For a texture that is smoother and meltier, you can use sliced mozzarella.
Storing and Reheating
- You can store baked or unbaked Italian subs in the refrigerator. Just make sure to wrap it airtight in your favorite food storage wrap. I would recommend that you eat them within a day or two at most.
- To reheat the subs, it’s best to do so in the oven. Unwrap the sub first and open it back up to reheat faster. Place it on the parchment paper covered baking sheet and reheat it at 350°F just until heated through, 7-10 minutes.
Try More Sandwich Recipes
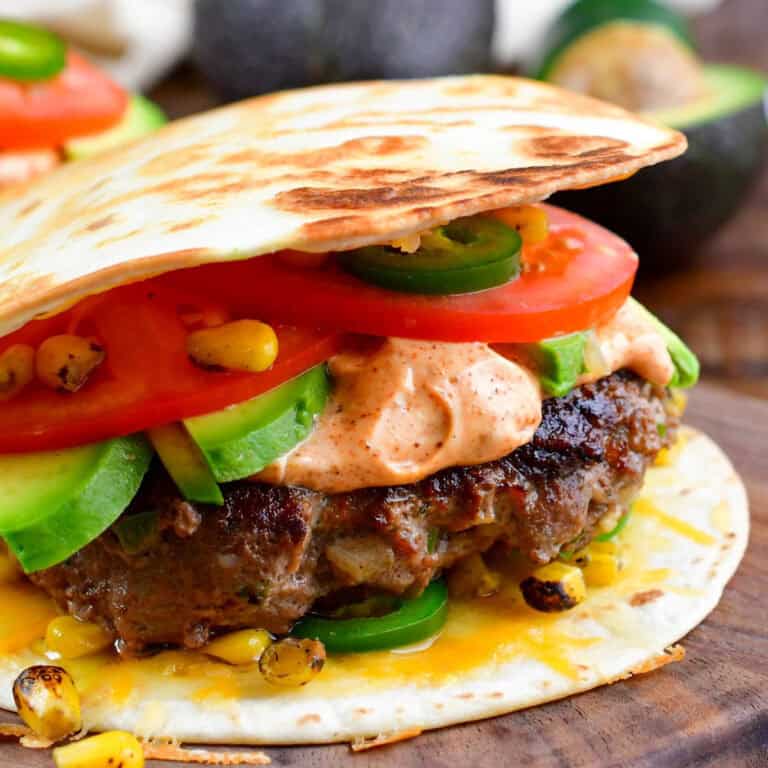
White BBQ Chicken Sub is an amazing hot sub sandwich packed with chicken, cheese, and homemade white BBQ sauce.
Cuban sandwich is a classic! There is a real explosion of flavor from the slow-roasted pork, slightly sweet ham, tangy pickles and mustard, and Swiss cheese.
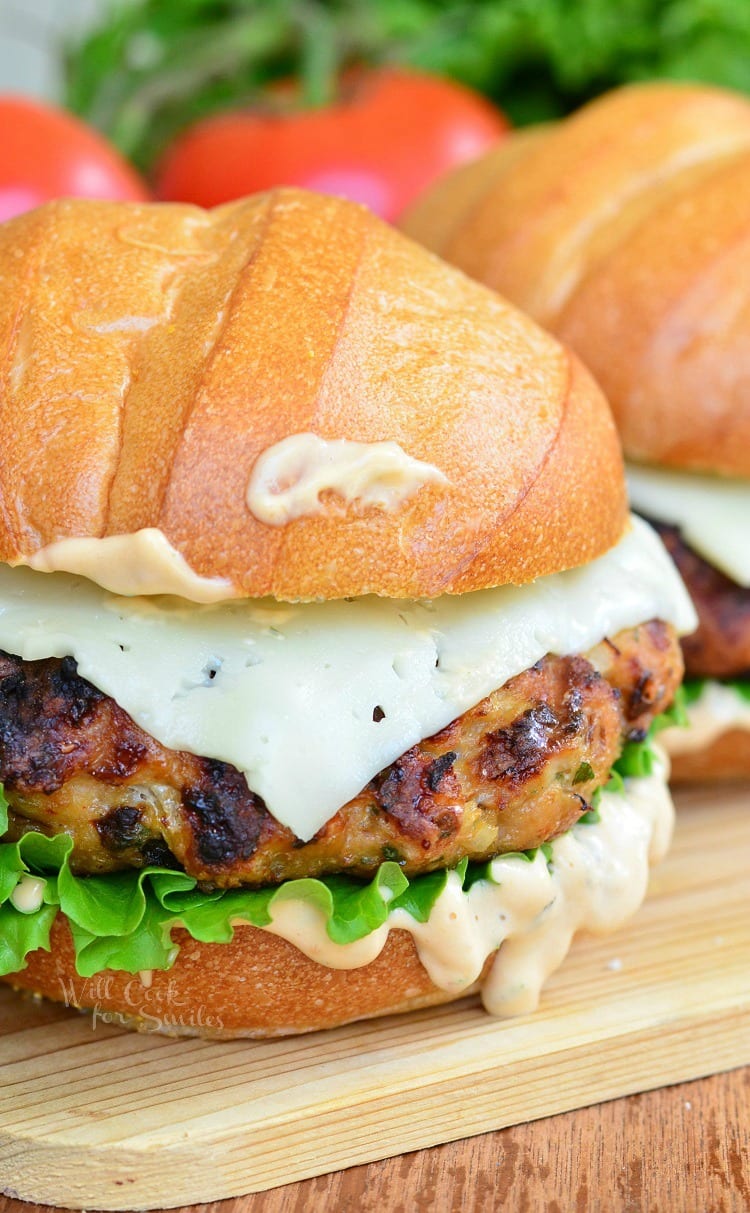
Another classic is a Philly Cheesesteak, that combines thinly shaved steak, bell peppers and onions, and melted provolone cheese on a deli fresh hoagie.
Meatball Sub is a hot delicious sandwich packed with tender Italian meatballs, marinara sauce, and gooey, melted Mozzarella Cheese.
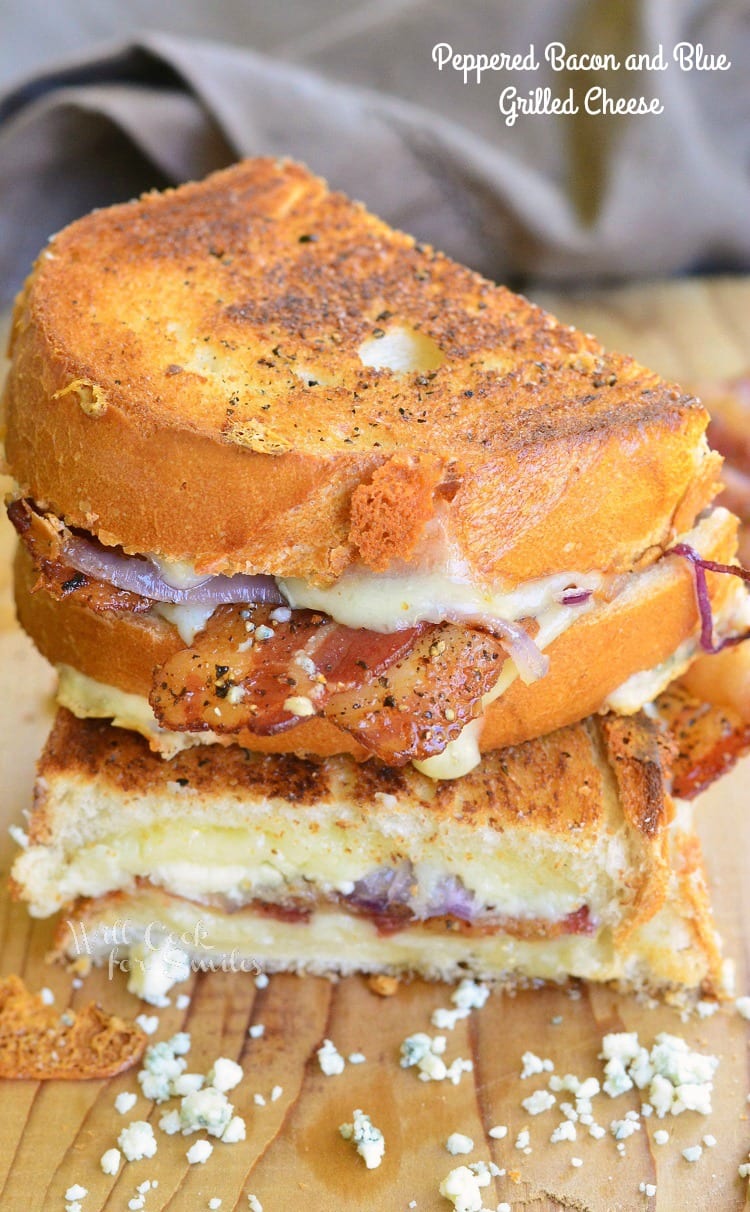
Italian garlic bread grilled cheese is something special! It’s made with garlic bread and loaded with gooey mozzarella cheese, pine nuts, and prosciutto.
Originally published on Will Cook For Smiles in July 2014.
Would you like to save this recipe?
All images and text ©Lyubov Brooke for ©Will Cook For Smiles. Please do not use my images without prior permission. If using my posts in collections and features, please link back to this post for the recipe.
Disclaimer: Nutrition information shown is not guaranteed to be 100% accurate as most ingredients and brands have variations.