
Pumpkin Chili Recipe

This post may contain affiliate links.
Reader reviews

I have made this many times. It is a great way to use my frozen pumpkin. I sometimes use ground turkey and chicken broth. I sometimes add can corn. It is so versatile. ~Charlotte

What I Love About My Pumpkin Chili
To say that I’ve made hundreds of chili recipes in my life would be an understatement. Between home and restaurants, I’ve made everything from easy ground beef beef to white chicken chili, short ribs chili and vegetarian chili versions, but this pumpkin twist has become a fall favorite in my kitchen.
- Pumpkin two ways. I use diced pie pumpkin for tender bites and pumpkin puree to thicken the sauce naturally, so every spoonful has both texture and body.
- A gentle sweetness. I love the slight natural sweetness against the smoky chipotle. It’s subtle, so the pot still tastes like savory chili first.
- One pot, hands-off simmer. Once everything goes into the pot, all you do is stir now and then while it simmers.
- Freezer friendly. A full pot makes about 3 quarts, and leftovers freeze for up to 2 months.
- Easy to make your own. You can swap the meat, mix up the beans, or skip the meat entirely. Readers have made it with ground turkey, chicken broth, corn, and an extra can of beans.


Key Ingredients and Variation Options
- Pie pumpkin: Choose a small pie pumpkin, sometimes labeled “sugar pumpkin,” about 2 to 2.5 lbs. Pie pumpkins have dense, smooth flesh, perfect for a long simmer. Large carving pumpkins are grown for size, and their flesh tends to be watery and stringy, do not use them for cooking. If you have pumpkin left over, it’s just about the right amount for my crock pot roast with pumpkin. You can also dice and sauté or roast it as a side.
- Pumpkin puree: I love using my homemade pumpkin puree because I know exactly what’s in it, but a can of pure pumpkin puree works just fine. Make sure to get pumpkin puree, not pumpkin pie mix! Pie mix already has sugar and spices in it, and those don’t belong in chili.
- Chipotle chili powder: Chipotle chili powder is ground from smoked, dried jalapeños, so it has more smoke and heat than a regular chili powder blend. Heat varies by brand, so start with the recipe amount, taste after simmering, and adjust from there.
- Seasonings: Create the very best flavor with garlic powder, oregano, paprika, sugar, chipotle chili powder, black pepper, salt, and cumin. Feel free to adjust these spices once you’ve done a taste test!
- Vegetables: You’ll need a simple medley of yellow onion (white works in a pinch), tomatoes, and red bell pepper.
- Beans: I like to use both navy and kidney beans in this pumpkin chili recipe. You can use other varieties if you wish.
Substitutions and Variations
- Pumpkin substitutes: No pie pumpkin at the store? Butternut, acorn, kabocha, or red kuri squash all work in its place. Kabocha is a little sweeter and denser than pumpkin, so the diced pieces hold their shape well.
- More veggies: You can also load your chili with veggies like carrots, celery, more bell peppers, zucchini, yellow squash, corn, butternut squash, or acorn squash, and avocado as a topping only.
- Other beans: Pinto, cannellini, black, or great northern beans make the chili a bit softer and creamier in texture.
- No beans: No problem, simply increase the amount of vegetables and meat.
- Meat options: I use ground beef in this recipe, but it’s very easy to swap in ground chicken or ground turkey. If using turkey, I recommend lean ground turkey (93/7), not extra lean (99/1), or it will be too dry.
- Meatless: To skip the meat altogether, simply increase the vegetables and add an extra can or two of beans.
- Warm spice: readers even tried adding cinnamon for a warm fall twist.
How to Make Pumpkin Chili: Steps and Tips
- Prep the pumpkin and veggies. Pop off the stem with a large knife (always keep the knife facing away from you) and cut the pumpkin in half. Scoop out the seeds and membrane; I like an ice cream scoop because it easily scoops up the membrane. Cut each half in two, peel off the tough skin with a vegetable peeler, and dice the flesh. Dice the onion, bell pepper, and tomatoes, and smash the garlic before mincing it. Try to get all the cuts as even as possible.
- Sauté the onions. Heat the oil in a pot over medium heat and cook the onions until translucent and starting to get golden brown caramelization.
- Add the pumpkin and bell pepper. Stir in the diced pumpkin and bell pepper and cook for a few minutes.
- Bloom the garlic and spices. Make a little well in the middle of the veggies and add the minced garlic, chipotle chili powder, paprika, garlic powder, oregano, and cumin. Sauté for 30 to 45 seconds, stirring the whole time, until fragrant, then stir everything into the veggies. I bloom the spices at this stage because the heat and fat bring out so much more of their flavor. Keep it quick, though: if you cook garlic and ground spices too long, you’ll scorch them and end up with a bitter taste.
- Add the tomatoes. Stir in the diced tomatoes and cook until all the veggies are soft.
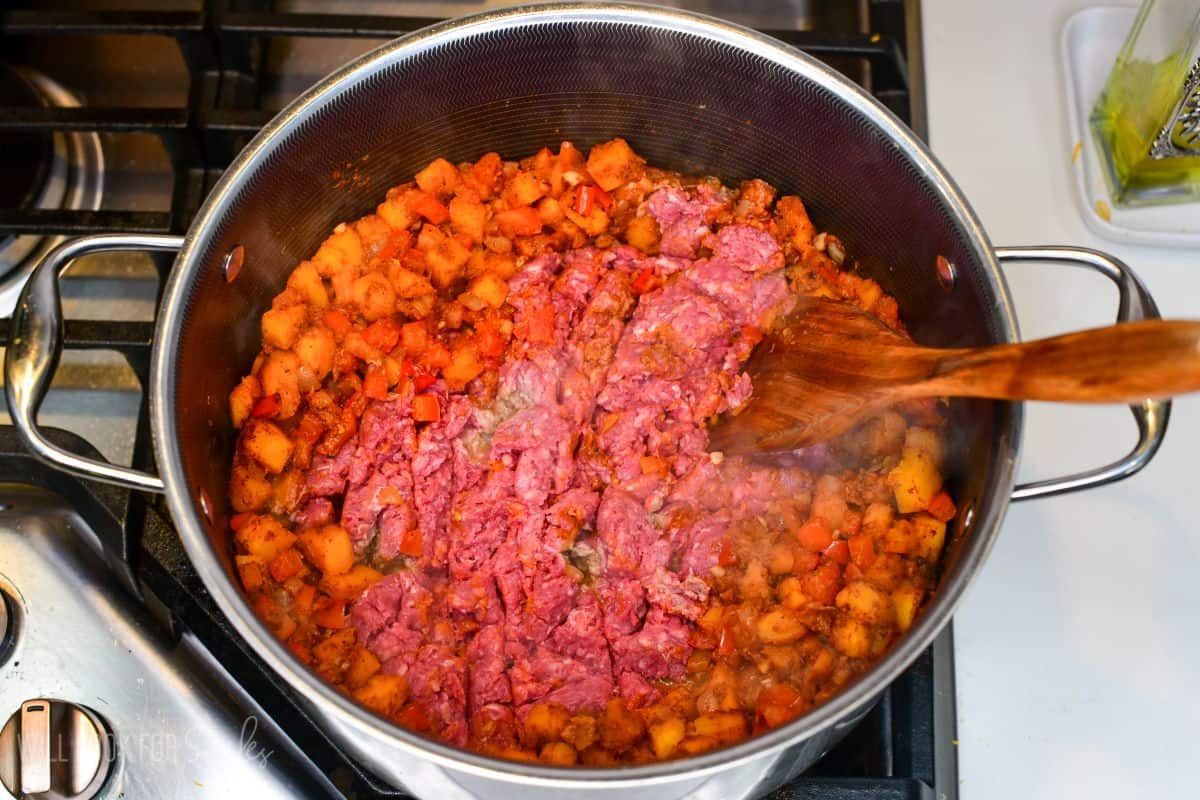
- Brown the beef. Move the veggies to the sides of the pot to make room for the meat. Add the ground beef to the center, break it apart, cover the pot with a lid, and let it cook for a few minutes. Open the lid from time to time to stir, breaking up as many lumps as you can.
- Add everything else. Once the meat is mostly browned, stir in the salt, sugar, black pepper, stock, pumpkin puree, tomato sauce, tomato paste, and drained beans.
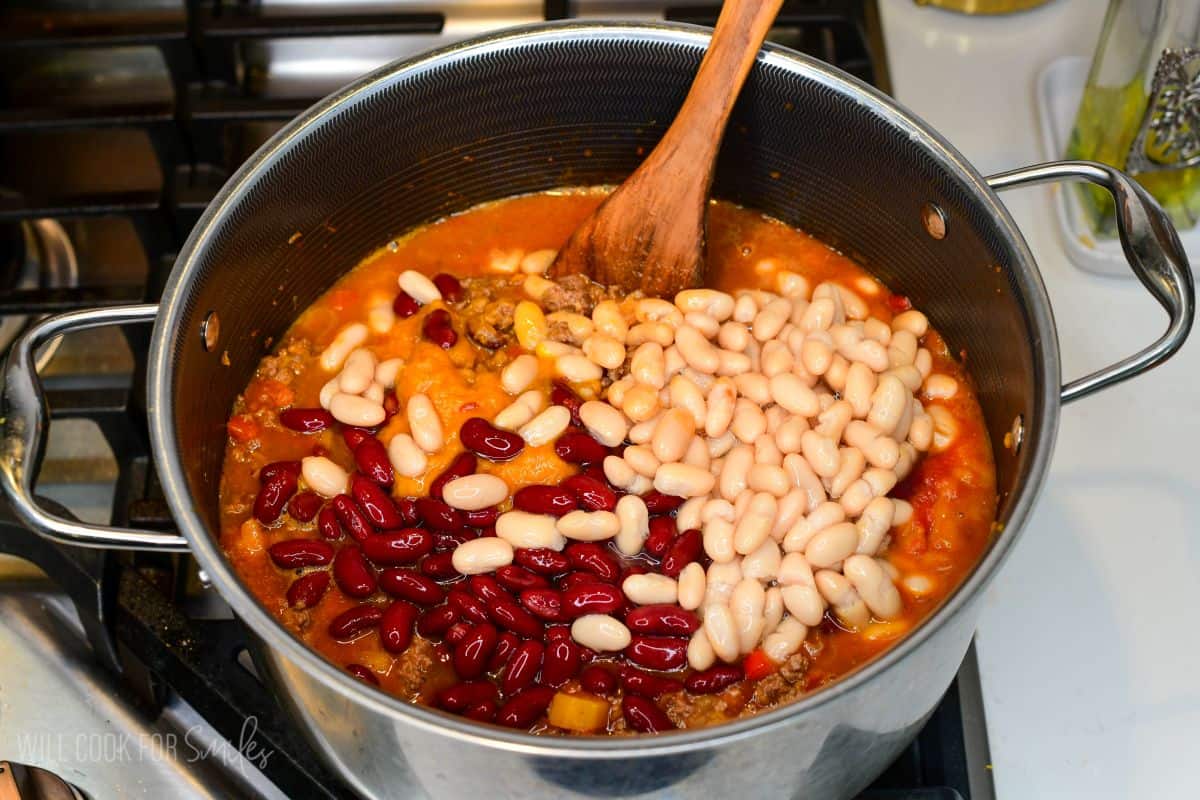
- Simmer low and slow. Bring the chili to a simmer, then lower the heat to low. Cover with a lid, leaving a crack for the steam to escape.
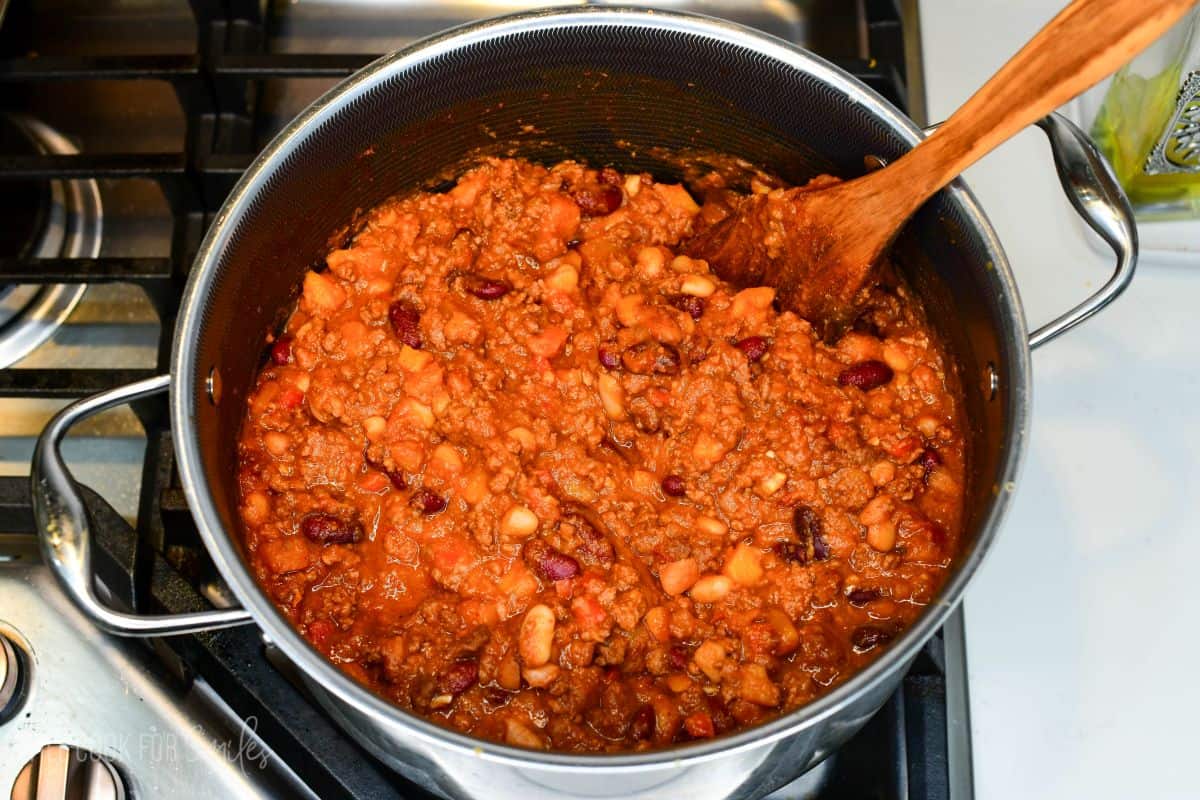
- Uncover halfway through. Cook on low for about 1.5 to 2 hours, and take off the lid halfway through to cook the rest of the time uncovered. Cooking uncovered for the second half reduces some of the liquid for a richer flavor. Stir from time to time and scrape the bottom of the pot.
- Taste and adjust. Wait until the chili has simmered before tasting, then adjust the salt and chipotle chili powder. If it’s thicker than you like, stir in a splash of stock; if it’s too thin, simmer it uncovered a little longer.
What to Serve With Pumpkin Chili
A few toppings and an easy side turn a bowl of pumpkin chili into a full dinner spread.
- Toppings: My first go-to toppings are pepitas (pumpkin seeds), sour cream, and a squeeze of fresh lime juice. More options include sliced avocado, sliced jalapeños, cilantro, green onions, and shredded cheddar or Mexican blend cheese.
- About the jalapeños: Jalapeños range from mild to fairly hot. Remove the seeds and membranes for milder slices, and keep in mind that jalapeños with light brown veins on the skin tend to be spicier.
- About the cilantro: If you’re not a cilantro fan, top your bowl with sliced green onions or chopped fresh parsley instead.
- Cornbread: A side of buttermilk cornbread is a classic match for scooping up every last bite.
- A fresh salad: Pair the rich chili with something cool and crunchy, like my creamy corn salad or avocado corn salad.
- Over rice or a baked potato: Spoon the chili over white rice or a split baked potato to stretch the pot a little further.
- Tortilla chips: Serve a big bowl on the side for scooping.

Storing, Freezing, and Reheating Instructions
- Make ahead: cook the chili up to 2 days ahead. I love it even more in a day or two because chilling it overnight gives the flavors time to infuse through the chili even more.
- Store: in the refrigerator in an airtight container for 3 to 4 days. Cool the chili completely before storing.
- Freeze: cool the chili as quickly as possible by setting the pot in a larger container filled with ice, stirring from time to time. Cooling it fast gives bacteria less of a chance to grow and extends the shelf life. Once it’s cool, portion it into freezer bags, let all the air out, and seal them well. Don’t forget to label and date them. Freeze for up to 2 months.
- Thaw: move the frozen bag to the refrigerator and let it slow-thaw overnight.
- Reheat: in the microwave or on the stovetop over medium heat. Add a splash of stock if it’s too thick.

Pumpkin Chili Recipe FAQs
This chili has a medium heat level, which you can easily adjust to your preference:
To make it spicier: Use older, veined jalapeños, keep the seeds in, substitute a hotter pepper like habanero or serrano, or add more chili powder.
To make it less spicy: Use younger, smooth-skinned jalapeños, remove the seeds, and reduce the chili powder.
This chili tastes savory first, with a gentle natural sweetness from the pumpkin that sets it apart from a classic beef chili. It doesn’t taste like pumpkin pie, though. There’s no pumpkin pie spice in my recipe, so the smoky chipotle and cumin stay front and center.
No. Pumpkin pie filling already has sugar and warm spices mixed in, which would make the chili way too sweet. Look for a can labeled 100% pure pumpkin, or use homemade pumpkin puree.
Yes! Follow the stovetop steps to sauté the onions, pumpkin, and bell pepper, bloom the garlic and spices, cook the tomatoes, and brown the beef. Transfer everything to the Crockpot and stir in the salt, sugar, black pepper, stock, pumpkin puree, tomato sauce, tomato paste, and drained beans. Cover and cook on HIGH for about 4 hours or on LOW for about 6 hours.
NOTE: the slow cooker will not reduce the chili and concentrate the flavors like cooking it on the stove uncovered does. So make sure you know it will be thinner.
Yes! Use the “sauté” setting to cook the onions, pumpkin, and bell pepper, bloom the garlic and spices, cook the tomatoes, and brown the beef. Pour in the stock and scrape up anything stuck to the bottom of the pot. Stir in the salt, sugar, black pepper, beans, and tomato sauce, then spoon the pumpkin puree and tomato paste on top without stirring.
Layering them on top keeps them off the bottom of the pot and helps you avoid a burn warning.
Close and latch the lid, turn the valve to “seal,” and set the pressure cooker to “beans/chili.” If your pressure cooker doesn’t have that setting, cook on high pressure for 30 minutes. Check your manual for exact settings and safety instructions. Let the pressure release naturally for about 10 minutes, then carefully do a quick release and stir.
NOTE: this chili will also be thinner as the liquids will no reduce like they do on the stove.
I absolutely do not ever drain the beef for chilis or stews, all the flavor will go right into the dish! (Why pour it into trash?!) I also make sure to use 85/15 beef to fat ratio and that helps keep the fat minimal while still incorporating lots of flavor and keep the beef tender.
Yes, you can skip the diced pumpkin and make it with just the puree. The chili still has its thick, velvety base and gentle sweetness; you’ll just miss the tender bites of pumpkin and fresh pumpkin flavor. If your store is out of pie pumpkins, you can use butternut or kabocha squash as a great alternative.

More of Our Family Favorite Chili Recipes
I make chili all year long so I tend to variate which ones I make. We love the classic ground beef chili and I even add bacon to it! Other times, I make turkey chili, white chicken chili and even a vegetarian chili when we don’t feel like meat. When short on time, I use my pressure cooker to make Instant Pot chili. For game days, I even make chili with beer. If you like savory pumpkin recipes, my pumpkin soup recipe is a must try!
DID YOU MAKE THIS RECIPE? PLEASE leave a 🌟 star rating! Let me know how you liked it by leaving the 📝 comment below or share and tag me on social media @willcookforsmiles. DON’T FORGET to subscribe to my newsletter!
Pumpkin Chili Recipe
Ingredients
- 2-3 tbsp avocado or olive oil
- 12 oz diced pumpkin (half of a small (2.5 lbs) pie pumpkin)
- 1 large onion
- 1 red bell pepper
- 1 oz garlic (4-8 cloves, depending on size)
- 1 tbsp chipotle chili powder more or less to taste
- 2 tsp paprika
- 2 1/2 tsp cumin
- 2 tsp garlic powder
- 1 tsp dried oregano
- 2 tomatoes
- 2 lbs ground beef
- 1 cup beef stock
- 8 oz tomato sauce
- 3 oz tomato paste
- 1 cup pumpkin puree
- 15 oz can kidney beans drained
- 15 oz can white beans drained
- 2 tsp white granulated sugar
- 1-2 tsp coarse sea or kosher salt to taste
- 1/2 tsp fresh cracked black pepper
Instructions
- SMALL UPDATE: I've updated the order of steps. Specifically, when to add the spices to bloom them in fat, for better overall flavor.
Prep the Ingredients:
- Start by cutting pumpkin and other veggies. To cut pumpkin: pop the stem off with a large knife (knife always facing away from you) and cut pumpkin in half. Scoop out seeds and membrane. I like to use an ice cream scoop because it easily scoops up the membrane. Cut pumpkin halves in two and peel the tough skin off with a vegetable peeler.
- Dice pumpkin, onions, bell pepper, and tomatoes. Try to get the cuts as even as possible.
Cooking Pumpkin Chili:
- Preheat the pot over medium heat and add oil.
- Add onions and saute until transparent.
- Add pumpkin, and bell peppers. Cook for a few minutes.
- Make some room in the middle and add minced garlic, chili powder, paprika, garlic powder, oregano, and cumin. Stir into the veggies and sauté until fragrant, just about 30-45 seconds, stirring the whole time.
- Mix in tomatoes and stir and cook until veggies are softened.
- Move veggies to the sides of the pot. Add ground beef to the center of the pot, break it apart, cover the pot with a lid, and let it cook for a few minutes. Stir as it cooks and try to break up all the lumps as much as possible.
- Once meat is mostly browned, stir in the salt, sugar, pepper, stock, pumpkin puree, tomato sauce, tomato paste, and beans.
- Bring the chili mixture to a simmer and then lower the heat to low. Cover with a lid but leave a crack for the steam to escape.
- Cook for about 1.5-2 hours and make sure to stir from time to time. Take the lid off half way through and cook the rest of the time uncovered (still on low heat).
Notes
- To make it spicier: Use older, veined jalapeños, keep the seeds in, or substitute a hotter chili pepper. To make it less spicy: Use younger, smooth-skinned jalapeños, remove the seeds, and reduce the chili powder.
- To store: Store your cooled leftovers in an airtight food storage container in the refrigerator for about 4-5 days.
- To freeze: cool it as quickly as possible, portion it into smaller bags (or freezer container), let all the air out, and close it tight. Freeze for up to 2 months.
- To thaw: Pull the frozen bag from the freezer and place it in the refrigerator. Let it slow-thaw overnight. Reheat it in the microwave or on stove-top over medium heat.
Nutrition
Originally published on Will Cook For Smiles in October, 2018.
Would you like to save this recipe?
Categories:
Beef Recipes, Chili Recipes, Dinner Recipes, Fall Recipes, Gluten Free Recipes, Pumpkin Recipes, Seasonal Recipes,All images and text ©Lyubov Brooke for ©Will Cook For Smiles. Please do not use my images without prior permission. If using my posts in collections and features, please link back to this post for the recipe.
Disclaimer: Nutrition information shown is not guaranteed to be 100% accurate as most ingredients and brands have variations.












I have made this many times. It is a great way to use my frozen pumpkin. I sometimes use ground turkey and chicken broth. I sometimes add can corn. It is so versatile.
I am so glad you liked the recipe, Charlotte!
This is a great alternative to chili. It adds additional texture and fall favor.
Glad you liked it, Janet!
This turned out absolutely amazing!! We went heavy on the pumpkin, peppers, and tomatoes, because I have way too much of these things coming out of my garden right now! We also added an extra can of beans. We added some hot pepper flakes we made from our spicy peppers this year. It was sweeter, more savory, and spicier than any chili recipe I’ve ever made! The pumpkin was killer! This is the only chili recipe I’ll make from now on! Wish I could post a pic!
Thank you, Claire! This comment has made my day, I am so glad you liked it!
I absolutely loved this – I used a whole small pumpkin, and 3 different cans of beans, added a can of pickled red jalapeños, and a tablespoon of cinnamon – got huge wows from the family – it was even a thought to substitute a fall beer for the beef stock! Great recipe😊
Thanks, Lisa! I love that you made it your own and it turned out so well! I think the beer would be good too! 😉