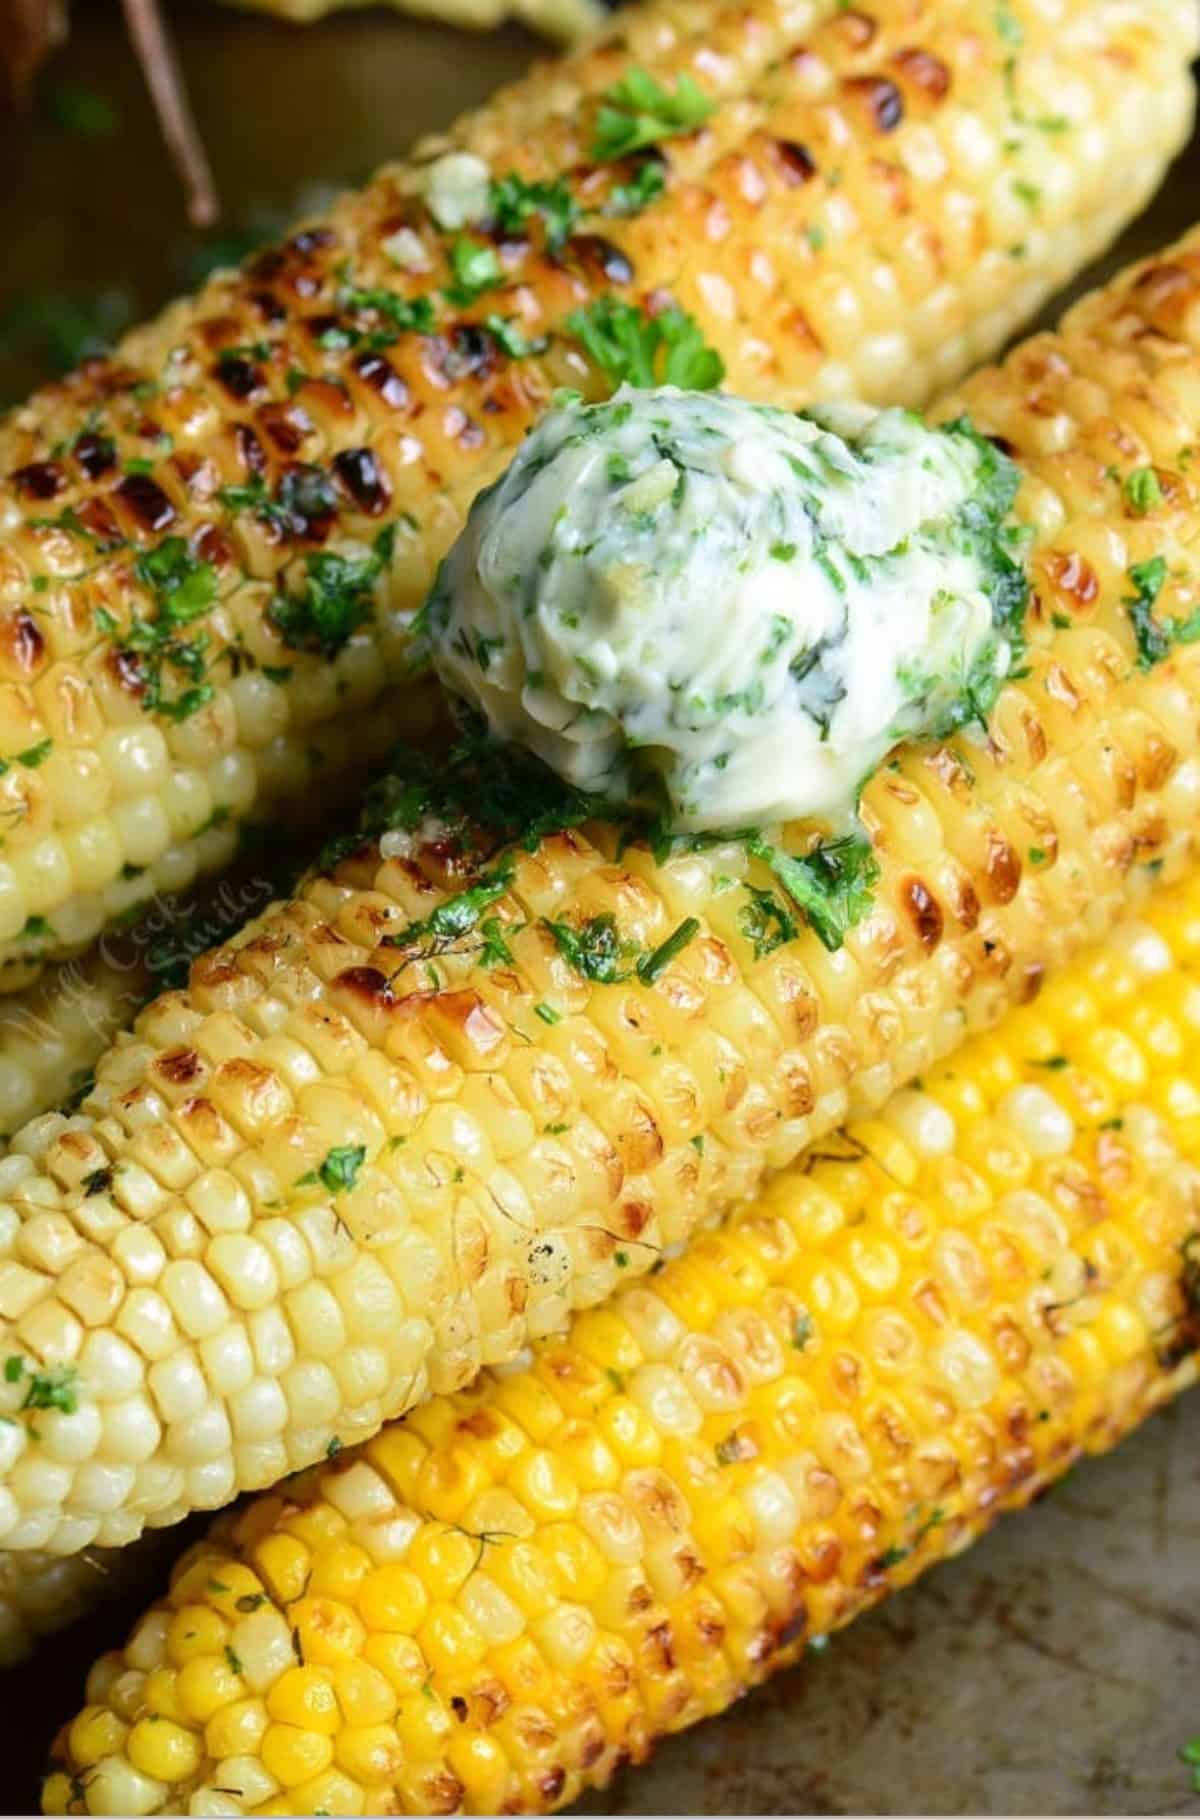
Grilled Corn On The Cob
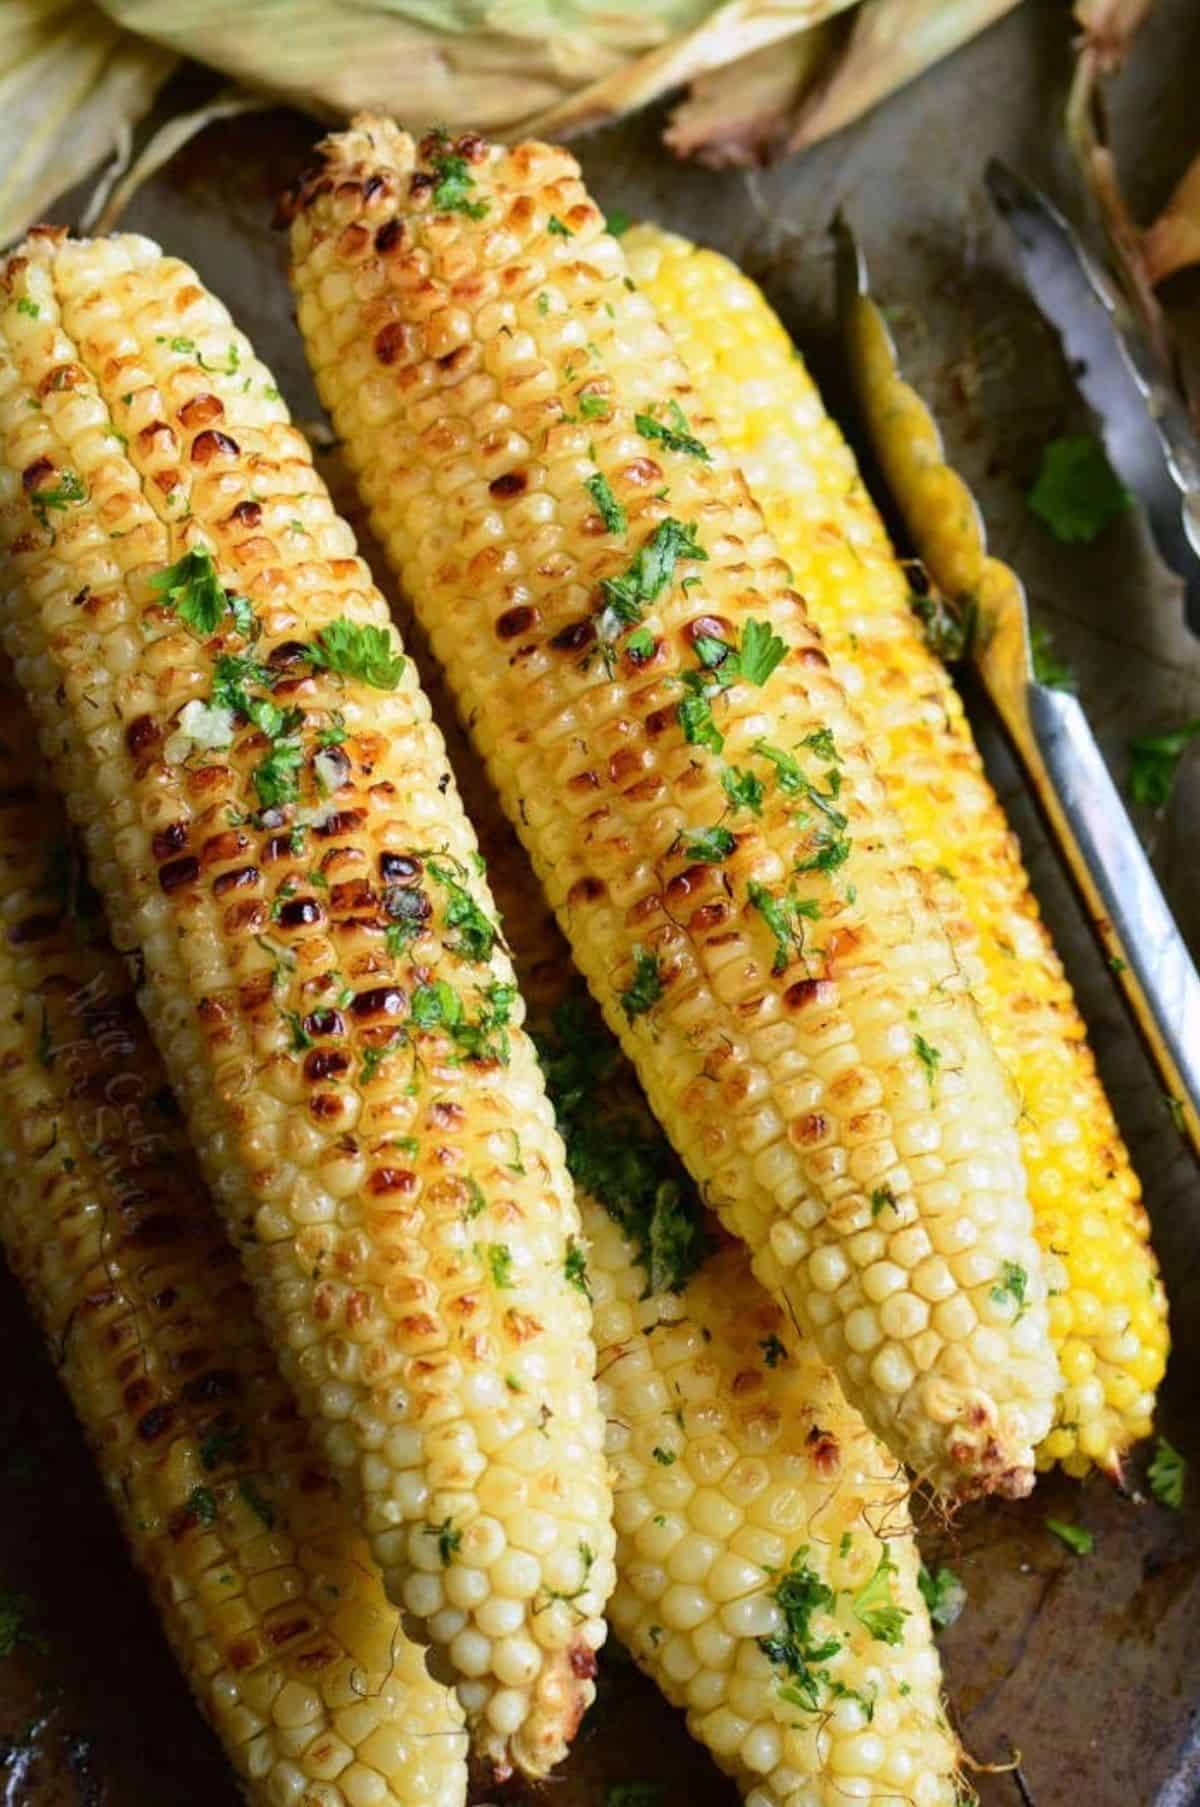
Let’s face it – corn tastes a million times better fresh off the grill! The taste comes from steaming corn in it’s own husks while grilling and infusing those smoky flavors. Then, slathering it in flavorful butter and grilling it naked for just a few minutes to lightly char it. It’s a simple process that’s tried and true!
There are so many schools of thought on how corn should be cooked on the grill. Do we keep husks on or take them off? Boil the corn first and then place it on the grill? Soak the corn or not? Use foil or grill it naked? Each person will defend their position to the core, and I have to tell you, sometimes it just gets a little too complicated.
Put simply, corn is delicious. Unless you under-cook it or overcook it, you will be pretty happy with the final result. I have my own very easy method for grilling corn and it has not failed me yet! This simple recipe yields delicious, juicy, tender corn each time and the fuss is minimal.
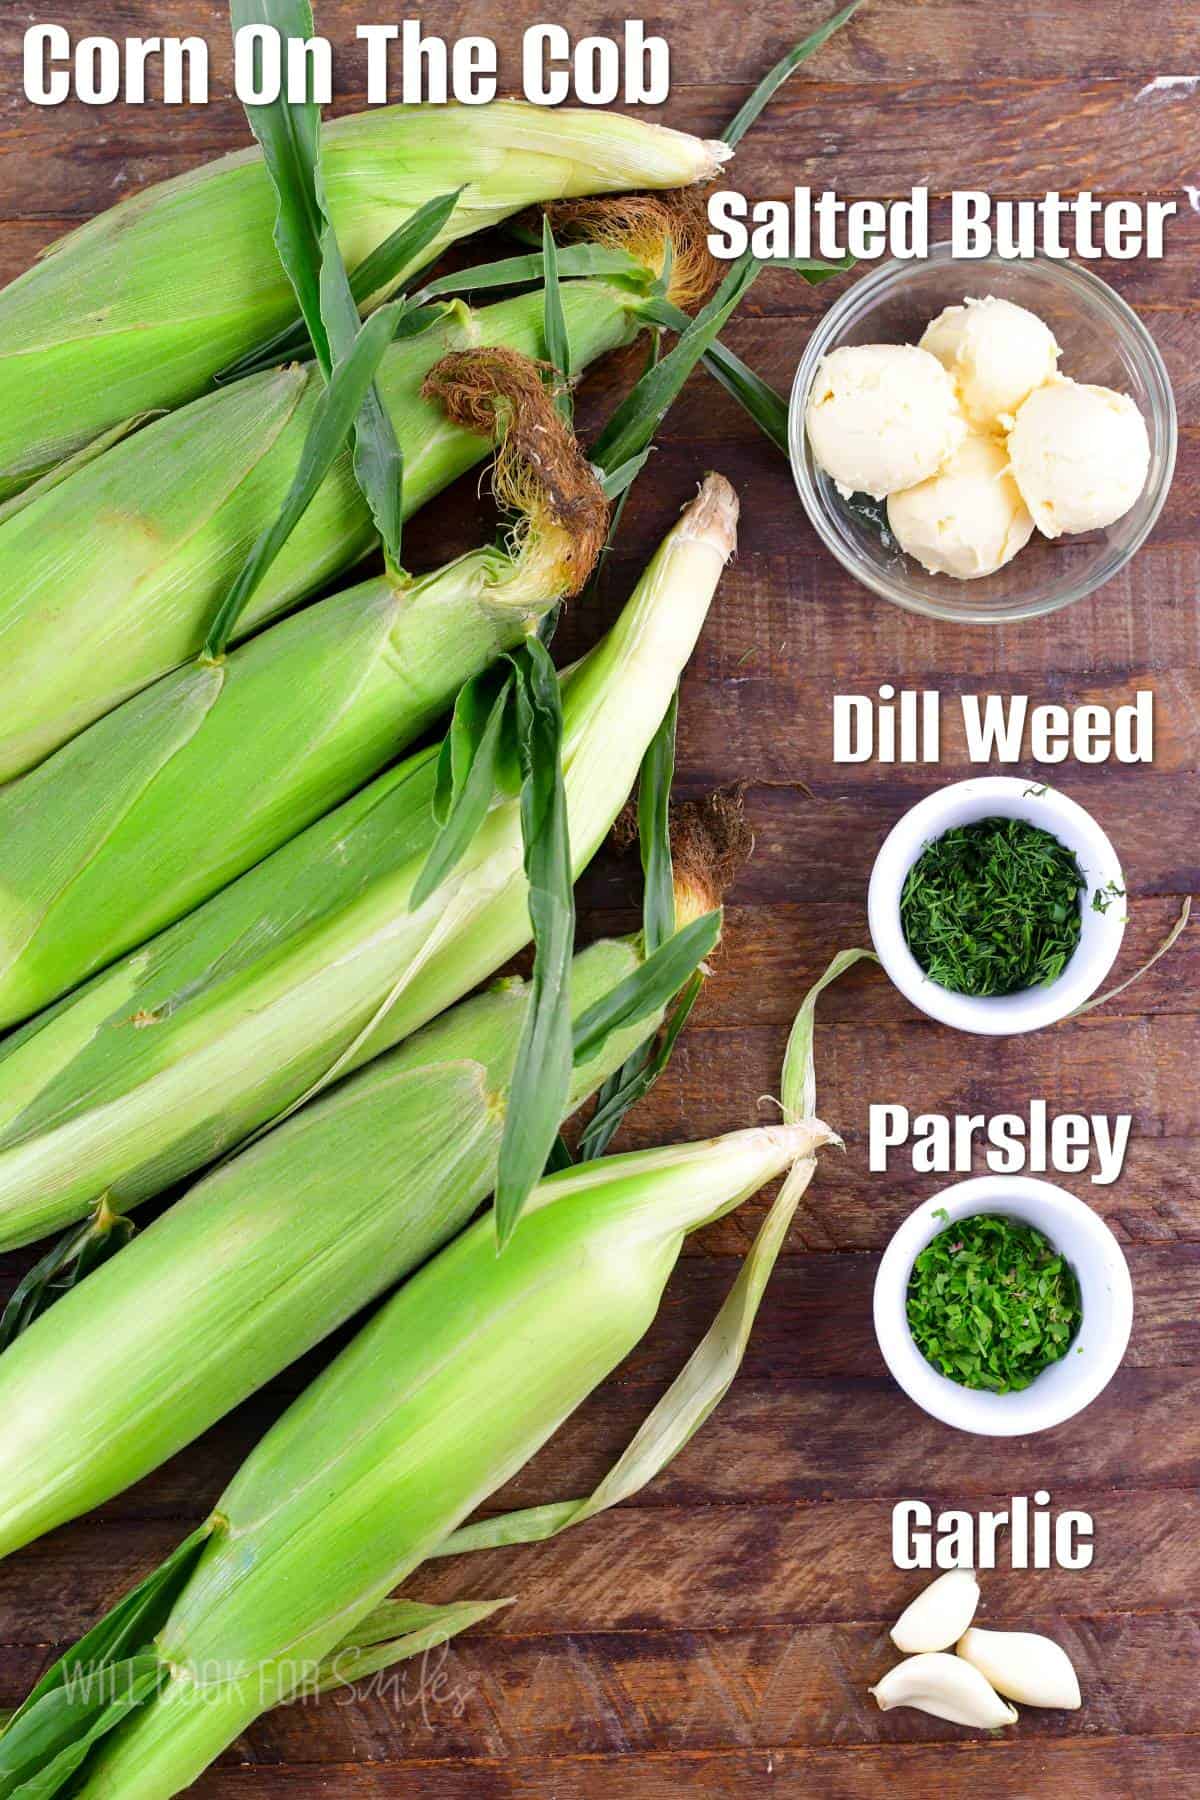
Key Ingredient Notes
Corn – make sure to get corn still in husks, this will help cook it through while on the grill, without burning the outside.
Butter – use regular butter or plant based butter if you need to. Just make sure to soften it first on the counter so that it is easy to mix with the herbs and garlic.
Herbs – I prefer to use fresh herbs for the best flavor and aroma, but it’s okay to use dried herbs when needed. Just remember that dried herbs are more potent than fresh so you may want to use a little less.
Tips For Grilling the Corn
Depending on the grill, you can lift the grate to get it further away from the charcoal or create two temperature zones, so there is a hotter side and a cooler side.
Trim the husks. Trim the silks and tips of husk leaves sticking out of the top so they don’t burn.
Cut off and discard husks if you wish. I cut it off because it takes too much space on the grill, but some people like to leave it on and tie it for the look. It does have a very nice presentation to leave husks pulled back, but it’s not practical if you have to cook several things on the grill.
Soak or no soak? There’s never been a need for me to soak the corn in water first because the husks are not exposed to direct flames and it sits too far away from the coals to get burned. Soaking corn before grilling it is done so that the husks don’t catch on fire. I simply cut off the tops of the husk where there are loose leaves and silk sticking out and other loose parts of husk leaves.
Storing and Reheating Suggestions
Storing: Once cooled to room temperature, grilled corn on the cob will stay fresh in an airtight container in the fridge for about 2-3 days.
Reheating: I find it best to reheat grilled corn in the oven. Wrap each corn on the cob in aluminum foil but not too tight. Preheat oven to 350°F and reheat corn for about 15 minutes, just until it’s hot.
If the corn is cut off the cob, reheat it in a microwave safe bowl covered with a microwave lid, plastic wrap, or damp paper towel. Use lower power setting, 50% or 60%, and reheat it in 30 second increments until hot.
Serving Suggestions
The simplest way to serve corn is as a side dish, of course. Serve it with your favorite hamburgers, grilled steaks, hot dogs, and all other meats coming off the grill.
Cut corn kernels off the cob and mix it into a Mexican street corn salad. To cut the corn, stand the cob in the thickest part, on a large cutting board. Use a sharp knife to slice the kernels off down along the cob. Don’t slice too fast so the kernels don’t fly everywhere.
Add cut corn kernels to dinner salads like Southwest salad, pasta salads, or potato salads.
DID YOU MAKE THIS RECIPE? PLEASE leave a 🌟 star rating! Let me know how you liked it by leaving the 📝 comment below or share and tag me on social media @willcookforsmiles. DON’T FORGET to subscribe to my newsletter!
Grilled Corn on the Cob Recipe
Ingredients
Garlic Herb Butter:
- 1/2 cup salted butter slightly softened
- 2 tbsp fresh minced parsley
- 1 tbsp fresh minced dill weed
- 3 garlic cloves pressed
Grilled Corn:
- 6 corn on the cob still in husks
Instructions
Garlic Herb Butter
- Take butter out of the refrigerator and let it sit on the counter for about 30 minutes to soften.
- Add butter to a mixing bowl and add pressed garlic and herbs. You can either use a blender or simply mix it with a fork. Mix it until all ingredients are incorporated throughout the butter.
- Divide it in half. Keep out one half to rub it all over the corn before putting it back on the grill. Remaining half of butter can be kept in the refrigerator and serve on the side of cooked corn.
Prepare the grill:
- Prepare your charcoal until it’s ashed over and make sure the coals basket is at the lowest level, farthest down away from the grate. (If that option is available on the grill. If there are no levels up and down, move the coals to one half of the grill so there is a hotter side and a cooler side.)
Grilling corn
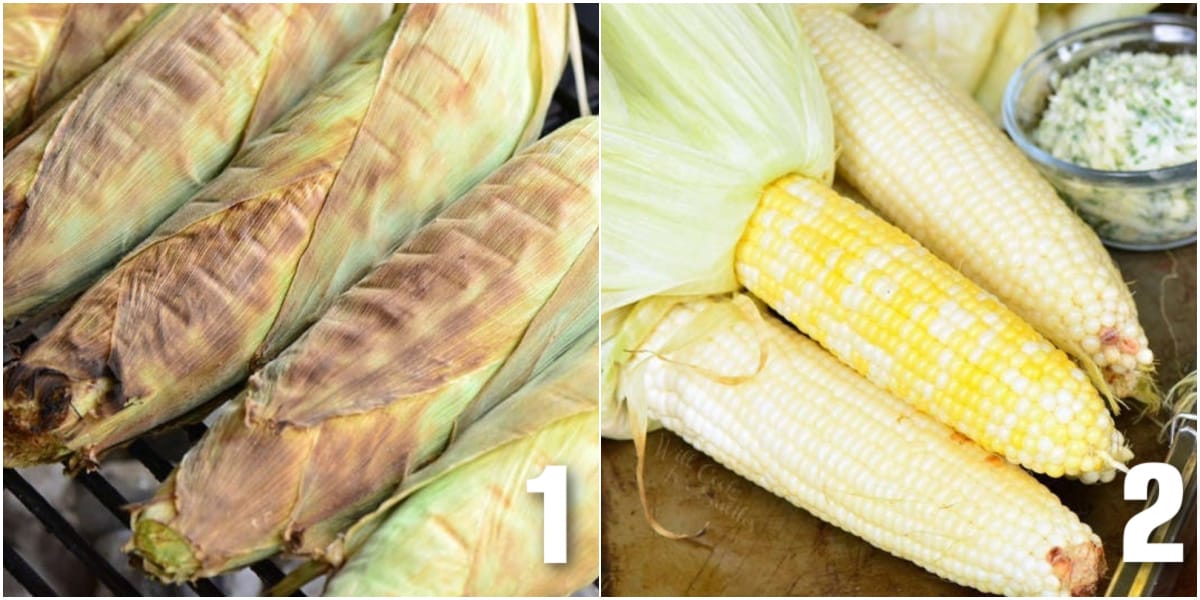
- Trim the silks and tips of husk leaves sticking out of the top off the corn husk but leave the rest of the corn husk intact. The corn will steam and cook better inside if the the husk is not disturbed.
- Lay corn on the grill and close the grill lid. Cook for 15-20 minutes, turning it half way through. Time will depend on the thickness of the corn.
- Take corn off the grill and carefully, using metal tongs, take off the husk and the silk. (You can also use gloves to brush the silk off the corn easier.)
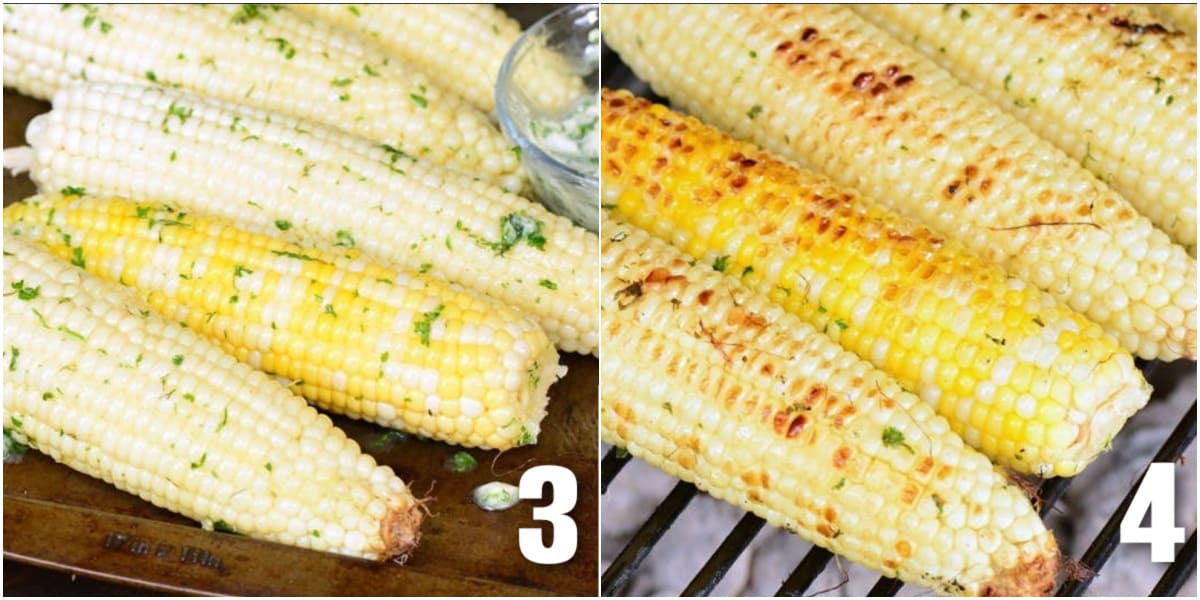
- Cut off and discard husks if you wish.
- Rub each corn on the cob with prepared garlic herb butter and place back on the grill. Close the grill and cook, turning it every 2-3 minutes, until lightly charred on all sides.
- Take the corn off the grill and serve with some more garlic herb butter.
Video
Notes
Nutrition
More of the Best Corn Recipes
Would you like to save this recipe?
All images and text ©Lyubov Brooke for ©Will Cook For Smiles. Please do not use my images without prior permission. If using my posts in collections and features, please link back to this post for the recipe.
Disclaimer: Nutrition information shown is not guaranteed to be 100% accurate as most ingredients and brands have variations.